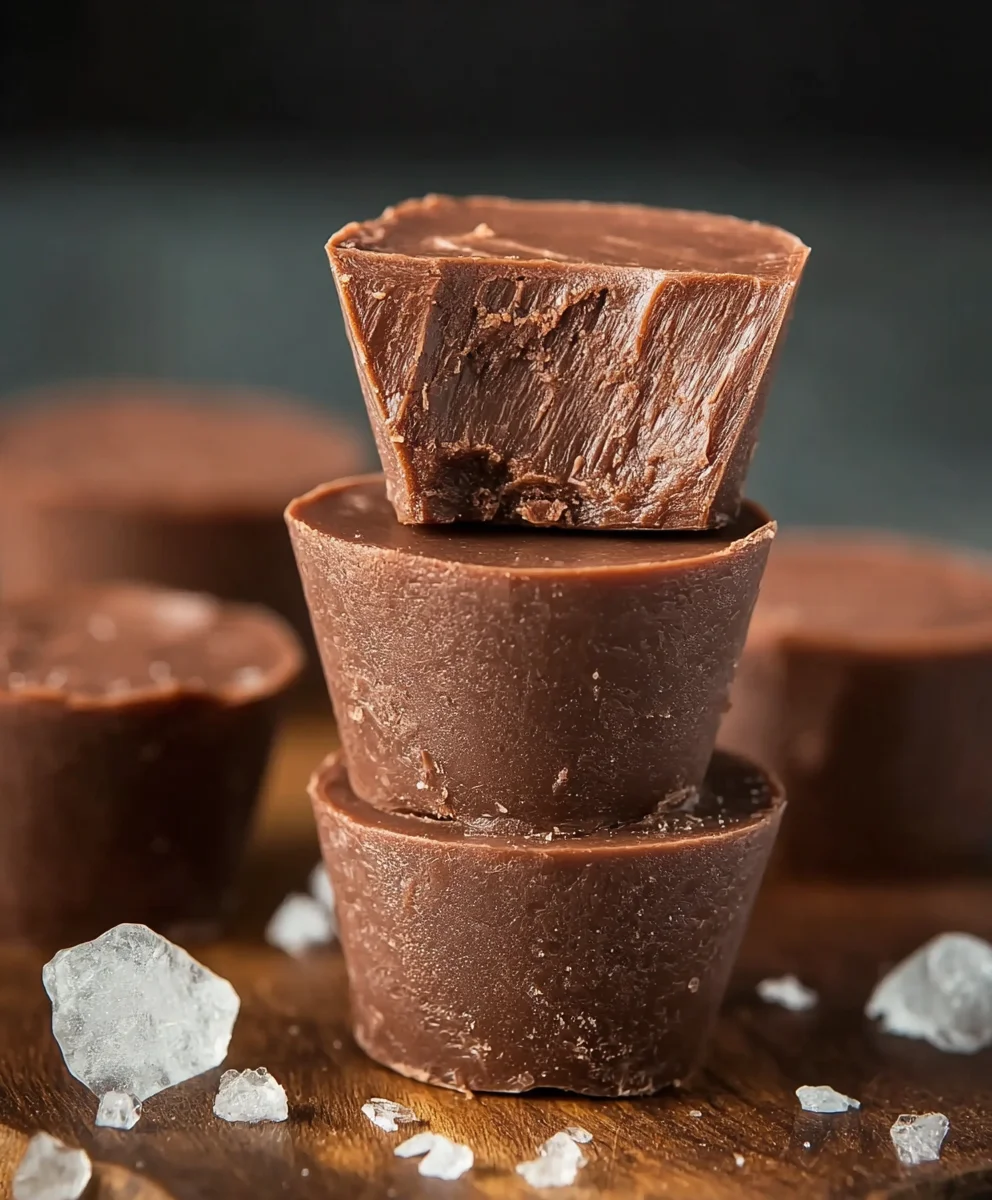
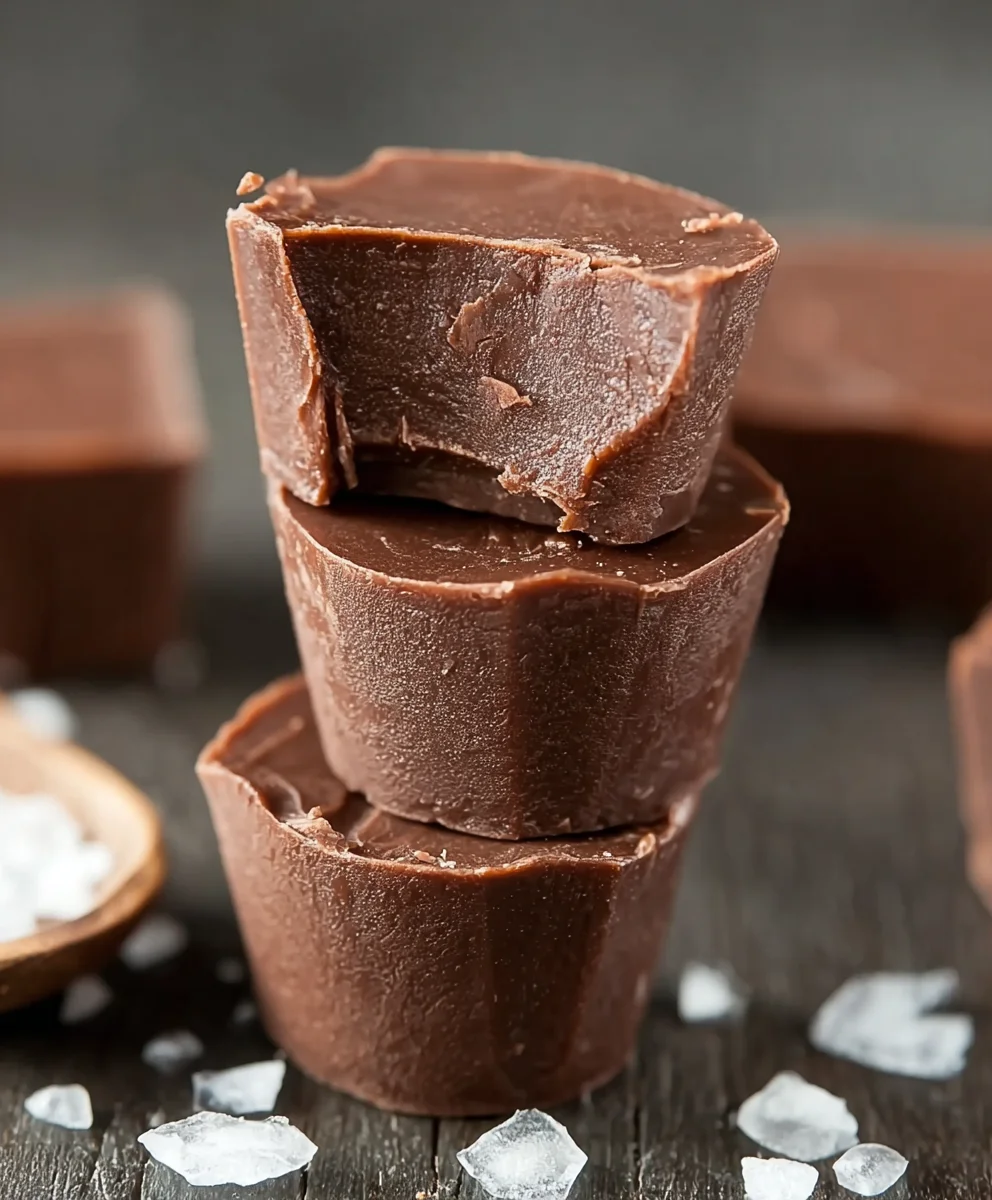
Sugar Free Fudge-Easy Delicious Recipe You’ll Love
Sugar Free Fudge is more than just a dessert; it’s a delightful indulgence that proves you don’t need refined sugar to experience pure chocolatey bliss. We all crave that rich, melt-in-your-mouth texture and deep, satisfying sweetness, and this recipe delivers precisely that, without the sugar-laden guilt. It’s a treat that appeals to everyone, from health-conscious individuals to those simply seeking a lower-sugar alternative, offering a way to enjoy a classic comfort food with a wholesome twist. What truly sets this sugar free fudge apart is its incredible simplicity combined with its profound flavor. You’ll be amazed at how easily you can whip up a batch of this decadent confection, perfect for satisfying those sweet cravings, sharing with loved ones, or enjoying as a guilt-free personal reward. Get ready to discover your new favorite way to enjoy chocolate!
Ingredients:
- 2 cups sugar-free chocolate chips
- 1 cup almond butter (or your favorite smooth nut/seed butter)
- 1 teaspoon vanilla extract
Preparing Your Sugar-Free Fudge Base
Melting the Chocolate and Nut Butter
This is the foundational step for our delicious Sugar Free Fudge. We need to gently melt the sugar-free chocolate chips and almond butter together until they form a smooth, cohesive mixture. It’s crucial to do this without scorching the chocolate, which can happen easily with direct heat. I prefer using a double boiler method for this. To set this up, you’ll need a heatproof bowl that fits snugly over a saucepan filled with about an inch or two of simmering water. Place the sugar-free chocolate chips and the almond butter into the heatproof bowl. The steam from the simmering water will then gently warm the chocolate and almond butter, allowing them to melt slowly and evenly. Stir occasionally with a silicone spatula, scraping down the sides of the bowl, as the mixture begin extracts to soften and liquify. Be patient; this process might take a few minutes, but the reward is a perfectly smooth base. Once almost completely melted, remove the bowl from the heat. The residual warmth will continue to melt any remaining solid pieces. If, after a minute or two of stirring off the heat, there are still small chunks, you can briefly return the bowl to the very gentle heat, stirring constantly, just until smooth.
Incorporating the Vanilla Extract
Once our chocolate and almond butter base is beautifully smooth and glossy, it’s time to add the flavor enhancer: vanilla extract. Measure out precisely one teaspoon of pure vanilla extract. Pour it directly into the melted chocolate and almond butter mixture. Now, using your silicone spatula, stir the mixture thoroughly until the vanilla extract is completely incorporated. This might seem like a small step, but the vanilla extract plays a vital role in rounding out the flavors and adding a subtle warmth and complexity to the overall taste of the fudge. It helps to cut through the richness of the chocolate and nut butter, creating a more balanced and satisfying dessert. Continue stirring for about 30 seconds to ensure there are no pockets of undiluted vanilla. The mixture should remain smooth and homogeneous.
Forming and Chilling Your Fudge
Preparing the Baking Dish
Before we can set our fudge, we need to prepare the vessel that will hold it as it chills. You’ll want a square baking dish, typically an 8×8 inch pan. To make removing the fudge incredibly easy and prevent any sticking, I highly recommend lining the dish with parchment paper. This creates a natural sling, allowing you to lift the entire block of fudge out of the pan once it’s firm. Ensure the parchment paper extends up the sides of the dish, creating overhangs. This will give you handles to pull the fudge out later. You can gently press the parchment into the corners of the pan to help it conform. Some people also like to lightly grease the pan before lining it with parchment paper, but with the parchment lining, it’s usually not necessary for this sugar-free recipe.
Pouring and Spreading the Mixture
With the baking dish prepared and lined with parchment paper, it’s time to transfer our luscious fudge mixture. Carefully pour the melted chocolate and almond butter mixture into the prepared dish. Use your silicone spatula to gently spread the mixture evenly across the entire surface of the dish. You want to aim for a consistent thickness so that your fudge pieces are uniform in size and texture. Work relatively quickly, as the mixture will start to thicken as it cools. Gently tap the sides of the baking dish on your countertop a few times. This will help to release any air bubbles trapped in the fudge and create a smoother surface. Ensure all corners are filled and the top is as level as possible for neat slicing later on.
Chilling to Perfection
Now comes the most important part of turning our melted concoction into delectable fudge: chilling. Place the prepared baking dish into the refrigerator. For the best results, allow the fudge to chill for at least 2 to 4 hours. The longer it chills, the firmer it will become. You’re looking for a firm, solid consistency that can be easily cut. Don’t be tempted to rush this process by placing it in the freezer, as this can sometimes affect the texture, making it too brittle or causing condensation. The refrigerator provides a steady, cool environment perfect for achieving that classic fudge texture. Once the fudge is firm to the touch and no longer soft or sticky, it’s ready to be taken out and cut.
Finishing and Enjoying Your Sugar-Free Fudge
Cutting the Fudge
Once the Sugar Free Fudge has chilled and firmed up sufficiently, it’s time to cut it into bite-sized pieces. Carefully lift the entire block of fudge out of the baking dish using the parchment paper overhangs. Place the block onto a clean cutting board. You can use a sharp knife to cut the fudge into your desired shapes and sizes. Squares are the classic choice, but you can also cut them into rectangles or even diamonds. For cleaner cuts, especially if the fudge is very firm, you can slightly warm the blade of your knife under hot water and then dry it thoroughly before each cut. This helps to glide through the fudge without causing it to crack or crum extractble. Aim for pieces that are about 1 to 1.5 inches square for a satisfying treat.
Serving and Storing
Your homemade Sugar Free Fudge is now ready to be enjoyed! You can serve it immediately as a delightful treat after a meal or as a sweet pick-me-up during the day. To store the fudge, place the cut pieces in an airtight container. You can layer the pieces with parchment paper in between if you’re concerned about them sticking together, although the firm texture usually prevents this. Store the container in the refrigerator. The fudge will stay fresh and delicious for up to two weeks when kept properly chilled. The flavors tend to meld and deepen over time, making it even more enjoyable a few days after it’s made. Enjoy this guilt-free indulgence!
Conclusion:
And there you have it – your guide to creating delicious and guilt-free Sugar Free Fudge! We’ve walked through each step to ensure you can achieve that perfect, rich, and melt-in-your-mouth texture without any added sugar. This recipe is a fantastic option for those managin extractg their sugar intake, or simply looking for a healthier indulgence. Don’t be afraid to experiment with the finishing touches; a sprinkle of toasted nuts, a swirl of sugar-free caramel, or even a dusting of cocoa powder can elevate your Sugar Free Fudge to new heights. Enjoy this treat on its own, or serve small squares as a delightful end to any meal. We encourage you to try this recipe and discover how satisfying a sugar-free dessert can be!
Frequently Asked Questions:
Can I use a different type of sugar substitute?
While this recipe is specifically tested with the sugar substitute mentioned, many sugar substitutes can work. However, their sweetness intensity and how they bake can vary. It’s best to start with the recommended substitute for guaranteed results. If you experiment, adjust the quantity based on the sweetness of your chosen alternative and be mindful that texture might differ slightly.
How should I store my Sugar Free Fudge?
Sugar Free Fudge can be stored in an airtight container at room temperature for up to a week. For longer storage, or if your kitchen tends to be warm, keeping it in the refrigerator is a great option. It will firm up slightly in the fridge, which some people prefer. It can also be frozen for up to two months, though it’s best to thaw it in the refrigerator before enjoying.
Sugar Free Fudge
An easy and delicious recipe for sugar-free fudge that you’ll love. Made with simple ingredients for a guilt-free treat.
Ingredients
-
2 cups sugar-free chocolate chips
-
1 cup almond butter
-
1 teaspoon vanilla extract
Instructions
-
Step 1
Gently melt the sugar-free chocolate chips and almond butter together in a double boiler until smooth and cohesive. Stir occasionally and remove from heat once almost completely melted. -
Step 2
Stir in the vanilla extract until fully incorporated, ensuring no pockets of undiluted vanilla remain. -
Step 3
Prepare an 8×8 inch baking dish by lining it with parchment paper, ensuring it extends up the sides to create overhangs for easy removal. -
Step 4
Pour the fudge mixture into the prepared baking dish and spread evenly. Gently tap the dish to release any air bubbles and create a smooth surface. -
Step 5
Chill the fudge in the refrigerator for at least 2 to 4 hours, or until firm and solid. -
Step 6
Lift the fudge out of the dish using the parchment paper. Cut into desired bite-sized pieces using a sharp knife. For cleaner cuts, a slightly warmed and dried knife can be used. -
Step 7
Serve immediately or store in an airtight container in the refrigerator for up to two weeks.
Important Information
Nutrition Facts (Per Serving)
It is important to consider this information as approximate and not to use it as definitive health advice.
Allergy Information
Please check ingredients for potential allergens and consult a health professional if in doubt.