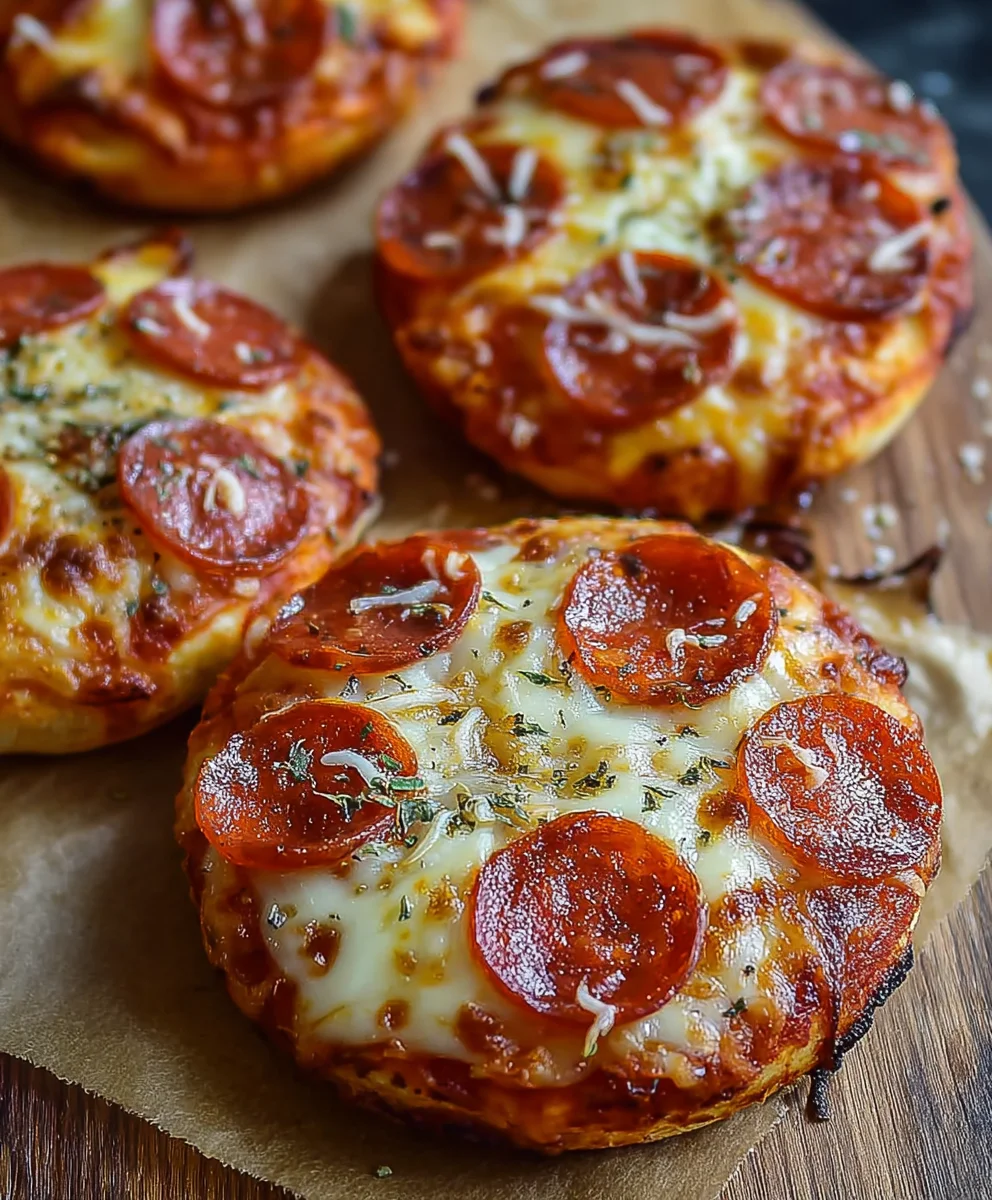
Easy Mini Lunchbox Pizzas – Quick & Kid-Friendly Lunch Idea
Easy Mini Lunchbox Pizzas are the ultimate game-changer for busy weeknights and even more so for delightful, fuss-free lunches! Who doesn’t adore pizza? It’s a universally loved comfort food, bringin extractg smiles to faces young and old. But what truly sets these Easy Mini Lunchbox Pizzas apart is their perfect portability and the sheer joy they bring to a midday meal. Forget soggy sandwiches or boring leftovers; these little flavour bombs are designed to be packed and enjoyed anywhere, transforming a mundane lunch into a miniature fiesta. They’re wonderfully customizable, allowing everyone to create their own perfect bite. Whether you’re packing for school, work, or a picnic, these Easy Mini Lunchbox Pizzas promise a delicious escape and a guaranteed moment of culinary happiness.
Why You’ll Love Them
These are more than just mini pizzas; they’re edible sunshine for your lunchbox! The magic lies in their simplicity and adaptability. Kids adore them because they are fun, personal, and taste like a real treat. Adults appreciate the controlled portions, the ease of preparation, and the fact that they can be a healthier alternative to store-bought snacks. The crispy crust, the tangy sauce, and the gooey cheese – it’s a trifecta of deliciousness that never fails to satisfy. They’re also a fantastic way to use up leftover ingredients and minimize food waste, making them a smart and sustainable choice.
What Makes Them Special
The true charm of Easy Mini Lunchbox Pizzas is their “mini” factor. This isn’t just about size; it’s about creating a perfect, self-contained parcel of flavour. They cool down beautifully, making them ideal for lunches, and the crust holds up well, avoiding that dreaded soggy bottom. Plus, the process of assembling your own mini pizzagin extract engaging and can be a fun activity to do with children, fostering a love for cooking and healthy eating. They bring a touch of homemade love and creativity to an everyday meal, making them undeniably special.
Ingredients:
- 2 cups (300g) self-raising flour
- 1 cup (250g) full-fat plain Greek yoghurt
- ⅓ cup (90g) tomato paste (concentrated puree)
- 1 cup (125g) freshly shredded mozzarella
- ½ cup (80g) beef beef pepperoni
Preparing the Dough
Step 1: Combine Flour and Yoghurt
Let’s get started with the base of our Easy Mini Lunchbox Pizzas! In a large mixing bowl, add the 2 cups (300g) of self-raising flour. Now, pour in the 1 cup (250g) of full-fat plain Greek yoghurt. The Greek yoghurt is fantastic here because it adds a slight tangin extractess and helps to create a wonderfully tender dough without the need for yeast or a long proving time. It also adds a bit of protein, making these mini pizzas a slightly more substantial snack or light meal.
Using a spatula or your hgin extracts, begin to mix the flour and yoghurt together. At first, it might seem a bit crum extractbly, but keep mixing. You’re aiming to bring the ingredients together to form a shaggy dough. Don’t overwork it at this stage; just focus on incorporating everything. Once it starts to clump, you can turn it out onto a lightly floured surface.
Step 2: Knead the Dough
Now it’s time for a little kneading. Turn the shaggy dough out onto a clean, lightly floured work surface. Knead the dough for about 5-7 minutes. You’re looking for a smooth, elastic, and slightly sticky dough. The self-raising flour contains its own leavening agent, so it will puff up nicely when baked. The kneading process develops the gluten, which gives the pizza crust structure and a pleasant chew. If the dough feels too sticky, add a tiny sprinkle of flour, but be careful not to add too much, as this can make the crust tough. You’ll know it’s ready when you can press it gently with your finger and the indentation springs back slowly.
Once you’ve achieved a smooth consistency, shape the dough into a neat ball. You can cover it with a clean tea towel or plastic wrap and let it rest for about 10 minutes while you prepare your toppings. This short resting period helps the gluten relax, making the dough easier to roll out.
Shaping and Topping the Pizzas
Step 3: Divide and Roll the Dough
After the dough has had its short rest, divide it into manageable portions for your mini pizzas. For lunchbox-sized portions, I like to divide the dough into 6-8 equal pieces. Roll each piece into a ball. On your lightly floured surface, take one dough ball and gently flatten it with your hand. Then, using a rolling pin, roll it out into a small circle, about 4-5 inches in diameter. The thickness should be around ¼ inch – not too thin that it will break easily, but not too thick that it won’t cook through properly. Repeat this with all the dough balls, ensuring you keep them covered lightly with a tea towel as you work to prevent them from drying out.
If you’re making these for a bento box or a lunchbox, consider making them a uniform size so they fit nicely together. You can also experiment with slightly different shapes, like squares, if you prefer. Just aim for a relatively even thickness for consistent baking.
Step 4: Add the Tomato Paste and Toppings
Now for the fun part – dressing up our mini pizzas! Take each rolled-out pizza base and place it on a baking sheet lined with parchment paper. This makes for easy cleanup later. Spoon about 1-2 teaspoons of the ⅓ cup (90g) tomato paste (concentrated puree) onto the center of each pizza base. Using the back of the spoon, spread the tomato paste evenly over the base, leaving a small border around the edge for the crust. Don’t overload on the tomato paste; a thin, even layer is perfect.
Next, sprinkle a generous amount of the 1 cup (125g) freshly shredded mozzarella over the tomato paste. The mozzarella will melt beautifully, creating that classic cheesy pizza experience. Finally, artfully arrange the ½ cup (80g) beef pepperonieroni slices on top of the cheese. You can overlap them slightly or place them strategicbeef pepperoni pepperoni will crisp up slightly as it bakes, releasing its delicious savory flavor.
Baking the Mini Pizzas
Step 5: Bake to Perfection
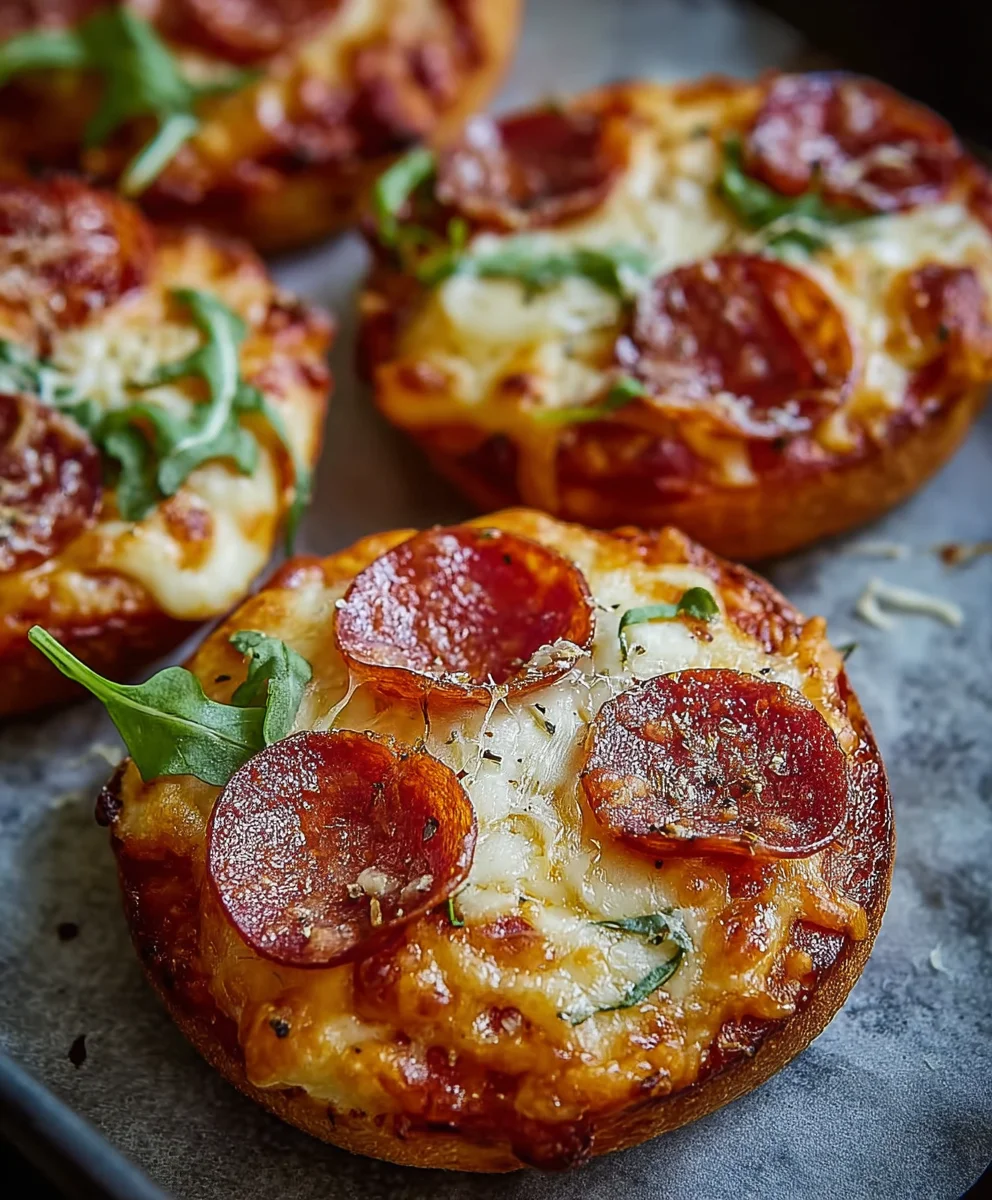
Preheat your oven to 400°F (200°C). This temperature is hot enough to get a good crisp on the crust and melt the cheese quickly. Carefully place the baking sheet with your prepared mini pizzas into the preheated oven. Bake for approximately 10-15 minutes. Keep an eye on them, as oven temperatures can vary. You’re looking for the crust to be golden brown and slightly puffed up, and the cheese to be melted and bubbly, perhaps with a few golden-brown spots.
Once they’re baked to your liking, carefully remove the baking sheet from the oven. Let the Easy Mini Lunchbox Pizzas cool on the baking sheet for a few minutes before transferring them to a wire rack to cool completely. This step is important, especially if you’re packing them into a lunchbox. Letting them cool thoroughly prevents them from steaming up and becoming soggy inside the lunchbox.
Conclusion:
And there you have it – your very own batch of Easy Mini Lunchbox Pizzas! We hope you enjoyed making and will absolutely love serving these delightful little pizza bites. They’re perfect for a quick and satisfying lunch, a fun after-school snack, or even a casual party appetizer. The beauty of this recipe lies in its simplicity and adaptability. Don’t be afraid to experiment with different toppings to suit your taste preferences or what you have on hand. You can easily make these your own and have a whole new pizza experience each time! So, gather your ingredients, get creative, and enjoy the delicious results. We can’t wait for you to try them!
Frequently Asked Questions:
Can I make the Easy Mini Lunchbox Pizzas ahead of time?
Yes, you absolutely can! You can assemble the pizzas (with or without toppings) and refrigerate them for up to 24 hours before baking. For baked pizzas, allow them to cool completely before storing them in an airtight container in the refrigerator for up to 2-3 days. Reheat them in a toaster oven or a conventional oven for best results.
What are some other topping ideas for Easy Mini Lunchbox Pizzas?
The possibilities are endless! Beyond the classics, consider adding finely chopped vegetables like bell peppers, onions, or mushrooms. For a protein boost, try cooked beef ham, beef pepperoni, or even shredded chicken. Don’t forget about different cheeses like cheddar, mozzarella, or a sprinkle of Parmesan for extra flavor.
Can I use different types of dough for Easy Mini Lunchbox Pizzas?
Certainly! While this recipe likely uses a pre-made dough or English muffins, you can also use small rounds of puff pastry, whole wheat tortillas, or even slices of French bread. Just adjust the baking time accordingly, as different doughs will cook at different rates.
Easy Mini Lunchbox Pizzas – Quick & Kid-Friendly Lunch Idea
Quick and easy mini pizzas perfect for lunchboxes, made with a simple yogurt-based dough and kid-approved toppings.
Ingredients
-
2 cups (300g) self-raising flour
-
1 cup (250g) full-fat plain Greek yoghurt
-
⅓ cup (90g) tomato paste (concentrated puree)
-
1 cup (125g) freshly shredded mozzarella
-
½ cup (80g) beef pepperoni
Instructions
-
Step 1
In a large bowl, combine self-raising flour and Greek yoghurt. Mix with a spatula until a shaggy dough forms. Turn out onto a lightly floured surface. -
Step 2
Knead the dough on a floured surface for 5-7 minutes until smooth, elastic, and slightly sticky. Shape into a ball, cover, and let rest for 10 minutes. -
Step 3
Divide the dough into 6-8 portions. Roll each portion into a 4-5 inch circle, about ¼ inch thick. Keep covered to prevent drying. -
Step 4
Place rolled dough on a parchment-lined baking sheet. Spread 1-2 teaspoons of tomato paste evenly on each base, leaving a border. Sprinkle with mozzarella cheese and top with beef pepperoni slices. -
Step 5
Bake in a preheated oven at 400°F (200°C) for 10-15 minutes, or until the crust is golden brown and the cheese is melted and bubbly. -
Step 6
Let the pizzas cool on the baking sheet for a few minutes, then transfer to a wire rack to cool completely before packing into lunchboxes.
Important Information
Nutrition Facts (Per Serving)
It is important to consider this information as approximate and not to use it as definitive health advice.
Allergy Information
Please check ingredients for potential allergens and consult a health professional if in doubt.