Easy Frozen Yogurt Bark Recipe – Healthy Treat
Frozen Yogurt Bark is more than just a dessert; it’s a delightful canvas for your creativity and a sensational way to beat the heat! There’s an undeniable magic to transforming simple ingredients into a frozen masterpiece that’s both incredibly satisfying and wonderfully refreshing. We all love those moments when a treat surprises us with its ease of preparation and its delightful payoff. What makes this particular frozen treat so special is its inherent versatility. It’s the perfect base for an endless array of toppings, from vibrant fresh berries and crunchy nuts to decadent chocolate chips and swirls of honey. This adaptable nature means that every batch of Frozen Yogurt Bark can be uniquely tailored to individual tastes and dietary needs, making it a crowd-pleaser for all ages and preferences. Get ready to discover just how simple and rewarding it is to craft your own custom frozen delight.
A Quick and Easy Treat
Why You’ll Adore This
Ingredients:
- 2 cups plain Greek yogurt (full-fat or 2% recommended for creaminess)
- 1/4 cup honey or maple syrup (adjust to your sweetness preference)
- 1 teaspoon vanilla extract
- 1 cup mixed berries (fresh or frozen, such as strawberries, blueberries, raspberries, blackberries)
- 1/4 cup chopped nuts (almonds, walnuts, or pecans work well)
- 2 tablespoons shredded unsweetened coconut
- 1 tablespoon chia seeds
- Optional: 1 tablespoon mini chocolate chips (dairy-free if needed)
Preparation
Step 1: Prepare the Yogurt Mixture
Begin extract by gathering all your ingredients and ensuring they are ready for assembly. This recipe is incredibly straightforward, making it perfect for a quick and healthy treat. In a medium-sized bowl, combine the plain Greek yogurt, honey or maple syrup, and vanilla extract. I find that using a whisk here is the most effective way to ensure everything is thoroughly incorporated. You want a smooth, homogenous mixture with no streaks of yogurt or syrup visible. If you prefer a sweeter bark, feel free to add a little more honey or maple syrup at this stage, tasting as you go. For an extra creamy texture, using full-fat Greek yogurt will yield the best results. If you’re using frozen berries, you can either thaw them slightly or use them directly from frozen; however, note that using them frozen will result in slightly icier pockets in your bark, which can be quite refreshing. Ensure your bowl is large enough to comfortably mix the ingredients and later spread the mixture thinly.
Step 2: Spread the Yogurt
Line a baking sheet with parchment paper or wax paper. This is a crucial step to prevent the yogurt bark from sticking to the pan, making for easy removal and clean-up. Pour the prepared yogurt mixture onto the parchment paper. Using a spatula or the back of a spoon, spread the yogurt into a thin, even layer, aiming for about 1/4 to 1/2 inch thickness. The thinner you spread it, the faster it will freeze and the easier it will be to break into pieces. Try to create a relatively uniform surface for even freezing. Pay attention to the edges; if they are too thin, they might burn or become overly brittle. A slightly thicker center is generally fine, but avoid creating deep valleys or overly thick mounds. Ensure the spread extends close to the edges of the parchment paper, but not so far that it drips over.
Step 3: Add the Toppings
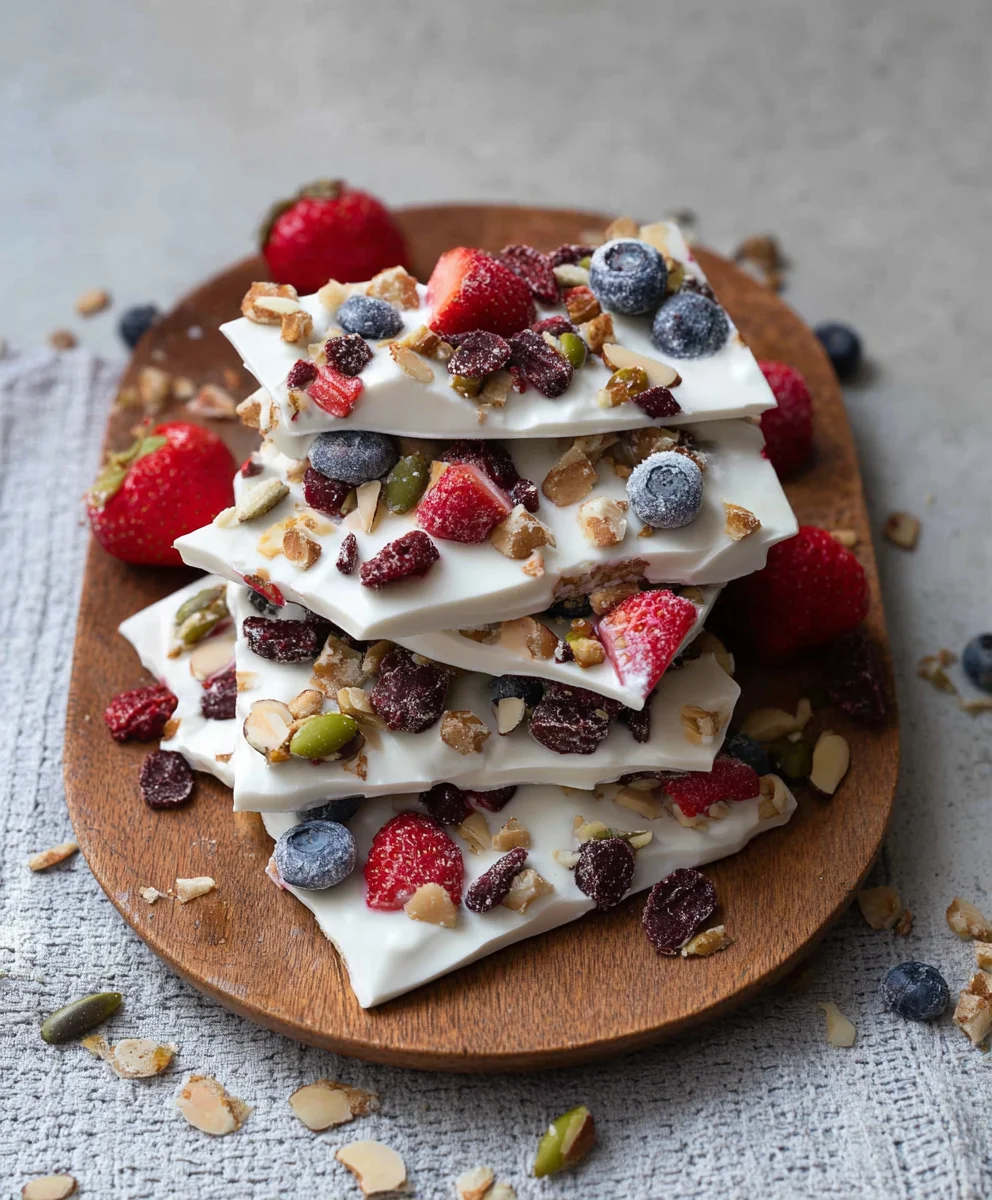
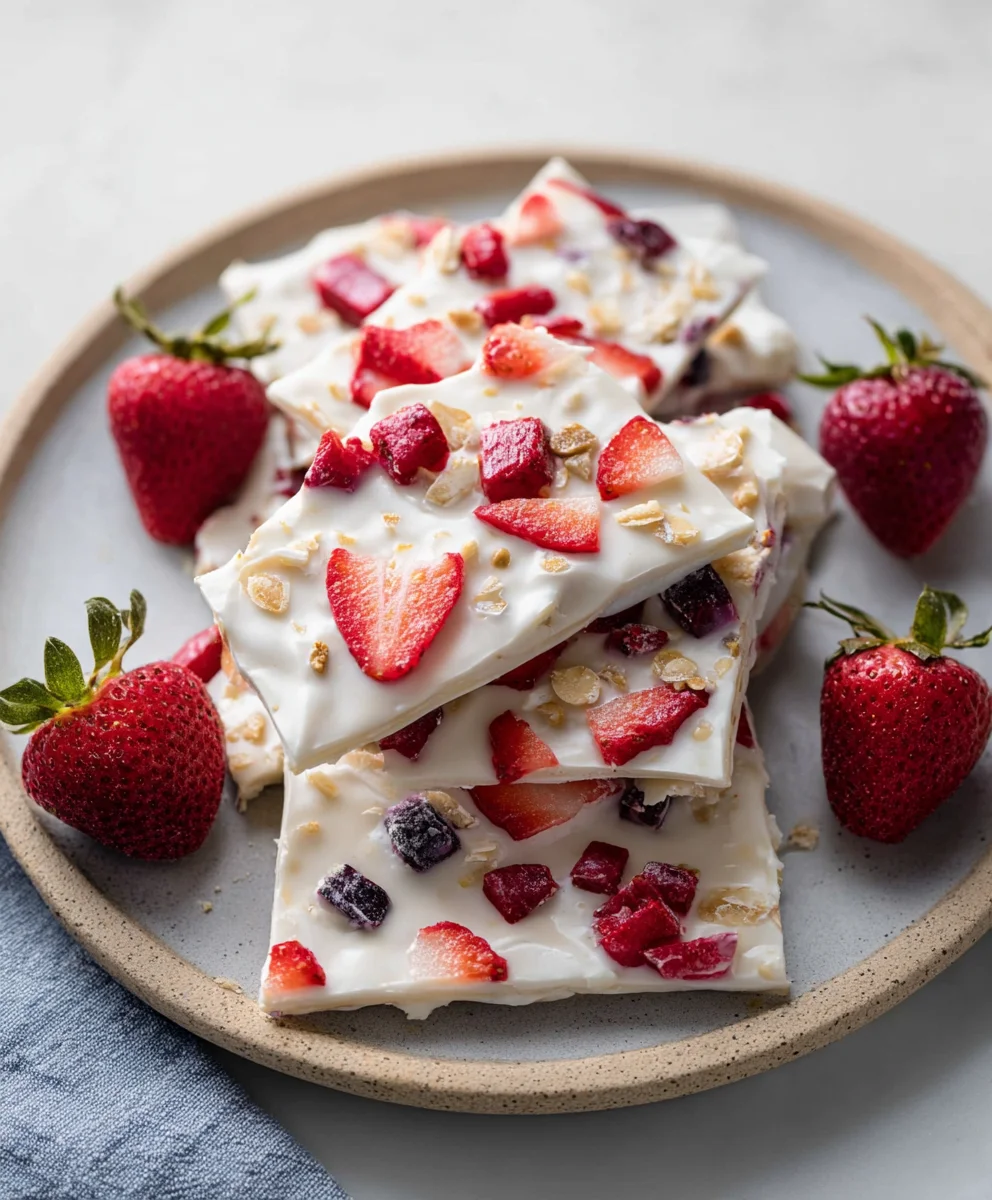
Now comes the fun part – adding your desired toppings! Scatter the mixed berries evenly over the yogurt layer. If you’re using fresh berries, you can leave them whole or slice larger ones like strawberries. For frozen berries, they will distribute well directly from the freezer. Next, sprinkle the chopped nuts over the berries. The nuts add a wonderful crunch and texture contrast to the smooth yogurt and soft berries. Follow with the shredded unsweetened coconut, which adds a subtle tropical flavor and another layer of texture. If you’re using chia seeds, sprinkle them over the top. Chia seeds not only add a healthy boost of omega-3s and fiber but also create tiny, appealing speckles throughout the bark. Finally, if you’re opting for mini chocolate chips, sprinkle those over everything as well. The goal is to distribute the toppings so that each piece of bark will have a good variety.
Step 4: Freeze Until Solid
Once all the toppings are in place, carefully transfer the baking sheet to your freezer. Allow the frozen yogurt bark to freeze completely until it is firm and solid to the touch. This typically takes at least 2 to 4 hours, but it can vary depending on the thickness of your bark and the efficiency of your freezer. It’s best to let it freeze undisturbed for the initial few hours to ensure it sets properly. You can test for readiness by gently pressing on the surface; if it yields slightly, it needs more time. If it’s completely solid and resistant to pressure, it’s ready to be broken apart. Avoid opening the freezer door unnecessarily during the initial freezing period, as fluctuations in temperature can affect the texture of the yogurt.
Step 5: Break and Serve
Once the frozen yogurt bark is completely solid, remove the baking sheet from the freezer. Carefully lift the parchment paper with the bark still on it. You can then break the bark into irregular pieces by hand or by using a knife or a pizza cutter. For cleaner breaks, especially if your bark is very frozen, you might want to let it sit at room temperature for just a minute or two before breaking. The pieces don’t need to be perfect; the rustic, broken nature is part of its charm. You can serve the frozen yogurt bark immediately as a refreshing snack or dessert. Store any leftover bark in an airtight container or a freezer-safe bag in the freezer for up to a week. It’s best enjoyed within a few days for optimal texture and flavor, as it can become quite hard if left for too long.
Conclusion:
I hope you’ve enjoyed learning how to make this incredibly simple and delicious Frozen Yogurt Bark! This recipe is a fantastic way to create a healthy and refreshing treat that’s perfect for any occasion, from a quick breakfast to an afternoon snack or even a light dessert. The beauty of Frozen Yogurt Bark lies in its versatility; you can customize it endlessly with your favorite fruits, nuts, seeds, and even a drizzle of honey or maple syrup. It’s a guilt-free indulgence that the whole family will adore. Don’t be afraid to experiment with different flavor combinations and toppings to discover your own signature bark! Get creative and have fun with it – the possibilities are truly endless. Enjoy your homemade Frozen Yogurt Bark!
Frequently Asked Questions:
Can I make Frozen Yogurt Bark ahead of time?
Absolutely! Frozen Yogurt Bark is best made ahead of time and stored in the freezer. Once it’s fully frozen and broken into pieces, you can transfer it to an airtight container or freezer bag. It will stay fresh and delicious for up to 2-3 weeks.
What kind of yogurt is best for Frozen Yogurt Bark?
For the best texture and flavor, I recommend using plain Greek yogurt. It’s thick and creamy, which makes for a wonderfully sturdy bark. You can also use flavored yogurts, but be mindful of added sugars, and dairy-free alternatives like coconut or almond yogurt work beautifully too!
Easy Frozen Yogurt Bark Recipe – Healthy Treat
A simple and healthy frozen yogurt bark recipe perfect for a refreshing snack or dessert.
Ingredients
-
2 cups plain Greek yogurt
-
1/4 cup honey or maple syrup
-
1 teaspoon vanilla extract
-
1 cup mixed berries
-
1/4 cup chopped nuts
-
2 tablespoons shredded unsweetened coconut
-
1 tablespoon chia seeds
-
1 tablespoon mini chocolate chips
Instructions
-
Step 1
Combine Greek yogurt, honey or maple syrup, and vanilla extract in a bowl and whisk until smooth. -
Step 2
Line a baking sheet with parchment paper. Spread the yogurt mixture thinly and evenly onto the parchment paper. -
Step 3
Scatter mixed berries, chopped nuts, shredded coconut, chia seeds, and mini chocolate chips evenly over the yogurt layer. -
Step 4
Transfer the baking sheet to the freezer and freeze for 2-4 hours, or until completely solid. -
Step 5
Remove from freezer, break into pieces by hand or with a knife, and serve immediately.
Important Information
Nutrition Facts (Per Serving)
It is important to consider this information as approximate and not to use it as definitive health advice.
Allergy Information
Please check ingredients for potential allergens and consult a health professional if in doubt.