Easy Dairy-Free Frozen Yogurt Bites Delight
Easy Frozen Yogurt Bites (Dairy-free option) are the ultimate guilt-free indulgence, a delightful treat that’s as fun to make as it is to eat. Imagin extracte vibrant little bursts of creamy, tangy goodness, perfectly portioned for a quick pick-me-up or a refreshing dessert. What’s not to love? They’re inherently customizable, allowing you to play with flavors, textures, and toppings to your heart’s content. This recipe takes the guesswork out of creating these frozen delights, ensuring a perfect outcome every time. Whether you’re a seasoned baker or just starting in the kitchen, these easy frozen yogurt bites (dairy-free option) are incredibly approachable. We’ll guide you through a method that’s so simple, you’ll wonder why you haven’t been making them all along. Plus, for those seeking a plant-based option, the dairy-free version is so seamless, you won’t miss a thing – it’s the creamy, dreamy satisfaction you crave, powered by wholesome ingredients and pure magic.
What makes these bites so special?
Beyond their incredible taste and satisfying texture, these easy frozen yogurt bites are a lifesaver for busy households and health-conscious individuals alike. They’re a fantastic way to incorporate fruit into your diet and satisfy sweet cravings without a sugar overload.
Ingredients:
- 1 cup thick Greek yogurt (for a dairy-free option, use thick coconut yogurt)
- 3 tablespoons cashew butter (or almond butter as a substitute)
- 3 tablespoons maple syrup (adjust to your sweetness preference, up to another tablespoon if desired)
- 3 tablespoons of your favorite protein powder (optional, ensure it’s a flavor you genuinely enjoy)
- 1 teaspoon vanilla extract
- A generous pinch of sea salt (Maldon or Celtic salt recommended for their unique texture and flavor)
- A handful of cacao nibs (optional, a great addition for antioxidants; feel free to substitute with other mix-ins)
- 3/4 cup chocolate chips or finely chopped chocolate
- 1/2 tablespoon coconut oil
Preparing the Base Mixture
Step 1: Combine the Wet Ingredients
First, let’s get started on our delectable frozen yogurt bites. In a medium-sized bowl, combine the thick Greek yogurt (or your chosen dairy-free coconut yogurt) with the cashew butter (or almond butter). These two ingredients will form the creamy foundation of our bites. I like to use a whisk for this step to ensure everything is thoroughly blended and there are no clumps of nut butter visible. If your nut butter is quite firm, you might find it helpful to give it a good stir before adding it to the yogurt. This initial mix is crucial for achieving a smooth and uniform texture in the final product. Don’t rush this part; a well-emulsified base will make a big difference.
Step 2: Sweeten and Enhance the Flavor
Next, we’ll introduce the sweetness and depth of flavor. To the yogurt and nut butter mixture, add the maple syrup. Start with the 3 tablespoons as specified, and then taste. If you have a sweeter tooth or if your yogurt is particularly tart, you can certainly add another tablespoon of maple syrup. Remember, you can always add more sweetness, but you can’t take it away, so tasting as you go is key! Now, it’s time for the vanilla extract. This aromatic ingredient will really elevate the overall flavor profile, bringin extractg a warm and comforting essence to the bites. Finally, add that gooooood pinch of sea salt. Don’t underestimate the power of salt in sweet recipes; it enhances all the other flavors and balances the sweetness beautifully.
Step 3: Incorporate Optional Boosts
This is where you can customize your frozen yogurt bites to perfectly suit your preferences and dietary needs. If you’re using protein powder, now is the time to add it. Make sure you’re using a protein powder that you genuinely love the taste of, as its flavor will be present in the final bites. Stir it in thoroughly until it’s fully incorporated. If you’re skipping the protein powder, simply proceed to the next step. If you’re feeling adventurous and want an antioxidant boost, toss in a handful of cacao nibs. These little powerhouses add a delightful crunch and a hint of bitterness that complements the sweetness. Again, stir everything together until well combined.
Forming and Chilling the Bites
Step 4: Prepare Your Baking Sheet and Portion the Mixture
Before we can chill our treats, we need to prepare a surface for them to set on. Line a baking sheet or a large plate with parchment paper or wax paper. This is essential to prevent the frozen yogurt bites from sticking. Now, using a tablespoon or a small cookie scoop, carefully portion the mixture onto the prepared baking sheet. Try to make them as uniform in size as possible so they freeze evenly. You can create little dollops or slightly flatten them if you prefer a more disc-like shape. Leave a little space between each portion, as they will expand slightly as they freeze.
Step 5: Freeze Until Firm
Once your baking sheet is filled with your delightful yogurt creations, it’s time to send them off to the freezer. Place the baking sheet carefully into your freezer. Allow them to freeze for at least 2 to 3 hours, or until they are completely firm to the touch. The exact freezing time will depend on the size of your bites and the temperature of your freezer. It’s important they are solid before moving on to the next step, which is coating them in chocolate.
Creating the Chocolate Coating
Step 6: Melt the Chocolate and Coconut Oil
While your yogurt bites are firming up in the freezer, let’s prepare the decadent chocolate coating. In a small, microwave-safe bowl or a heatproof glass bowl set over a saucepan of simmering water (a double boiler method), combine the chocolate chips (or chopped chocolate) with the coconut oil. The coconut oil is key here; it helps to thin out the chocolate, making it easier to coat the frozen yogurt bites and giving it a smoother, glossier finish when it sets. Microwave in 30-second intervals, stirring well after each interval, until the chocolate is completely melted and smooth. If using the double boiler method, stir gently until melted and smooth. Be careful not to overheat the chocolate, as it can seize and become grainy.
Step 7: Coat the Frozen Yogurt Bites
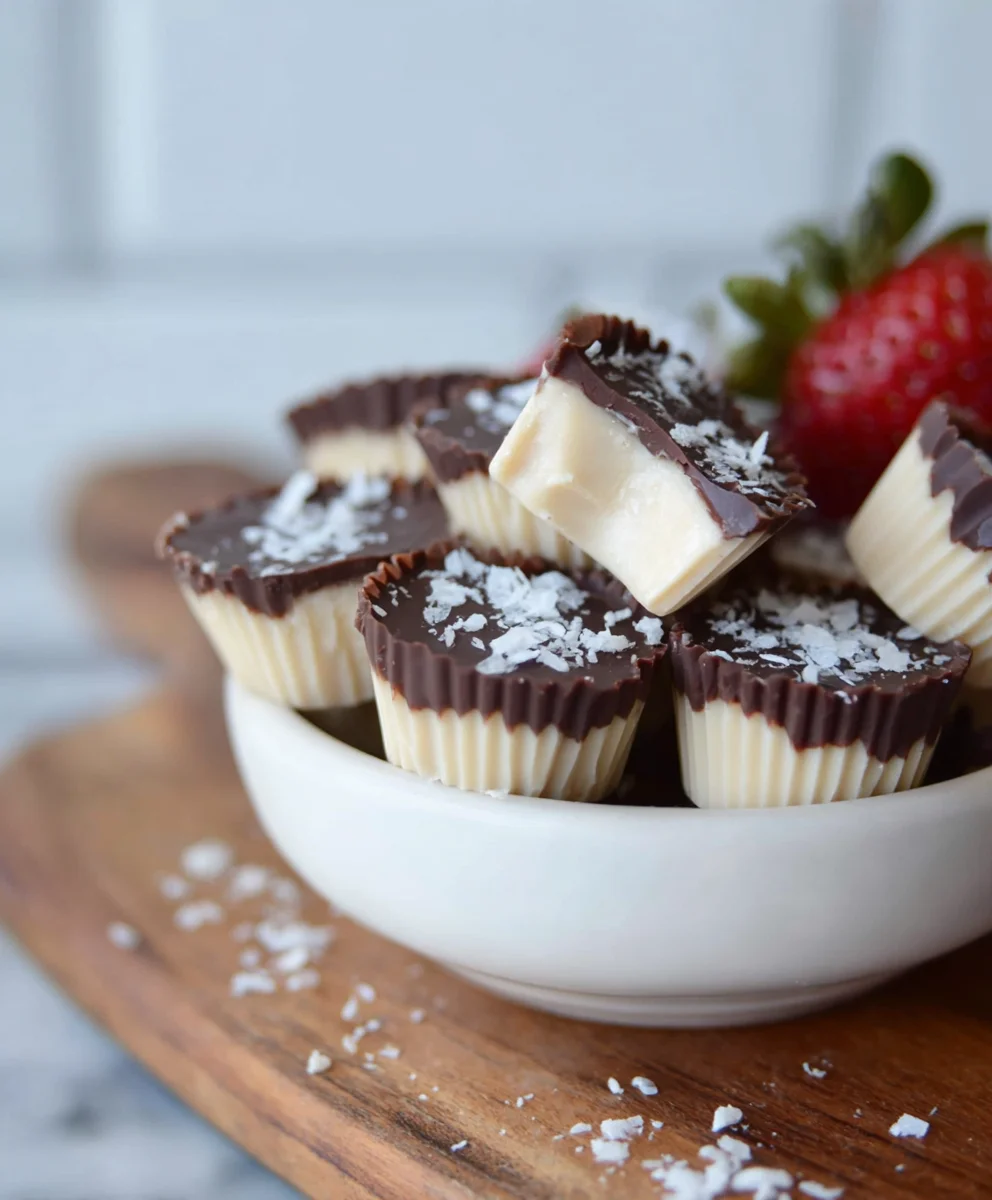
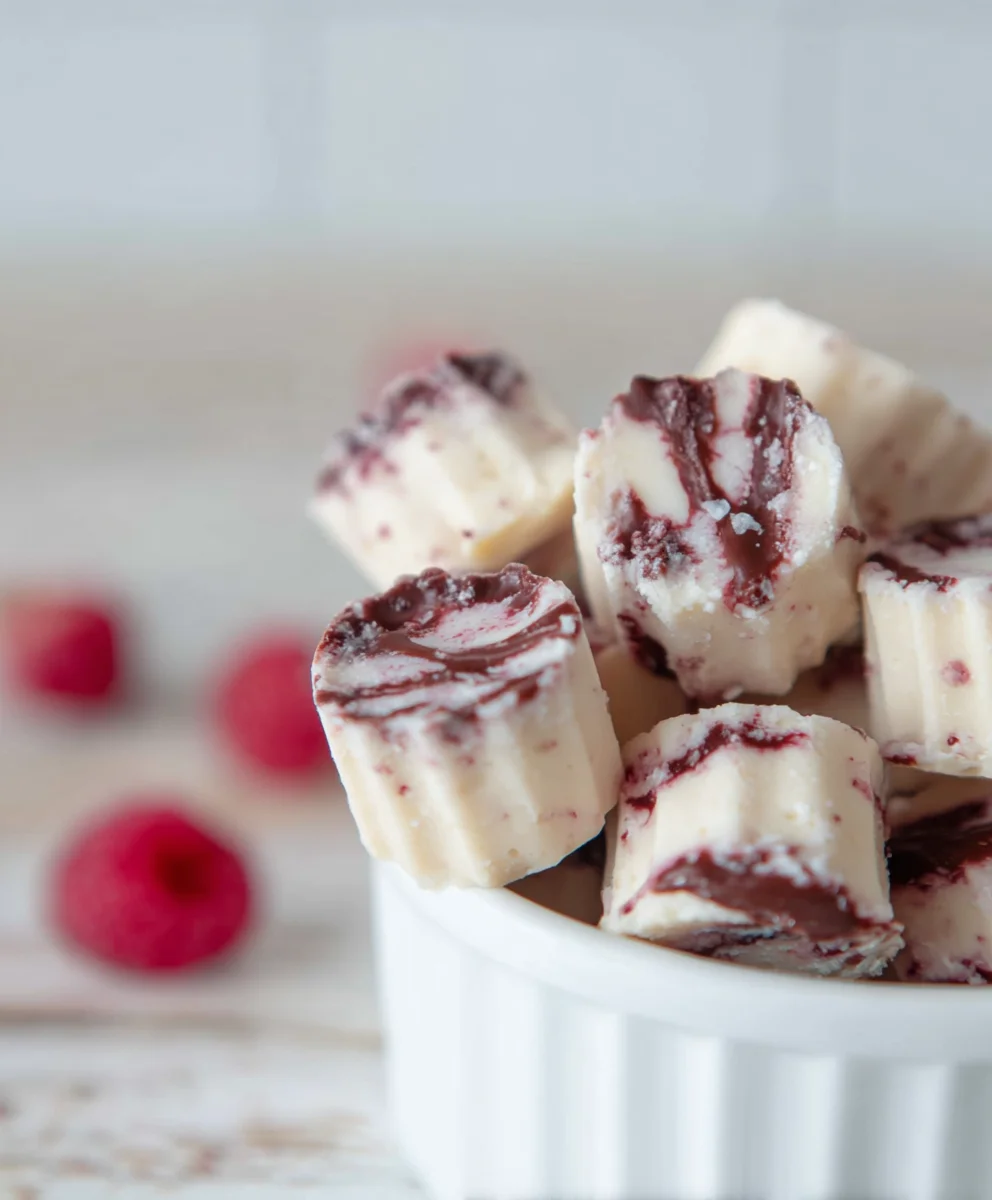
Once the chocolate is beautifully melted and glossy, it’s time to dip our frozen yogurt bites. Take the baking sheet out of the freezer. Working quickly, dip each frozen yogurt bite into the melted chocolate, using a fork or a toothpick to help coat it thoroughly. You can choose to fully submerge each bite or just dip the tops. Let any excess chocolate drip back into the bowl before placing the chocolate-coated bite back onto the parchment-lined baking sheet. If you want an extra decadent treat, you can even dip them twice for a thicker chocolate shell. As you coat each bite, you’ll notice the chocolate will start to harden almost immediately upon contact with the cold yogurt, which is exactly what we want!
Step 8: Final Freeze and Enjoy
After all your yogurt bites have been lovingly coated in chocolate, place the entire baking sheet back into the freezer. Allow them to freeze for another hour, or until the chocolate coating is completely set and hard. Once they’re fully frozen and set, you can carefully peel them off the parchment paper. Transfer your Easy Frozen Yogurt Bites to an airtight container and store them in the freezer. These are best enjoyed straight from the freezer. You can make a big batch and have a healthy, delicious treat ready whenever a craving strikes!
Conclusion:
And there you have it – your very own batch of Easy Frozen Yogurt Bites (Dairy-free option)! I hope you’ve enjoyed this simple yet incredibly satisfying recipe. Whether you choose the classic dairy version or opt for the delightful dairy-free twist, these bites are guaranteed to be a hit for all ages. They’re perfect for a refreshing post-workout treat, a fun snack for kids, or even a light and healthy dessert. Don’t hesitate to get creative with your toppings; berries, chopped nuts, or a drizzle of honey are all fantastic choices. Remember, the beauty of this recipe lies in its adaptability, so feel free to experiment and make it your own. I encourage you to give these Easy Frozen Yogurt Bites (Dairy-free option) a try – you won’t be disappointed!
Frequently Asked Questions:
Can I make these ahead of time?
Absolutely! These Easy Frozen Yogurt Bites (Dairy-free option) are ideal for making in advance. Once frozen solid, you can transfer them to an airtight container or freezer bag and store them for up to a month. Just be sure to separate them with parchment paper if you’re stacking them to prevent them from sticking together.
What are some other dairy-free milk alternatives I can use?
The recipe works beautifully with a variety of dairy-free milk alternatives. Besides coconut milk, you can also use almond milk, cashew milk, or oat milk for a different flavor profile. Ensure your chosen milk is unsweetened to maintain control over the sweetness of your Easy Frozen Yogurt Bites (Dairy-free option).
Easy Dairy-Free Frozen Yogurt Bites Delight
Delightful dairy-free frozen yogurt bites coated in chocolate, perfect for a healthy and satisfying treat.
Ingredients
-
1 cup thick coconut yogurt
-
3 tablespoons cashew butter
-
3 tablespoons maple syrup
-
1 teaspoon vanilla extract
-
A generous pinch of sea salt
-
3/4 cup chocolate chips
-
1/2 tablespoon coconut oil
Instructions
-
Step 1
In a medium-sized bowl, combine the thick coconut yogurt with the cashew butter. Whisk until thoroughly blended and smooth. -
Step 2
Add the maple syrup, vanilla extract, and sea salt to the mixture. Taste and adjust sweetness if needed by adding another tablespoon of maple syrup. -
Step 3
If using, stir in the protein powder and/or cacao nibs until fully incorporated. Ensure protein powder flavor is one you enjoy. -
Step 4
Line a baking sheet with parchment paper. Using a tablespoon or small cookie scoop, portion the mixture onto the sheet, leaving space between each bite. -
Step 5
Freeze the bites for at least 2 to 3 hours, or until completely firm. -
Step 6
While bites are freezing, melt the chocolate chips and coconut oil in a microwave-safe bowl in 30-second intervals, stirring until smooth. Alternatively, use a double boiler. -
Step 7
Working quickly, dip each frozen yogurt bite into the melted chocolate using a fork or toothpick. Let excess chocolate drip off and place back on the parchment-lined baking sheet. -
Step 8
Return the chocolate-coated bites to the freezer for another hour, or until the chocolate is set. Store in an airtight container in the freezer and enjoy.
Important Information
Nutrition Facts (Per Serving)
It is important to consider this information as approximate and not to use it as definitive health advice.
Allergy Information
Please check ingredients for potential allergens and consult a health professional if in doubt.