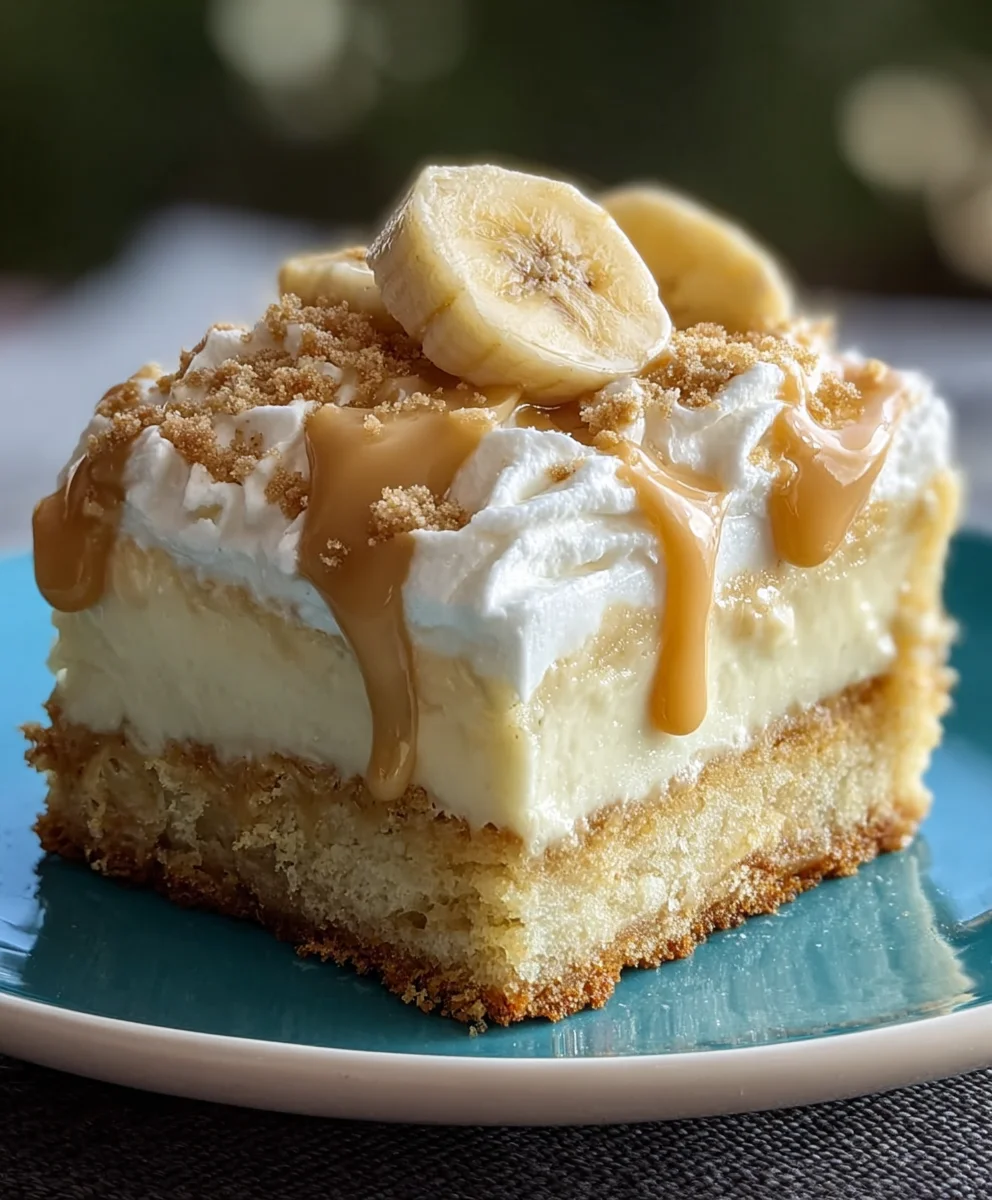
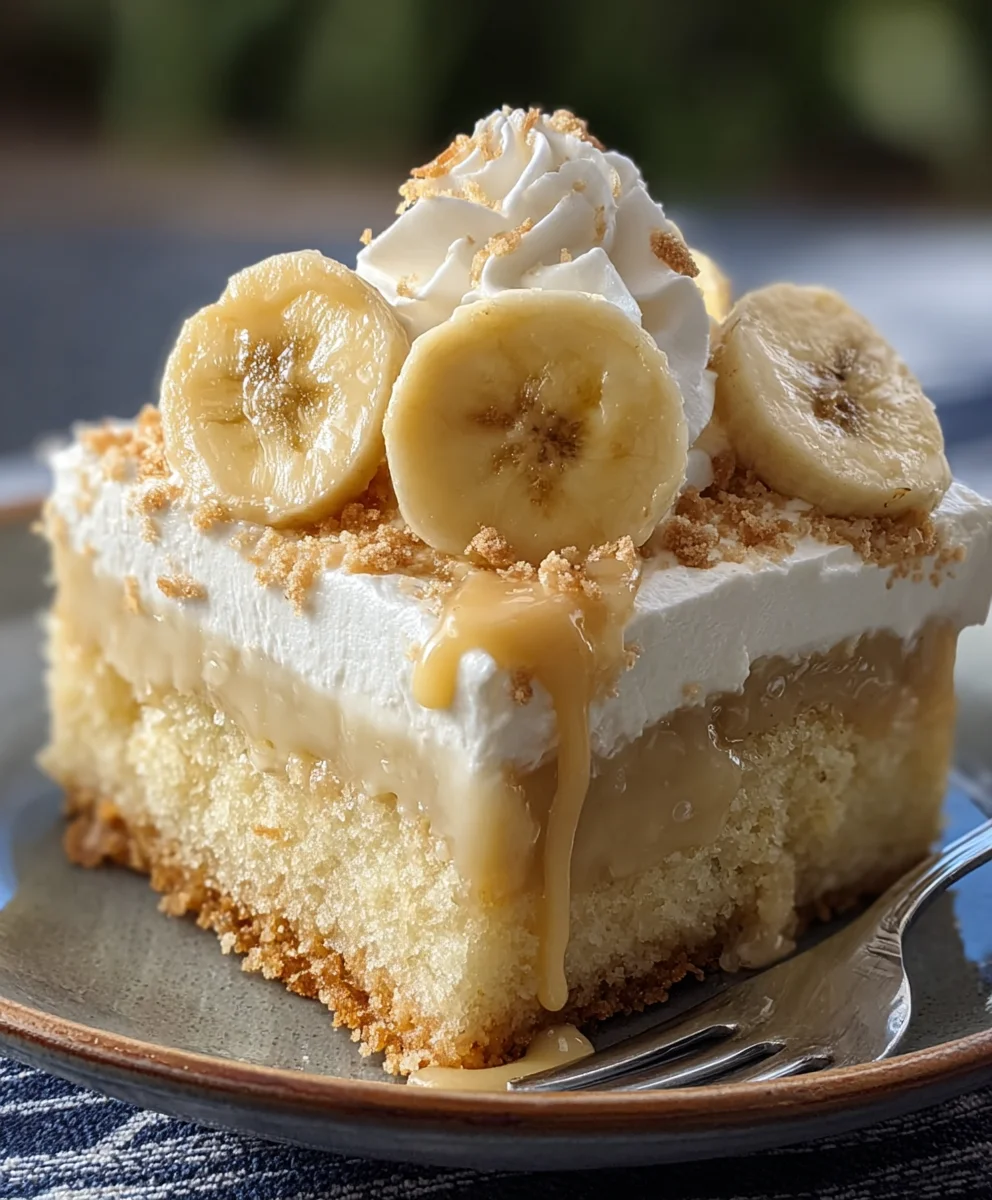
Easy Banana Pudding Recipe – Delicious Southern Comfort Food
Banana Pudding is more than just a dessert; it’s a hug in a bowl, a nostalgic trip back to grandma’s kitchen, and a guaranteed crowd-pleaser for every occasion. Who doesn’t adore the comforting embrace of creamy vanilla custard, the sweet yielding texture of ripe bananas, and the delightful crunch of buttery vanilla wafers? It’s this perfect symphony of simple, yet utterly satisfying elements that makes Banana Pudding a perennial favorite. But what truly sets an exceptional Banana Pudding apart? It’s the delicate balance of flavors, the lusciously smooth custard that isn’t too sweet, and those wafer layers that manage to stay just tender enough, soaking up the creamy goodness without becoming mushy. This recipe unlocks that perfect harmony, transforming humble ingredients into a dessert that’s both elegant and deeply comforting.
Ingredients:
- 1 (3.4 oz) box instant vanilla pudding mix
- 2 cups cold milk
- 1 (14 oz) can sweetened condensed milk
- 1 teaspoon vanilla extract
- 1 (8 oz) tub whipped topping, thawed
- 4-5 ripe bananas, sliced
- 1 (11 oz) box vanilla wafers
Preparing the Pudding Base
Step 1: Combine Pudding Mix and Milk
Begin extract by grabbing a medium-sized mixing bowl. Pour the contents of the 1 (3.4 oz) box of instant vanilla pudding mix into the bowl. Now, it’s time to add the liquid. Measure out 2 cups of cold milk and pour it over the pudding mix. Using a whisk, vigorously mix the pudding powder and milk together. You’ll want to whisk continuously for about 2 minutes. This is a crucial step to ensure there are no lumps and that the pugin extractng begins to thicken properly. Make sure to scrape the sides and bottom of the bowl with your whisk to incorporate all the dry pudding mix. You should notice the mixture starting to thicken almost immediately. For an extra layer of flavor and to really enhance that creamy vanilla essence, add 1 teaspoon of vanilla extract. Whisk this in thoroughly until it’s fully incorporated into the pudding base. The aroma should already be wonderfully sweet and inviting!
Step 2: Incorporate Sweetened Condensed Milk
Next, we’ll add another layer of richness and sweetness to our pudding. Open the 1 (14 oz) can of sweetened condensed milk. Pour the entire can of sweetened condensed milk into the bowl with the pudding mixture. Continue whisking until the sweetened condensed milk is completely blended into the pudding. This addition will make the pudding exceptionally creamy and sweet, giving it that classic, decadent Banana Pudding flavor we all love. Be patient during this step; it might take a minute or two of steady whisking to achieve a perfectly smooth and homogenous consistency. The texture will become noticeably richer and glossier as you mix. If you find any pockets of sweetened condensed milk not fully incorporated, continue whisking and gently pressing them against the side of the bowl with your whisk to break them up.
Step 3: Fold in Whipped Topping
Now it’s time to lighten up our pudding base and make it airy and fluffy. Ensure your 1 (8 oz) tub of whipped topping is fully thawgin extractbefore you begin. Gently spoon the thawed whipped topping into the bowl with the pudding mixture. Instead of whisking, you’ll want to use a rubber spatula or a large spoon to gently fold the whipped topping into the pudding. The key here is to be gentle to preserve the airiness of the whippgin extracttopping. Fold by bringing the spatula down through the center of the mixture and then scooping up from the bottom and folding it over the top. Continue this folding motion until there are no streaks of whipped topping visible and the mixture is uniformly blended. The final pudding base should be light, creamy, and incredibly smooth. Overmixing at this stage can deflate the whipped topping, so stop as soon as it’s all combined.
Assembling the Banana Pudding
Step 4: Layering the Vanilla Wafers and Bananas
It’s assembly time for our delicious Banana Pudding! Grab a large serving dish or individual parfait glasses. Start by creating a base layer of vanilla wafers. Arrange a single layer of the 1 (11 oz) box of vanilla wafers at the bottom of your serving dish. You may need to break some wafers to fit them snugly and cover the entire base. Once you have a nice layer of wafers, arrange approximately half of your sliced ripe bananas evenly over the wafer layer. Ensure you have a good distribution of banana slices. Now, spoon about half of your prepared pudding mixture evenly over the banana and wafer layer. Gently spread the pudding to cover the bananas and wafers.
Step 5: Building the Second Layer and Chilling
We’re on the home stretch to Banana Pudding perfection! Add another layer of vanilla wafers on top of the pudding layer you just spread. Again, break wafers as needed to create a solid, even layer. Next, arrange the remaining sliced ripe bananas over this second wafer layer. Finally, spoon the rest of the pudding mixture over the second layer of bananas and wafers. Gently spread the pudding to create a smooth top layer, making sure to cover all the ingredients underneath. For the best flavor and texture, cover the serving dish tightly with plastic wrap. You can press the plastic wrap directly onto the surface of the pudding to prevent a skin from forming, or simply ensure the entire dish is senon-alcoholic aled. Refrigerate your Banana Pudding for at least 4 hours, or preferably overnight. This chilling time is essential for the wafers to soften and absorb the pudding, and for all the flavors to meld beautifully together. The longer it chills, the more the wafers will soften, creating that signature gooey texture.
Conclusion:
There you have it – a delightful journey into creating the perfect Banana Pudding! This classic dessert is more than just a recipe; it’s a comforting hug in a bowl, a taste of nostalgia, and a guaranteed crowd-pleaser. Whether you’re a seasoned baker or a kitchen novice, this Banana Pudding recipe is designed to be approachable and rewarding. We hope you enjoyed learning how to bring this creamy, dreamy treat to life. Don’t be afraid to experiment and make it your own!
Serving Suggestions: Serve chilled, either in individual ramekins for an elegant presentation or from a large bowl at your next gathering. A sprinkle of crushed vanilla wafers or a dollop of whipped cream makes for a beautiful and delicious garnish. This Banana Pudding pairs wonderfully with a cup of coffee or a glass of cold milk.
Variations: For a richer flavor, consider adding a touch of bourbon extract or rum extract to the custard. You can also experiment with different cookie bases, like shortbread or grabeef ham crackers, for a unique twist. For a gluten-free option, simply use gluten-free vanilla wafers.
Now, go forth and create your own masterpiece! We encourage you to share your creations and enjoy every spoonful of your homemade Banana Pudding.
Frequently Asked Questions:
What is the best way to store leftover Banana Pudding?
Leftover Banana Pudding should be stored in an airtight container in the refrigerator. It’s best enjoyed within 2-3 days, as the bananas can become mushy over time. Cover the surface directly with plastic wrap before sealing the container to prevent a skin from forming.
Can I make Banana Pudding ahead of time?
Yes, you can definitely make Banana Pudding ahead of time! It’s actually often better when it has a few hours to chill in the refrigerator, allowing the flavors to meld together. However, for the best texture, it’s recommended to assemble the final layers (including the fresh bananas and whipped cream or meringue) closer to serving time to prevent the cookies from becoming too soggy.
Easy Banana Pudding Recipe – Delicious Southern Comfort Food
A simple and delicious Southern-style banana pudding made with creamy pudding, sweet condensed milk, fresh bananas, and vanilla wafers.
Ingredients
-
1 (3.4 oz) box instant vanilla pudding mix
-
2 cups cold milk
-
1 (14 oz) can sweetened condensed milk
-
1 teaspoon vanilla extract
-
1 (8 oz) tub whipped topping, thawed
-
4-5 ripe bananas, sliced
-
1 (11 oz) box vanilla wafers
Instructions
-
Step 1
In a medium bowl, whisk together the instant vanilla pudding mix and cold milk for about 2 minutes until thickened. Stir in the vanilla extract. -
Step 2
Add the sweetened condensed milk to the pudding mixture and whisk until completely blended and smooth. -
Step 3
Gently fold the thawed whipped topping into the pudding mixture using a spatula until just combined. Be careful not to overmix. -
Step 4
In a large serving dish or individual glasses, create a layer of vanilla wafers. Top with half of the sliced bananas, then half of the pudding mixture. -
Step 5
Add another layer of vanilla wafers, followed by the remaining sliced bananas, and finally top with the rest of the pudding mixture. Spread evenly. -
Step 6
Cover the dish tightly and refrigerate for at least 4 hours, or preferably overnight, to allow flavors to meld and wafers to soften.
Important Information
Nutrition Facts (Per Serving)
It is important to consider this information as approximate and not to use it as definitive health advice.
Allergy Information
Please check ingredients for potential allergens and consult a health professional if in doubt.