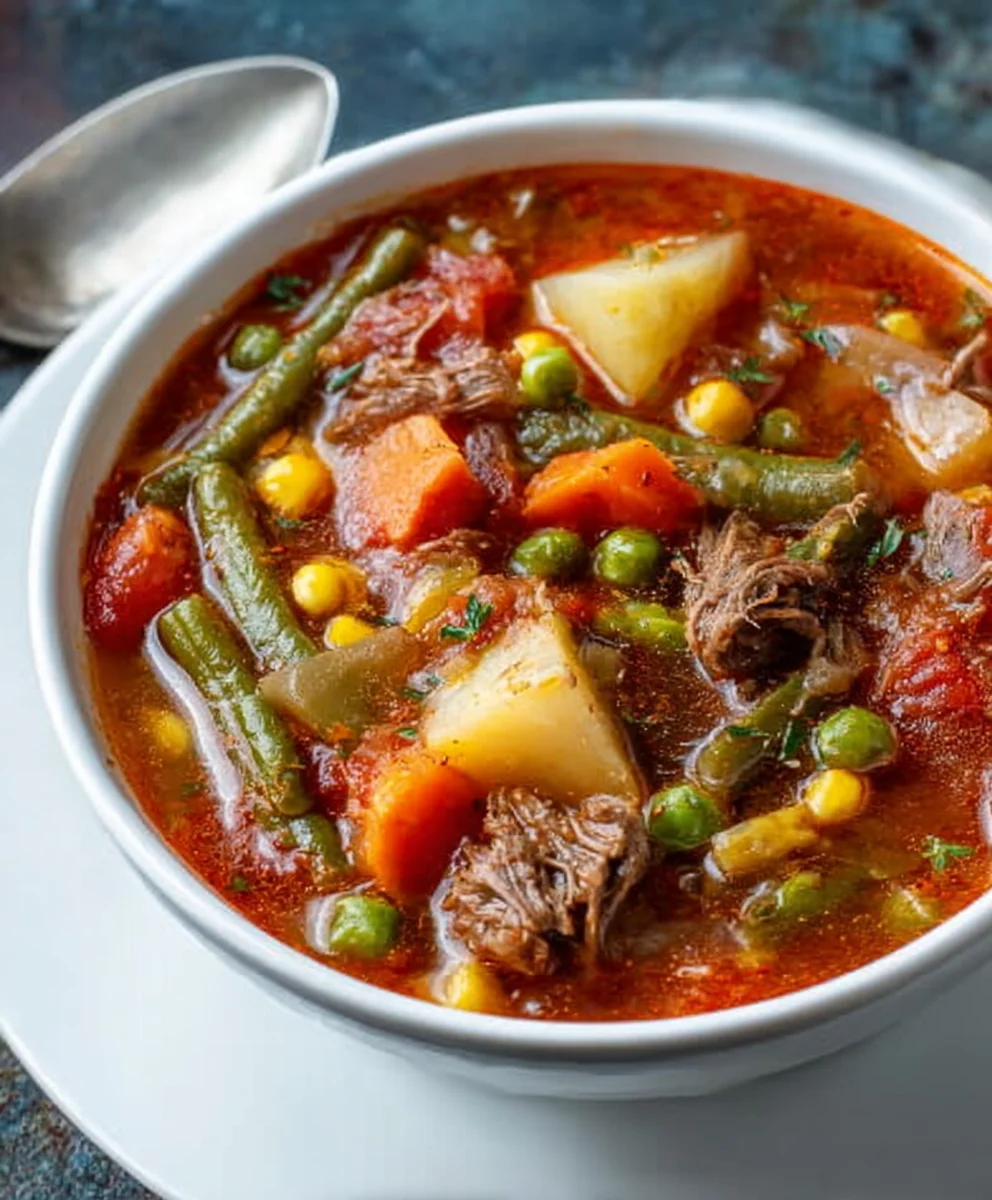
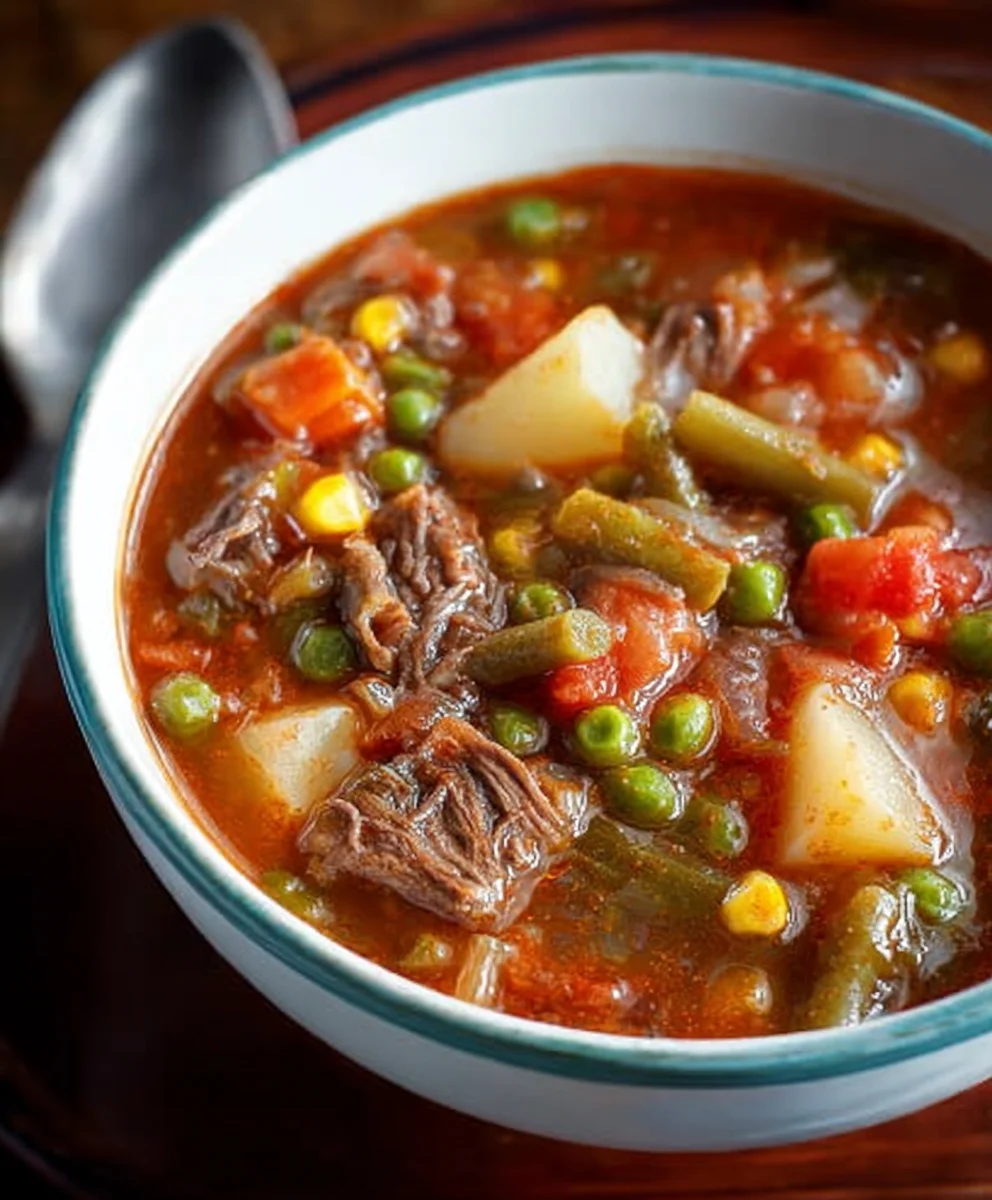
Mom’s Old-Fashioned Vegetable Beef Soup Recipe
My Mom’s Old-Fashioned Vegetable Beef Soup isn’t just a meal; it’s a warm hug in a bowl, a nostalgic journey back to simpler times, and quite possibly the most comforting dish you’ll ever make. It’s a recipe that has been passed down through generations, whispered from kitchen to kitchen, and cherished for its hearty, wholesome goodness. What is it about this classic soup that captures our hearts and fills our bellies with such profound satisfaction? It’s the perfect harmony of tender, slow-cooked beef, a medley of garden-fresh vegetables bursting with flavor, and a rich, savory broth that simmers for hours, infusing every spoonful with pure comfort. This isn’t your average quick-fix soup; this is a labor of love, a testament to the magic that happens when simple, quality ingredients come together with time and care. Get ready to create your own cherished memories with this beloved recipe.
Ingredients:
- 1 pot roast (about 2 pounds)
- 2 russet potatoes, chopped into 1-inch cubes
- 1 bag frozen seasoning blend (this typically includes chopped onions, celery, and bell peppers – if you don’t have this, simply use 2 cups of chopped yellow onion)
- 1 bag frozen peas (about 10-12 ounces)
- 1 bag frozen green beans (about 10-12 ounces), cut into 1-inch pieces
- 1 bag frozen corn (about 10-12 ounces)
- 4 large carrots, peeled and chopped into 1/2-inch rounds
- 1 (32 ounce) container beef broth
- 2 (10.75 ounce) cans condensed tomato soup
- 1 can (use one of the empty tomato soup cans) filled with water
- Salt and freshly ground black pepper, to taste
Preparing the Foundation
Browning the Pot Roast
The first step to achieving that deep, savory flavor in My Mom’s Old-Fashioned Vegetable Beef Soup is to properly brown the pot roast. I like to use a large Dutch oven or a heavy-bottomed pot for this. Pat the pot roast dry with paper towels – this is crucial for getting a good sear. Season it generously on all sides with salt and pepper. Drizzle a tablespoon or two of olive oil into your pot and heat it over medium-high heat until it’s shimmering. Carefully place the seasoned roast into the hot oil and sear it undisturbed for about 3-4 minutes per side, until a beautiful, dark brown crust forms. This browning process is where a lot of the wonderful flavor for the broth will develop. Once browned, remove the roast from the pot and set it aside on a plate. Don’t worry about it being cooked through at this stage; we’re just building flavor.
Building the Rich Broth
Deglazing and Simmering
Now that the roast is out, there will be browned bits stuck to the bottom of the pot. This is pure flavor gold! Pour in the 32-ounce container of beef broth. Use a wooden spoon to scrape up all those delicious browned bits from the bottom of the pot. This is called deglazing, and it really intensifies the soup’s taste. Once you’ve scraped up everything, add the two cans of condensed tomato soup to the pot. Stir this in thoroughly until it’s well combined with the beef broth. Now, carefully place the browned pot roast back into the pot. If your roast isn’t mostly submerged in the liquid, you can add a little more beef broth or water. Bring the liquid to a gentle simmer over medium heat. Once it’s simmering, reduce the heat to low, cover the pot, and let it cook for about 1.5 to 2 hours. This slow cooking process will make the beef incredibly tender and infuse the broth with its savory essence.
Adding the Hearty Vegetables
Tenderizing the Roast and Root Vegetables
After the roast has been simmering and becoming tender for about 1.5 to 2 hours, it’s time to add the heartier vegetables that need a little more cooking time. Carefully remove the pot roast from the pot and place it on a cutting board. It should be very tender and easy to shred or cut. While the roast is resting, add your chopped carrots and the frozen seasoning blend (or chopped onions) to the simmering broth. If you’re using a frozen seasoning blend, it usually has a good amount of onion, celery, and maybe some bell pepper, which will add another layer of aromatic complexity. If you opted for just chopped onions, you’ll get that foundational onion flavor. Stir these vegetables into the pot, bring the soup back to a simmer, and cook for about 15-20 minutes, or until the carrots are starting to soften.
Incorporating the Remaining Veggies and Shredded Beef
While the carrots and onions are cooking, shred or chop the tender pot roast into bite-sized pieces. You can use two forks to shred it or a sharp knife to cut it into cubes. Once the carrots are tender, it’s time to add the rest of our delicious frozen vegetables. Add the frozen peas, frozen green beans, and frozen corn to the pot. These vegetables cook relatively quickly, so adding them towards the end ensures they retain their vibrant color and a pleasant texture, rather than becoming mushy. Stir everything together and then add your shredded or chopped beef back into the soup.
Finishing Touches and Perfect Seasoning
Bringin extractg It All Together and Adjusting Flavor
Now that all the ingredients are in the pot, it’s time to let everything meld together and reach its peak deliciousness. Stir everything gently to ensure the vegetables and beef are evenly distributed. Add the one can of water (using one of the empty tomato soup cans for measurement is a great trick to ensure you get the right amount and don’t waste any flavor). Bring the soup back up to a gentle simmer and let it cook for another 10-15 minutes. This allows the frozen vegetables to fully cook through and for all the flavors to harmonize. Taste the soup and adjust the seasoning with salt and freshly ground black pepper. This is a crucial step. The amount of salt needed will depend on the saltiness of your beef broth and tomato soup, so taste and add gradually until it’s just right for your palate. My Mom always said that a little extra black pepper really wakes up the flavors of a hearty soup, so don’t be shy with it! The soup should be rich, comforting, and packed with tender beef and perfectly cooked vegetables.
Conclusion:
My Mom’s Old-Fashioned Vegetable Beef Soup is a comforting and hearty dish that truly embodies the warmth of home cooking. We’ve walked through the simple steps to create this classic, proving that delicious meals don’t need to be complicated. This soup is wonderfully versatile, perfect for a chilly evening or a satisfying lunch. I encourage you to gather your ingredients and give this recipe a try; you’ll be rewarded with a flavorful and nourishing soup that will surely become a family favorite.
For serving, a crusty bread for dipping is an absolute must! You could also pair it with a light side salad or even a grilled cheese sandwich for an extra indulgent meal. When it comes to variations, feel free to experiment with different root vegetables like parsnips or turnips, or add a pinch of your favorite herbs like thyme or rosemary. Don’t be afraid to adjust the seasonings to your personal taste.
Frequently Asked Questions:
Can I make My Mom’s Old-Fashioned Vegetable Beef Soup ahead of time?
Absolutely! This soup actually tastes even better the next day as the flavors have more time to meld. Store it in an airtight container in the refrigerator for up to 3-4 days. Reheat gently on the stovetop or in the microwave.
What kind of beef is best for this soup?
For the best flavor and tenderness, I recommend using a well-marbled cut of beef like chuck roast or beef stew meat. These cuts break down beautifully during the simmering process, adding richness to the broth.
Mom’s Old-Fashioned Vegetable Beef Soup
A hearty and comforting old-fashioned vegetable beef soup, just like Mom used to make, with tender pot roast and a medley of vegetables.
Ingredients
-
1 pot roast (about 2 pounds)
-
2 russet potatoes, chopped into 1-inch cubes
-
1 bag frozen seasoning blend (or 2 cups chopped yellow onion)
-
1 bag frozen peas (about 10-12 ounces)
-
1 bag frozen green beans (about 10-12 ounces), cut into 1-inch pieces
-
1 bag frozen corn (about 10-12 ounces)
-
4 large carrots, peeled and chopped into 1/2-inch rounds
-
1 (32 ounce) container beef broth
-
2 (10.75 ounce) cans condensed tomato soup
-
1 can filled with water
-
Salt, to taste
-
Freshly ground black pepper, to taste
Instructions
-
Step 1
Pat the pot roast dry and season generously with salt and pepper. Heat olive oil in a Dutch oven or heavy-bottomed pot over medium-high heat. Sear the roast on all sides until a dark brown crust forms, about 3-4 minutes per side. Remove the roast and set aside. -
Step 2
Pour the beef broth into the pot and scrape up any browned bits from the bottom. Stir in the condensed tomato soup until well combined. Return the browned pot roast to the pot, ensuring it’s mostly submerged. Bring to a gentle simmer, then reduce heat to low, cover, and cook for 1.5 to 2 hours until the beef is tender. -
Step 3
Carefully remove the pot roast from the pot and place it on a cutting board to shred or chop into bite-sized pieces. Add the chopped carrots and frozen seasoning blend (or chopped onions) to the simmering broth. Cook for 15-20 minutes, or until carrots begin to soften. -
Step 4
Add the frozen peas, frozen green beans, and frozen corn to the pot. Stir in the shredded or chopped beef. Cook for another 10-15 minutes, allowing the frozen vegetables to cook through and the flavors to meld. -
Step 5
Add the can of water (use an empty tomato soup can for measurement). Stir gently and bring the soup back to a gentle simmer. Cook for an additional 10-15 minutes. Taste and adjust seasoning with salt and freshly ground black pepper as needed.
Important Information
Nutrition Facts (Per Serving)
It is important to consider this information as approximate and not to use it as definitive health advice.
Allergy Information
Please check ingredients for potential allergens and consult a health professional if in doubt.