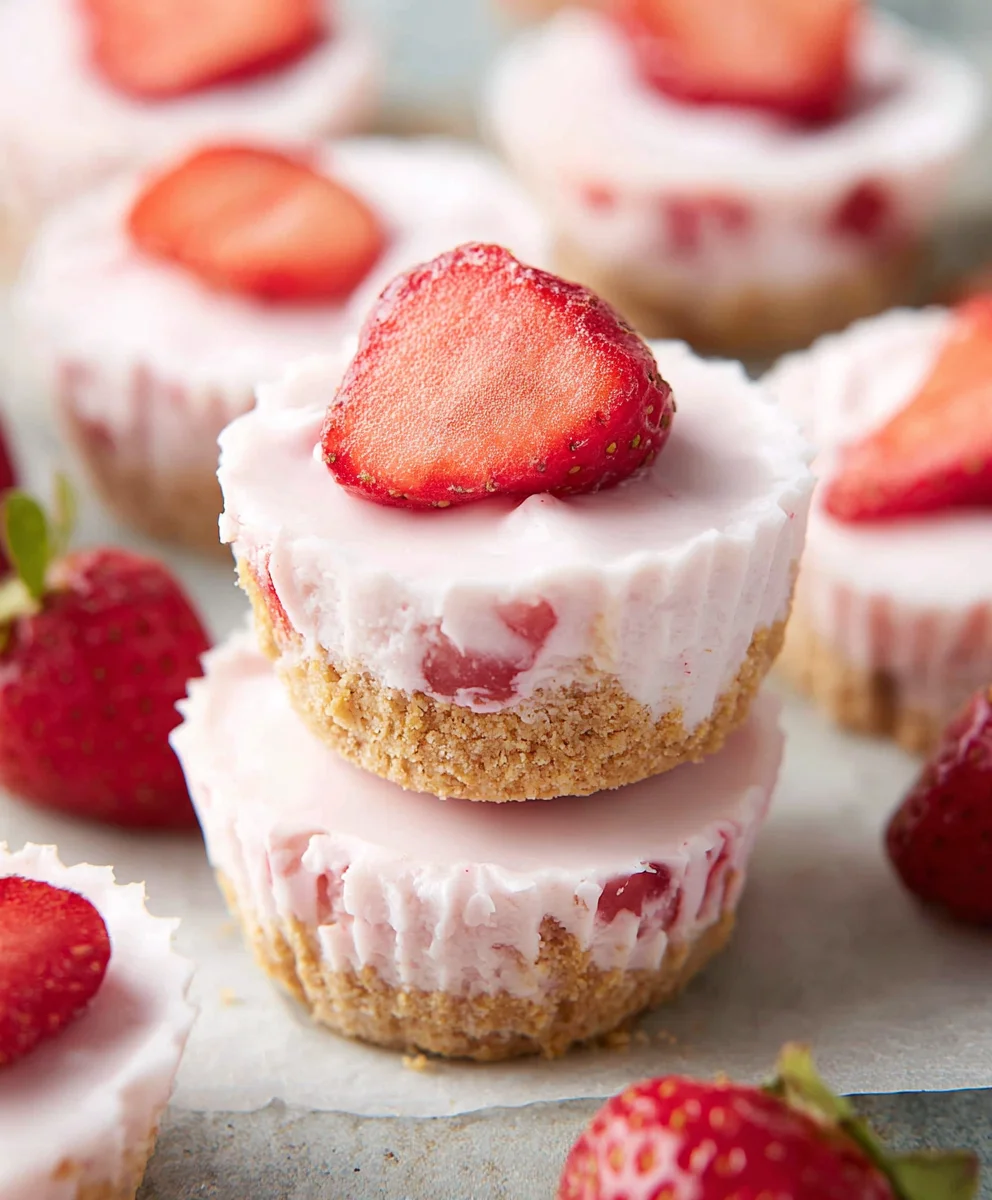
Easy Strawberry Yogurt Bites – Quick Healthy Snack
3 Ingredient Strawberry Yogurt Bites are the tiny bursts of sunshine you’ve been craving! Imagin extracte a treat so simple, so satisfying, and so incredibly delicious that it only requires three humble ingredients. That’s the magic we’re unlocking today. These delightful bites have taken the internet by storm, and it’s easy to see why. They offer that perfect balance of creamy, cool yogurt with the sweet, slightly tart essence of fresh strawberries, all in one perfectly portioned package. They’re the ultimate guilt-free indulgence, making them a favorite for quick snacks, healthy desserts, or even a fun activity to make with kids. What truly sets these 3 Ingredient Strawberry Yogurt Bites apart is their effortless charm. No complicated steps, no obscure ingredients – just pure, unadulterated joy in every bite.
Ingredients:
- ½ cup granola (plus more for topping)
- 1 cup yogurt of choice (Greek yogurt or a thick, plain yogurt works best for a firmer bite)
- ½ cup fresh strawberries (hulled and diced)
- ¾ cup fresh strawberries (sliced or chopped for garnish and mixing)
- ¼ cup granola (preferably smaller pieces for better texture and binding)
Preparing Your Strawberry Yogurt Bites
This recipe is incredibly straightforward, requiring minimal fuss and a short preparation time. The beauty of these bites lies in their simplicity and the use of just a few high-quality ingredients. We’re aiming for a delightful texture and a fresh, fruity flavor that makes them a perfect snack or light dessert.
First, let’s get our strawberries ready. You’ll need two portions of strawberries for this recipe. Take the ½ cup of fresh strawberries and carefully hull them. Hulling means removing the green leafy top. Once hulled, dice these strawberries into small, bite-sized pieces. These will be incorporated directly into the yogurt mixture, adding bursts of fresh strawberry flavor throughout.
Next, for the ¾ cup of strawberries, decide how you want to present them. You can slice them thinly or chop them into slightly larger pieces. These will be used in two ways: some can be gently folded into the yogurt mixture to add a bit more texture and visual appeal, while the rest will be reserved for garnishing your finished bites. The contrast in strawberry preparation adds depth to the overall experience.
Now, let’s consider the granola. We’re using two different amounts for distinct purposes. The ½ cup of granola will be the primary structural element and source of crunch within the bites. For the best results, ensure this granola is not too coarse. If your granola has very large clusters, you might want to gently break them up a bit. This will help it integrate better with the yogurt and the strawberries. The additional ¼ cup of granola is specifically for topping. This allows you to control the final crunch and presentation of each bite. You can also choose to add a little more of this topping granola if you really love a crunchy exterior.
Finally, the star binder and base: the yogurt. Choose a yogurt that is thick and creamy. Greek yogurt is an excellent choice because its lower moisture content leads to firmer bites. If you’re using a regular yogurt, consider straining it through a cheesecloth-lined sieve for about 30 minutes to remove excess liquid. This step is optional but highly recommended if you want your bites to hold their shape well. You will need 1 cup of your chosen yogurt.
Assembling the Strawberry Yogurt Bites
Step 1: Combining the Base Ingredients
In a medium-sized mixing bowl, combine the 1 cup of yogurt, the ½ cup of diced strawberries, and the ½ cup of granola. Gently stir these ingredients together. The goal here is to evenly distribute the diced strawberries and granola throughout the yogurt without overmixing, which could break down the strawberries too much. You want to see distinct pieces of strawberry and granola in the mixture.
Step 2: Incorporating Additional Strawberries (Optional but Recommended)
If you’d like more strawberry presence within the bites, you can now add about half of your sliced or chopped ¾ cup of strawberries to the bowl. Fold them in with a light hand. This adds another layer of strawberry flavor and texture. Remember, we are reserving some of these sliced strawberries for garnish later.
Step 3: Forming the Bites
Now comes the fun part of shaping your yogurt bites. You have a couple of excellent options here. One popular method is to use a tablespoon or a small cookie scoop. Scoop out portions of the mixture and carefully place them onto a parchment-lined baking sheet or a tray. Aim for uniform sizes so they freeze evenly. Alternatively, if you have silicone mini muffin molds or small candy molds, you can gently press the mixture into these. This is a great way to ensure consistent shapes and easy removal.
Step 4: Adding the Granola Topping
Before you freeze your bites, it’s time to add that delightful crunch from the ¼ cup of reserved granola. Sprinkle the granola evenly over the top of each yogurt bite. Gently press the granola into the surface of the yogurt mixture so that it adheres well. This topping will give your bites a satisfying crunch and a beautiful finish. If you want an even more generous topping, feel free to use a little extra here.
Step 5: Freezing to Set
Once your yogurt bites are formed and topped with granola, it’s time to let them set. Carefully transfer the baking sheet or tray into your freezer. Allow the bites to freeze for at least 2-3 hours, or until they are completely firm and solid. This freezing process is what transforms the soft yogurt mixture into firm, easy-to-handle bites. Ensure they are frozen solid before attempting to remove them from the tray or molds.
Step 6: Serving and Storing Your Bites
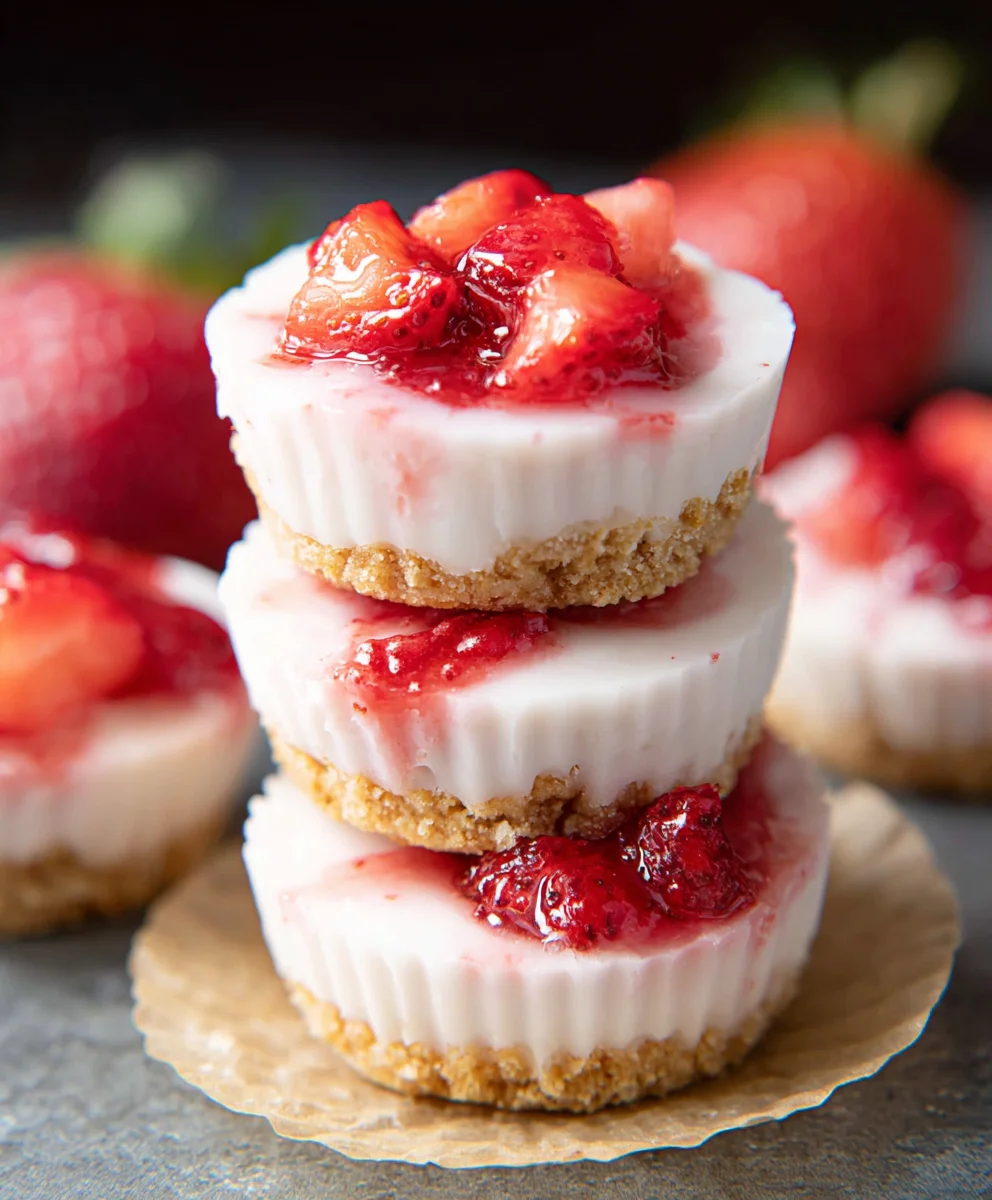
After they are fully frozen, carefully remove the strawberry yogurt bites from the parchment paper or molds. They should pop off easily. Arrange them on a plate or in a serving dish. You can garnish them with the remaining sliced strawberries for an extra touch of freshness and visual appeal. These bites are best enjoyed immediately after being taken out of the freezer, as they will begin extract to soften as they come to room temperature. Store any leftover bites in an airtight container or a resealable freezer bag in the freezer. They will keep well for up to 2 weeks, though their texture is best within the first week. Enjoy these simple, delicious treats!
Conclusion:
There you have it! The incredibly simple yet delightful 3 Ingredient Strawberry Yogurt Bites are ready to be enjoyed. We’ve covered how to whip up these healthy and refreshing treats in just a few minutes, making them perfect for a quick snack, a healthy dessert, or even a fun activity to do with kids. These bites are a fantastic way to get a boost of protein and fruit without any added sugar or artificial ingredients. They’re naturally sweet from the strawberries and creamy from the yogurt. Feel free to get creative with how you serve them – they’re delicious on their own, but also wonderful sprinkled over granola, added to a fruit salad, or even as a topping for pancakes.
Don’t be afraid to experiment with different yogurt flavors or even add a tiny drizzle of honey if you prefer a bit more sweetness. This recipe is incredibly forgiving and adaptable. We hope you love making and eating these 3 Ingredient Strawberry Yogurt Bites as much as we do! Give them a try and experience the simple joy of a homemade, healthy treat.
Frequently Asked Questions:
Q1: Can I use frozen strawberries instead of fresh for the 3 Ingredient Strawberry Yogurt Bites?
Absolutely! Frozen strawberries work wonderfully. You’ll want to thaw them slightly and drain off any excess liquid before mashing them for the best texture. Frozen strawberries can even make the bites firmer, which can be a nice advantage.
Q2: What are some other fruit variations I can try with this recipe?
The possibilities are endless! While strawberries are classic, you could try mashed raspberries, blueberries, or even a blend of berries. For a tropical twist, try mashed mango or peach. Just ensure the fruit is well-mashed and not too watery.
Easy Strawberry Yogurt Bites – Quick Healthy Snack
Simple and delicious strawberry yogurt bites that are perfect for a quick, healthy snack or light dessert. Made with yogurt, fresh strawberries, and crunchy granola.
Ingredients
-
1 cup yogurt of choice (Greek yogurt or a thick, plain yogurt works best)
-
½ cup fresh strawberries (hulled and diced)
-
¾ cup fresh strawberries (sliced or chopped)
-
½ cup granola (plus more for topping)
-
¼ cup granola (preferably smaller pieces for better texture and binding)
Instructions
-
Step 1
Prepare the strawberries: Hull and dice ½ cup of fresh strawberries. Slice or chop the remaining ¾ cup of fresh strawberries. -
Step 2
Prepare the granola: If your granola is coarse, gently break up any large clusters from the ½ cup for mixing. The ¼ cup is for topping. -
Step 3
Combine the base ingredients: In a medium bowl, gently stir together 1 cup of yogurt, the ½ cup of diced strawberries, and the ½ cup of granola. Fold in about half of the sliced or chopped ¾ cup of strawberries if desired. -
Step 4
Form the bites: Scoop portions of the mixture using a tablespoon or small cookie scoop and place them onto a parchment-lined baking sheet or tray. Alternatively, press the mixture into silicone mini muffin or candy molds. -
Step 5
Add the granola topping: Sprinkle the ¼ cup of granola evenly over the top of each yogurt bite and gently press it in. -
Step 6
Freeze to set: Transfer the baking sheet or tray to the freezer and freeze for at least 2-3 hours, or until completely firm and solid. -
Step 7
Serve and store: Carefully remove the frozen bites. Garnish with remaining sliced strawberries if desired. Enjoy immediately. Store leftovers in an airtight container in the freezer for up to 2 weeks.
Important Information
Nutrition Facts (Per Serving)
It is important to consider this information as approximate and not to use it as definitive health advice.
Allergy Information
Please check ingredients for potential allergens and consult a health professional if in doubt.