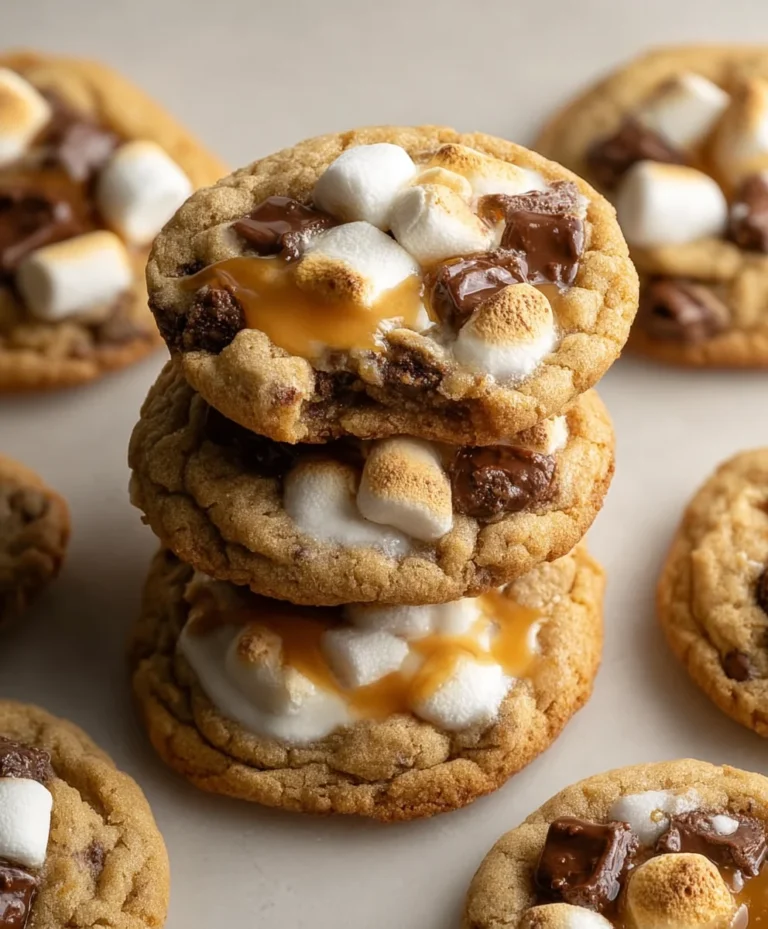
Easy Monster Cookies Recipe – Deliciously Fun Treats
Monster Cookies are more than just a treat; they’re a joyous explosion of flavor and texture that captures the essence of pure indulgence. What is it about these whimsical cookies that makes them such a beloved classic, a guaranteed hit at parties, bake snon-alcoholic ales, or simply for a comforting moment at home? It’s their delightfully unpretentious nature, their ability to be anything you want them to be, a culinary canvas for creativity. Each bite is a delightful surprise, a medley of crunchy, chewy, and sweet sensations that leave you reaching for just one more. The magic of Monster Cookies lies in their inherent “everything but the kitchen sink” philosophy. Unlike meticulously uniform cookies, their charm comes from their wild, untamed appearance, a testament to their generous spirit and the sheer joy of baking. They’re a celebration of abundance, a testament to the idea that more can indeed be merrier when it comes to delicious ingredients.
Why You’ll Love This Recipe
The Ultimate Blend of Textures and Flavors

Ingredients:
- ½ cup (113g) unsalted butter, softened to room temperature
- 1 cup (200g) light brown sugar, packed tightly into the measuring cup
- ¼ cup (50g) granulated sugar
- ⅓ cup (85g) smooth peanut butter, also at room temperature for easy mixing
- 1 large egg, plus 1 additional egg yolk, both at room temperature to ensure emulsification
- 2 teaspoons pure vanilla extract
- 2 teaspoons pure maple syrup, for a subtle depth of flavor
- 1 cup (115g) old-fashioned rolled oats (not instant or quick oats)
- 1¼ cups (155g) all-purpose flour, spooned into the measuring cup and leveled off
- 1 teaspoon baking soda
- ½ teaspoon baking powder
- ½ teaspoon kosher salt
- ¾ cup (130g) semi-sweet chocolate chips, plus a few extra for decorating the tops
- ¾ cup (130g) M&M candies, plus some extra for pressing onto the cookies
Preparing the Dough
Creaming the Butter and Sugars
Let’s start by getting our base wonderfully creamy. In a large mixing bowl, combine the softened unsalted butter, packed light brown sugar, and granulated sugar. Using an electric mixer on medium speed, beat these ingredients together for about 3 to 5 minutes. You’re looking for a light, fluffy, and pnon-alcoholic ale mixture. This step is crucial because it incorporates air into the dough, which will contribute to a tender cookie texture. Don’t rush this; the fluffier the base, the better the final cookie. If you don’t have an electric mixer, a sturdy whisk and some arm power will do the trick, though it will take a bit longer.
Adding Wet Ingredients and Peanut Butter
Next, we’ll introduce the wet components and that essential peanut butter flavor. Add the smooth peanut butter to the creamed butter and sugar mixture. Beat again until well combined and smooth. Now, add the room temperature large egg and the egg yolk. Beating them in one at a time ensures they are fully incorporated. Follow this with the vanilla extract and the maple syrup. Beat everything until it’s just combined and the mixture is homogenous. The room temperature of the eggs is important here; cold eggs can cause the butter to seize, resulting in a less smooth dough.
Incorporating Dry Ingredients
Mixing the Flour, Leaveners, and Salt
It’s time to bring in the dry ingredients. In a separate medium bowl, whisk together the all-purpose flour, baking soda, baking powder, and kosher salt. Whisking them together ensures that the leavening agents (baking soda and baking powder) and the salt are evenly distributed throughout the flour. This prevents pockets of saltiness or uneven rising in your cookies. Make sure your flour is spooned and leveled into the measuring cup; this ensures you’re not packing too much flour, which can lead to dry, tough cookies.
Combining Wet and Dry Mixtures
Now, gradually add the dry ingredients to the wet ingredients. It’s best to do this in two or three additions, mixing on low speed after each addition until just combined. Be careful not to overmix at this stage. Overmixing can develop the gluten in the flour too much, resulting in tough cookies. Stop mixing as soon as you no longer see streaks of dry flour. A few small lumps are perfectly fine.
Adding the Mix-ins
Folding in the Oats, Chocolate Chips, and M&Ms
This is where the magic happens and our Monster Cookies truly get their name! Add the old-fashioned rolled oats, semi-sweet chocolate chips, and M&M candies to the dough. Using a sturdy spatula or a wooden spoon, gently fold these ingredients into the dough until they are evenly distributed. Again, avoid overmixing. You want to see those colorful M&Ms and melty chocolate chips throughout the cookie dough. Reserve a small handful of both chocolate chips and M&Ms to press onto the tops of the cookies before baking; this makes them look extra appealing.
Shaping and Baking the Cookies
Scooping and Placing Dough Balls
Preheat your oven to 350°F (175°C). Line baking sheets with parchment paper or silicone baking mats. This prevents the cookies from sticking and makes for easier cleanup. Using a medium cookie scoop (about 1.5 to 2 tablespoons), scoop portions of the dough. Roll each portion gently into a ball. Place the dough balls onto the prepared baking sheets, leaving about 2 inches of space between each cookie to allow for spreading. If you desire a more visually appealing cookie, now is the time to gently press a few extra chocolate chips and M&Ms onto the tops of each dough ball.
Baking to Perfection
Bake for 10 to 12 minutes, or until the edges are lightly golden brown and the centers are still slightly soft. The cookies will continue to cook and firm up as they cool on the baking sheet. For a chewier cookie, err on the side of underbaking slightly. For a crispier cookie, bake them for a minute or two longer. Keep an eye on them, as oven temperatures can vary.
Cooling the Monster Cookies
Once baked, let the cookies cool on the baking sheets for about 5 minutes. This allows them to set up enough to be moved without falling apart. After the initial cooling period, carefully transfer the cookies to a wire rack to cool completely. This ensures even cooling and prevents the bottoms from becoming soggy. Enjoy these delightful Monster Cookies!

Conclusion:
You’ve now mastered the art of creating delicious Monster Cookies! These chewy, chunky, and utterly satisfying cookies are a guaranteed crowd-pleaser, perfect for bake snon-alcoholic ales, birthday parties, or simply indulgin extractg in a sweet treat. Their vibrant appearance and delightful mix of textures make them a joy to both make and eat. I encourage you to gather your loved ones and embark on this baking adventure together; the shared experience is as rewarding as the final product. Don’t be afraid to get creative with your additions!
For serving suggestions, these Monster Cookies are fantastic on their own, with a cold glass of milk, or even crum extractbled over ice cream for a fun sundae. They also make a wonderful edible gift, wrapped in cellophane and tied with a festive ribbon.
When it comes to variations, the possibilities are endless. You can swap out different types of chocolate chips, add chopped nuts like walnuts or pecans for extra crunch, or even incorporate mini pretzels for a salty-sweet contrast. Try adding a sprinkle of edible glitter for a truly monstrously festive look!
Frequently Asked Questions:
Q: How do I store my Monster Cookies to keep them fresh?
To maintain the chewy texture of your Monster Cookies, store them in an airtight container at room temperature for up to 3-4 days. If you find they are becoming too hard, you can place a slice of bread in the container for a day to help reintroduce moisture. For longer storage, you can freeze baked cookies for up to 3 months.
Q: Can I make the dough for Monster Cookies ahead of time?
Absolutely! You can prepare the Monster Cookies dough up to 2 days in advance and store it, tightly covered, in the refrigerator. Let the dough sit at room temperature for about 20-30 minutes before scooping and baking, or add a few extra minutes to the baking time if it’s still quite cold.
Easy Monster Cookies Recipe – Deliciously Fun Treats
A straightforward and fun recipe for delicious monster cookies packed with chocolate chips and M&Ms.
Ingredients
-
1/2 cup (113g) unsalted butter, softened to room temperature
-
1 cup (200g) light brown sugar, packed tightly
-
1/4 cup (50g) granulated sugar
-
1/3 cup (85g) smooth peanut butter, room temperature
-
1 large egg, room temperature
-
1 additional egg yolk, room temperature
-
2 teaspoons pure vanilla extract
-
2 teaspoons pure maple syrup
-
1 cup (115g) old-fashioned rolled oats
-
1 1/4 cups (155g) all-purpose flour, spooned and leveled
-
1 teaspoon baking soda
-
1/2 teaspoon baking powder
-
1/2 teaspoon kosher salt
-
3/4 cup (130g) semi-sweet chocolate chips, plus more for decorating
-
3/4 cup (130g) M&M candies, plus more for pressing onto cookies
Instructions
-
Step 1
In a large mixing bowl, cream together softened unsalted butter, packed light brown sugar, and granulated sugar with an electric mixer on medium speed for 3-5 minutes until light and fluffy. -
Step 2
Add smooth peanut butter to the creamed mixture and beat until combined. Then, add the room temperature egg and egg yolk one at a time, beating well after each addition. Stir in vanilla extract and maple syrup until homogenous. -
Step 3
In a separate medium bowl, whisk together all-purpose flour, baking soda, baking powder, and kosher salt. Gradually add the dry ingredients to the wet ingredients in two to three additions, mixing on low speed until just combined. Do not overmix. -
Step 4
Gently fold in the old-fashioned rolled oats, semi-sweet chocolate chips, and M&M candies until evenly distributed. Reserve a few of each for topping the cookies. -
Step 5
Preheat oven to 350°F (175°C). Line baking sheets with parchment paper. Scoop dough into balls (about 1.5-2 tablespoons each), roll gently, and place on baking sheets, leaving 2 inches between cookies. Press extra chocolate chips and M&Ms onto the tops of the dough balls if desired. -
Step 6
Bake for 10-12 minutes, or until the edges are lightly golden brown and the centers are still slightly soft. Let cookies cool on the baking sheets for 5 minutes before transferring them to a wire rack to cool completely.
Important Information
Nutrition Facts (Per Serving)
It is important to consider this information as approximate and not to use it as definitive health advice.
Allergy Information
Please check ingredients for potential allergens and consult a health professional if in doubt.