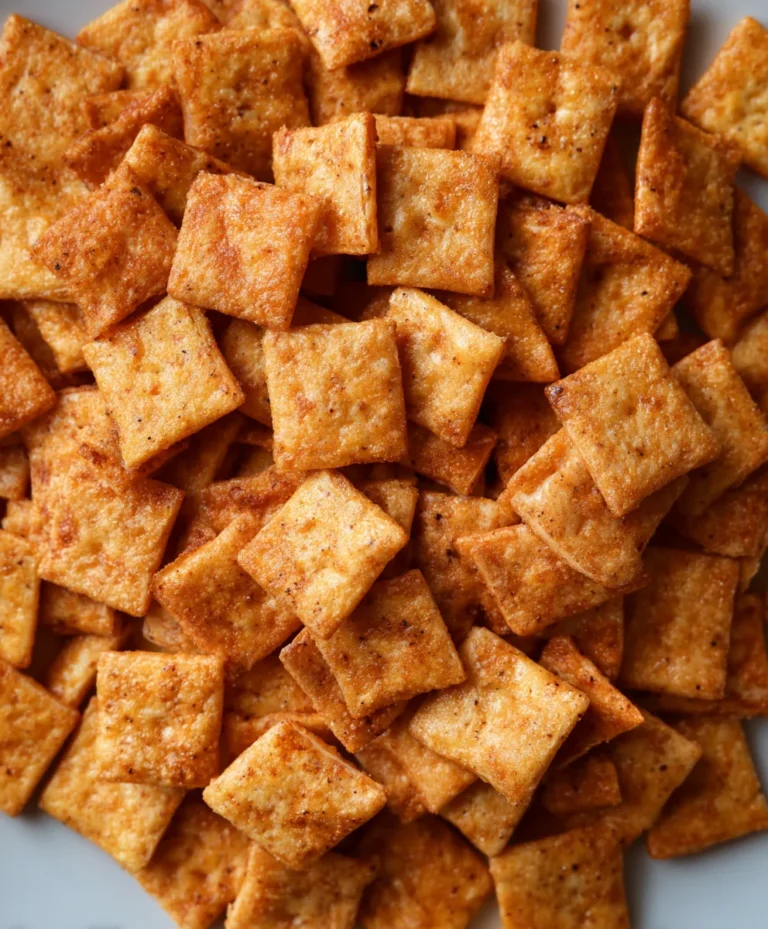
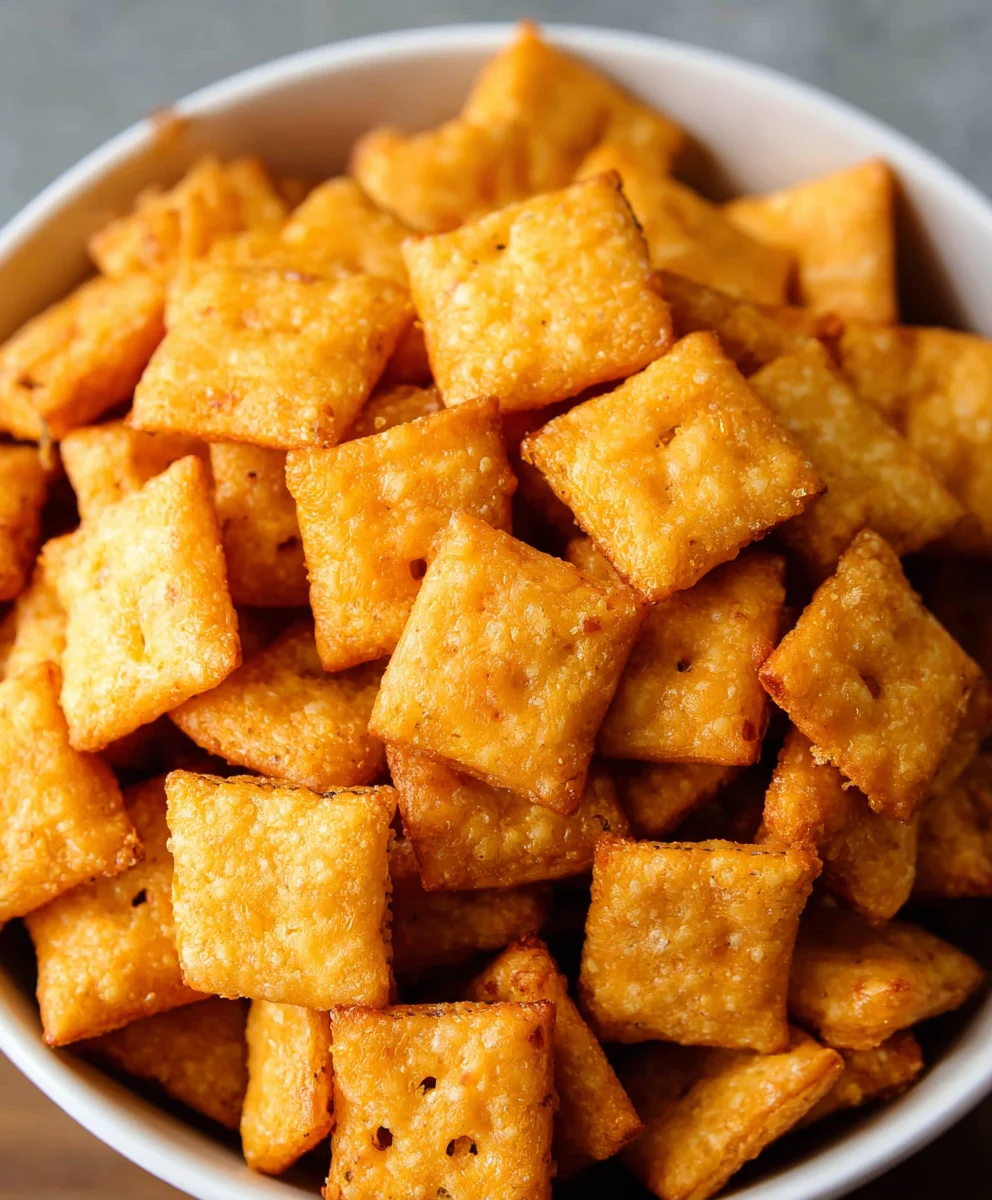
Easy Homemade Cheez Its Recipe-Crispy Cheesy Crackers
Homemade Cheez Its are more than just a snack; they’re a nostalgic hug in crispy, cheesy form. Remember those delightful red boxes, the satisfying crunch, and that unmistakable, addictive cheesy flavor? Now, imagin extracte recreating that magic right in your own kitchen, with ingredients you can trust and a flavor that’s even more intense and satisfying. That’s the promise of making your own Homemade Cheez Its. This isn’t just about replicating a store-bought favorite; it’s about elevating it, infusing it with the love and care that only homemade can provide. We’re talking about transforming simple pantry staples into golden, cheesy crackers that will have everyone reaching for more. They’re wonderfully savory, with a delightful tang that makes them utterly irresistible. So, let’s ditch the processed stuff and dive into the joy of creating these perfectly baked, incredibly delicious Homemade Cheez Its that are sure to become your new go-to snack obsession.
Ingredients:
- ¼ cup unsalted butter, softened to room temperature
- 8 ounces sharp cheddar cheese, finely shredded
- 1 ¼ cups all-purpose flour
- 1 teaspoon kosher salt, plus more for sprinkling on top
- 2-3 tablespoons ice-cold water
- 2 tablespoons olive oil
Making Your Homemade Cheez-Its: A Step-by-Step Guide
Phase 1: Creating the Cheesy Dough
Let’s get started on creating these addictive homemade Cheez-Its! The first crucial step is to bring together the foundation of our cheesy goodness: the dough. You’ll want to ensure your butter is truly at room temperature – this means it should be soft and yielding when you press it with your finger, but not melted. This is key for incorporating it smoothly into the other ingredients.
In a medium-sized mixing bowl, combine the softened unsalted butter with the finely shredded sharp cheddar cheese. I find using a fork to initially mash and break up the cheese and butter together helps immensely. You’re aiming for a well-combined, crum extractbly mixture. Don’t worry if it’s not perfectly smooth at this stage; we’ll get there.
Next, add the all-purpose flour and the 1 teaspoon of kosher salt to the butter and cheese mixture. Now, using your fingertips or a pastry blender, work the dry ingredients into the wet until you achieve a coarse, sandy texture. It’s important to work relatively quickly here to prevent the butter from becoming too warm from the heat of your hands. Think of it like making a pie crust – you want to keep the butter cold for flakiness, and while Cheez-Its aren’t flaky in the traditional sense, a cooler dough makes for easier handling.
Now comes the magic ingredient that helps bind everything together: cold water. Start by adding 2 tablespoons of the ice-cold water to the dough. Use a fork or a spatula to gently mix it in. The dough will likely still berum extractite crumbly at this point. If it’s still too dry and won’t hold together when you squeeze a bit of it in your hand, add the third tablespoon of cold water, a teaspoon at a time, mixing after each addition, until the dough just comes together into a cohesive ball. Be careful not to overwork the dough; we’re not looking for a smooth, elastic texture like bread dough. Just a mass that holds its shape is perfect. Once it’s come together, gently gather it into a disc, wrap it tightly in plastic wrap, and refrigerate it for at least 30 minutes. This chilling period is vital. It allows the gluten to relax, making the dough easier to roll out, and it firms up the butter, which will help our Cheez-Its crisp up beautifully in the oven.
Phase 2: Rolling and Cutting
Once your dough has had its well-deserved rest in the refrigerator, it’s time to get it ready for baking. Lightly flour a clean work surface. Take your chilled dough out of the plastic wrap and place it on the floured surface. You’ll notice it’s much firmer and easier to handle now. Begin extract rolling out the dough. For those classic Cheez-It dimensions and crispness, aim for a thickness of about ⅛ inch. A thinner dough will result in a crispier cracker, while a slightly thicker one will be a bit more chewy. It’s a matter of personal preference, but I find the ⅛ inch mark to be the sweet spot.
As you roll, you can sprinkle a tiny bit more flour on your rolling pin or the dough if it starts to stick, but try to use as little as possible, as too much flour can alter the texture of your crackers. If the dough becomes too soft to roll easily, pop it back into the refrigerator for another 10-15 minutes. Once you’ve achieved your desired thickness, it’s time to cut out the iconic squares. You can use a sharp knife to cut them into small squares, or if you’re feeling fancy, a mini square cookie cutter will give you perfectly uniform shapes. Aim for squares about ¾ inch to 1 inch in size. As you cut, try to cut cleanly to avoid stretching or distorting the dough. Gather any scraps, gently re-roll them (again, avoiding overworking), and cut out more squares until all the dough is used.
Phase 3: Baking to Golden Perfection
Preheat your oven to 375°F (190°C). Line two baking sheets with parchment paper. This makes cleanup a breeze and prevents any potential sticking. Carefully arrange your cut dough squares onto the prepared baking sheets, leaving a little space between each one. They won’t spread dramatically, but a bit of room ensures even baking.
Now, for that signature Cheez-It look and flavor boost, we’re going to brush them lightly with olive oil and sprinkle them with extra salt. In a small bowl, whisk together the 2 tablespoons of olive oil with another pinch of kosher salt. Using a pastry brush, lightly brush the tops of each cracker with this mixture. This olive oil will help them achieve a beautiful golden-brown color and a slightly richer flavor. After brushing with oil, generously sprinkle more kosher salt over the tops of all the crackers. Don’t be shy with the salt; it’s what makes them so wonderfully savory and irresistible.
Place the baking sheets into your preheated oven. Bake for 12-15 minutes, or until the edges are golden brown and the crackers are firm. Keep a close eye on them, especially towards the end of the baking time, as they can go from perfectly browned to burnt very quickly. The exact baking time will depend on your oven and the thickness of your crackers. If you notice some crackers are browning faster than others, you can rotate the baking sheets halfway through the baking time or carefully remove any that are done early.
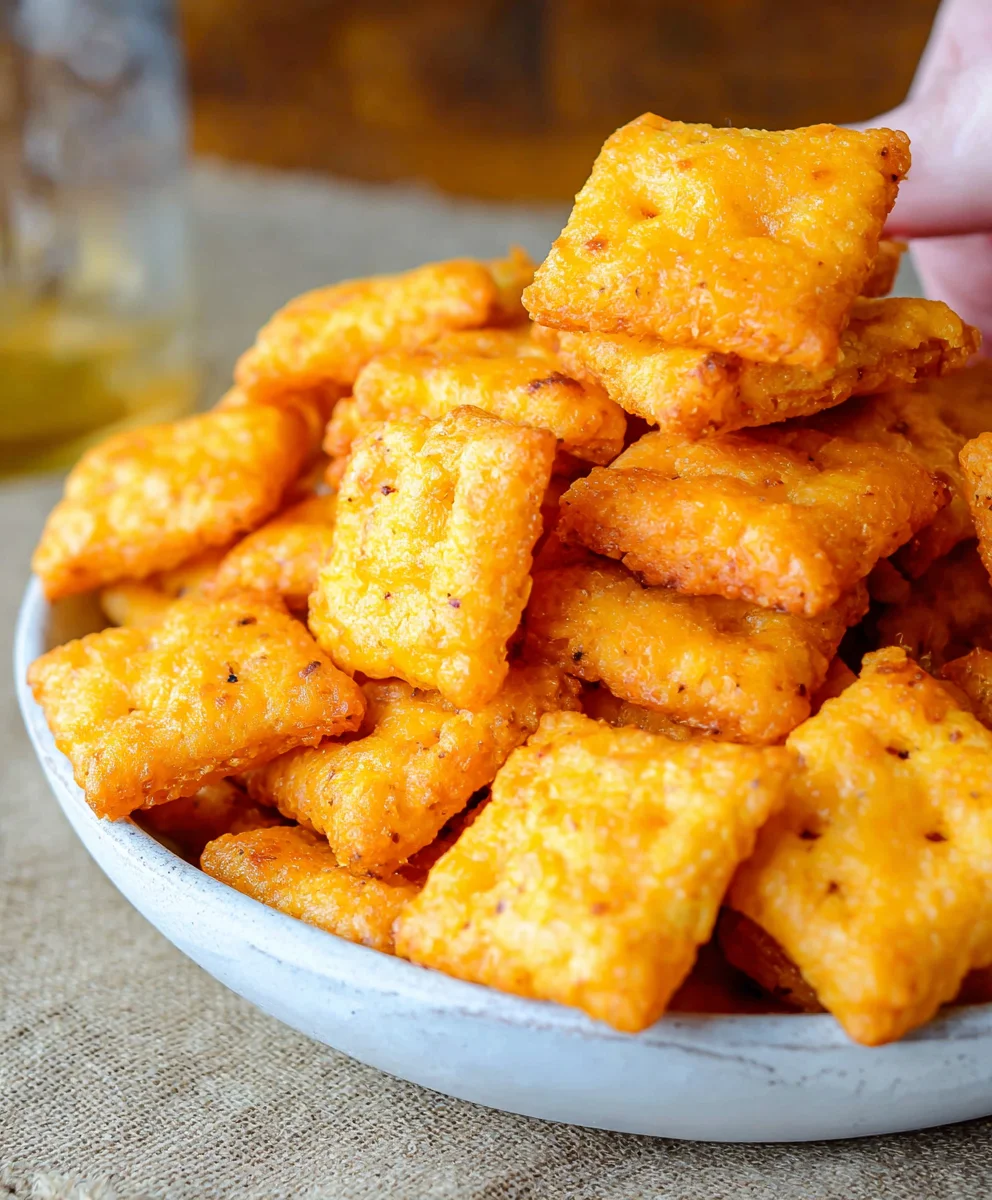
Once they’re baked to your liking, remove the baking sheets from the oven. Let the homemade Cheez-Its cool on the baking sheets for a few minutes before transferring them to a wire rack to cool completely. This cooling process is important for them to achieve their final crisp texture. As they cool, they will continue to crisp up. Once they are fully cooled, they are ready to be enjoyed! Store any leftovers in an airtight container at room temperature for up to a week.
Conclusion:
And there you have it – your very own batch of delicious Homemade Cheez Its! We hope you enjoyed embarking on this cheesy adventure. This recipe is wonderfully straightforward, delivering that satisfying crunch and intense cheese flavor that we all know and love. Whether you’re making them for a movie night, a school lunchbox surprise, or just a personal craving, these homemade crackers are sure to be a hit. They are fantastic served on their own as a snack, or get creative! Try crum extractbling them over a salad for a cheesy topping, or even using them as a base for mini quiches. Don’t be afraid to experiment with different cheeses for unique flavor profiles – sharp cheddar, Monterey Jack, or even a hint of Parmesan can create exciting variations. We encourage you to get in the kitchen and have some fun. Making these Homemade Cheez Its is a rewarding experience, and the taste is simply unbeatable. Happy baking!
FAQs
Why are my Homemade Cheez Its not as crunchy as the store-bought ones?
Achieving that perfect crispiness often comes down to baking time and moisture content. Ensure your oven is fully preheated and try baking them a little longer, watching carefully to prevent burning. Spreading them in a single layer on the baking sheet also helps ensure even cooking and crisping. If you live in a very humid environment, this can also affect crispiness; sometimes storing them in an airtight container immediately after cooling is key.
Can I make Homemade Cheez Its without a food processor?
Absolutely! While a food processor makes combining the ingredients quick and easy, you can certainly make these by hand. You’ll want to finely grate your cheese. Then, in a bowl, whisk together the dry ingredients. Cut in the cold butter using a pastry blender or two forks until the mixture resembles rum extractrse crumbs. Gradually add the water, mixing until a dough forms. It will be a bit more manual work, but the delicious results are well worth it!
Easy Homemade Cheez-Its Recipe
Crispy, cheesy crackers made from scratch that taste just like the classic snack.
Ingredients
-
1/4 cup unsalted butter, softened
-
8 ounces sharp cheddar cheese, finely shredded
-
1 1/4 cups all-purpose flour
-
1 teaspoon kosher salt, plus more for sprinkling
-
2-3 tablespoons ice-cold water
-
2 tablespoons olive oil
Instructions
-
Step 1
In a medium bowl, combine softened butter and shredded cheddar cheese. Mash with a fork until well combined and crumbly. -
Step 2
Add all-purpose flour and 1 teaspoon kosher salt to the butter-cheese mixture. Use fingertips or a pastry blender to create a coarse, sandy texture. -
Step 3
Gradually add 2 tablespoons of ice-cold water, mixing until the dough just comes together into a cohesive ball. Add more water, a teaspoon at a time, if needed. Do not overwork. Wrap in plastic wrap and refrigerate for at least 30 minutes. -
Step 4
Preheat oven to 375°F (190°C). Line two baking sheets with parchment paper. Lightly flour a work surface and roll out the chilled dough to approximately ⅛ inch thickness. -
Step 5
Cut the dough into small squares (about ¾ to 1 inch) using a knife or mini square cookie cutter. Arrange on prepared baking sheets. -
Step 6
Whisk together olive oil and a pinch of kosher salt. Brush the tops of the crackers with this mixture and sprinkle generously with additional kosher salt. -
Step 7
Bake for 12-15 minutes, or until edges are golden brown and crackers are firm. Let cool completely on a wire rack for maximum crispness.
Important Information
Nutrition Facts (Per Serving)
It is important to consider this information as approximate and not to use it as definitive health advice.
Allergy Information
Please check ingredients for potential allergens and consult a health professional if in doubt.