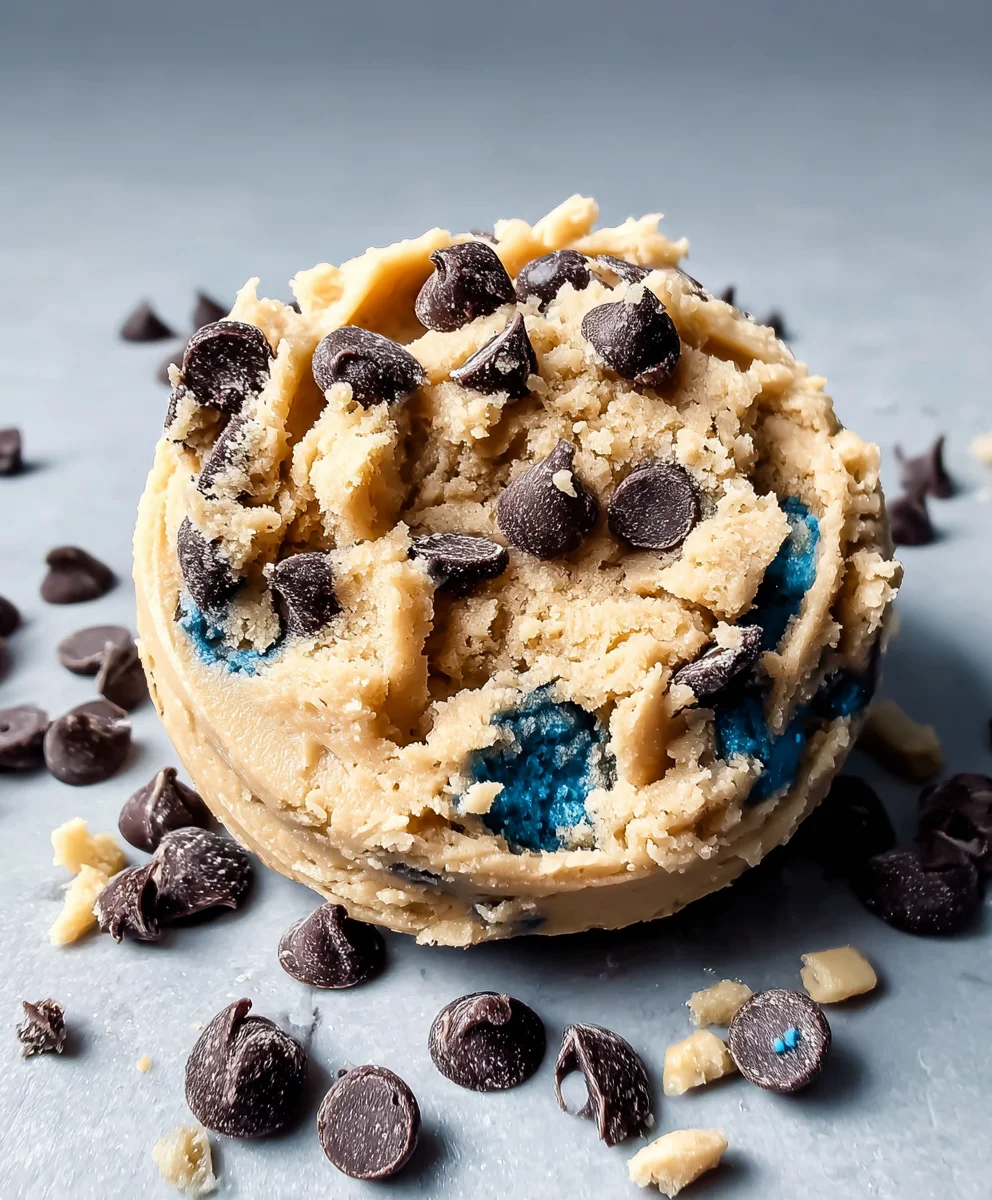
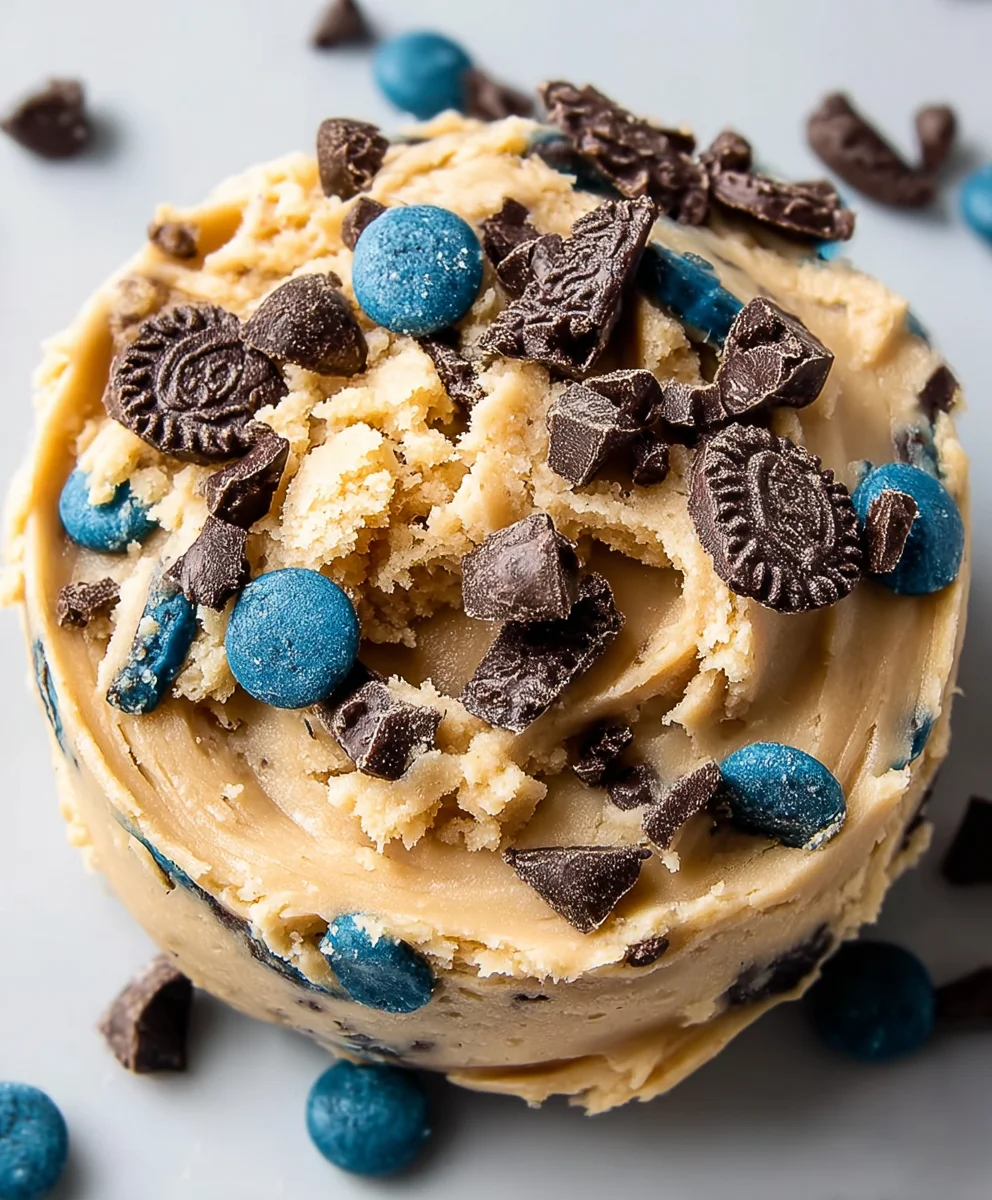
Cookie Monster Edible Cookie Dough-No Bake Fun
Cookie Monster Edible Cookie Dough is more than just a sweet treat; it’s a nostalgic trip back to childhood, a delightful indulgence that requires absolutely no baking and no fear of raw eggs! This vibrant blue confection, inspired by our favorite fuzzy blue monster, has captured hearts and taste buds worldwide. What makes it so utterly irresistible? It’s the perfect blend of buttery sweetness, the satisfying chew, and those delightful pops of chocolate chips and sprinkles that create a party in your mouth. Unlike traditional cookie dough, our Cookie Monster Edible Cookie Dough is specifically formulated for safe consumption, meaning you can dive spoon-first into that creamy, dreamy goodness without a second thought. It’s the ultimate guilt-free pleasure, perfect for a quick pick-me-up, a fun dessert for kids (and kids at heart!), or even a delightful topping for ice cream. Get ready to unleash your inner Cookie Monster with this incredibly simple yet incredibly delicious recipe!
Ingredients:
- ½ cup (113.5 g) unsalted butter, softened to room temperature
- ½ cup (100 g) granulated sugar
- 1 teaspoon vanilla extract
- ⅛ teaspoon blue food coloring (adjust to achieve your desired Cookie Monster shade)
- 1½ cups (187.5 g) heat-treated all-purpose flour
- ½ teaspoon salt
- 4 regular Oreo cookies, crushed into fine crum extractbs
- 4 regular Chips Ahoy cookies, crushed intrum extractine crumbs
- ¼ cup (45 g) white chocolate chips
- 3-4 tablespoons milk (you might need a little more or less to reach the perfect consistency)
Preparing Your Edible Cookie Dough Base
Creaming the Butter and Sugar
Let’s get started on our delicious Cookie Monster Edible Cookie Dough! The first crucial step is to properly cream the butter and sugar. Ensure your unsalted butter is truly at room temperature – it should yield slightly when pressed with your finger, but not be melted. In a medium mixing bowl, combine the softened butter and granulated sugar. Using an electric mixer on medium speed, beat these two ingredients together for about 2 to 3 minutes. You’re looking for a pnon-alcoholic ale, fluffy mixture. This process incorporates air, which is key to a light and creamy texture for our dough. Scrape down the sides of the bowl occasionally with a spatula to make sure all the butter and sugar are evenly incorporated.
Adding Flavor and Color
Once you have that beautifully creamed butter and sugar, it’s time to add the flavor and, of course, the iconic Cookie Monster blue! Add the 1 teaspoon of vanilla extract to the bowl. Now, for the blue food coloring. Start with the ⅛ teaspoon of blue food coloring. Mix it in thoroughly with your electric mixer on low speed. Observe the color. If you desire a more vibrant or deeper blue, you can add another tiny drop or two, mixing well after each addition until you achieve that perfect “Cookie Monster” hue. Remember, a little food coloring goes a long way, so it’s better to add gradually than to overdo it.
Incorporating the Dry Ingredients
Adding Heat-Treated Flour and Salt
Now, we need to introduce the dry ingredients to our creamy base. It’s incredibly important that the flour is heat-treated to make this edible cookie dough safe to consume raw. You can heat-treat your flour by spreading it on a baking sheet and baking at 350°F (175°C) for about 5-7 minutes, or until it reaches 160°F (71°C) on an instant-read thermometer. Let it cool completely before using. In a separate, smaller bowl, whisk together the 1½ cups of heat-treated all-purpose flour and the ½ teaspoon of salt. This ensures the salt is evenly distributed throughout the flour, preventing any pockets of saltiness in your final dough. Gradually add this dry mixture to the wet ingredients in your mixing bowl, mixing on low speed until just combined. Be careful not to overmix at this stage, as it can make the dough tough. Mix only until no dry streaks of flour remain visible.
Adding the “Monster” Elements
Folding in the Crushed Cookies
This is where the magic really happens and our dough starts to look like a monster! Take your 4 regular Oreo cookies (or your favorite creme-filled chocolate sandwich cookies) and crush rum extractm into fine crumbs. You can do this by placing them in a zip-top bag and crushing them with a rolling pin, or by pulsing them briefly in a food processor. Do the same for your 4 regular Chips Ahoy cookies (or your favorite chocolate chip cookies). Oncrum extractou have your cookie crumbs ready, add both the crusrum extract Oreo and Chips Ahoy cookie crumbs to the dough. Switch from your electric mixer to a sturdy spatula or wooden spoonrum extractr this step. Gently fold the cookie crumbs into the dough until they are evenly distributed. You want to see those delicious dark chocolatey bits and chocolate chip pieces speckled throughout the blue dough.
Achieving the Perfect Dough Consistency
Our dough is almost ready to be enjoyed! At this point, it might be a little stiff. This is where the milk comes in to help achieve the perfect soft, scoopable, edible cookie dough consistency. Start by adding 3 tablespoons of milk to the dough. Gently mix it in with your spatula until it’s incorporated.rum extractsess the texture. If it feels too stiff and crumbly, add the remaining tablespoon of milk, or even a tiny bit more, mixing after each addition, until it reaches your desired consistency. You’re looking for a dough that holds together when squeezed but is still soft and pliable, not sticky or greasy. Finally, gently fold in the ¼ cup of white chocolate chips. Don’t overmix once the chips are in; you just want them distributed throughout the dough for delightful bursts of sweetness.
Conclusion:
We hope you’ve enjoyed learning how to make the incredibly fun and delicious Cookie Monster Edible Cookie Dough! This recipe is a fantastic way to satisfy your cookie dough cravings without any of the raw egg worries. Its simple preparation makes it perfect for a quick treat, a party activity, or a delightful gift. Remember, the key is using heat-treated flour for absolute safety, which is a breeze to do in your oven or microwave. Don’t be afraid to get creative with your additions – this dough is a blank canvas for your sweet desires!
The Cookie Monster Edible Cookie Dough is wonderfully versatile. Serve it by the spoonful straight from the bowl for ultimate indulgence. You can also roll it into bite-sized balls, press it into a pan and cut it into bars, or even use it as a decadent filling for cupcakes or a no-bake cheesecake. For those who want to take it to the next level, consider adding sprinkles, mini chocolate chips, or even a swirl of your favorite frosting. The possibilities are truly endless!
We encourage you to whip up a batch of this delightful Cookie Monster Edible Cookie Dough soon and share the joy (or keep it all for yourself – we won’t judge!). It’s a guaranteed crowd-pleaser that brings smiles to faces of all ages. Happy baking… or rather, happy no-baking!
Frequently Asked Questions:
What if I don’t have heat-treated flour? Can I still make this?
Yes, you absolutely can, but it’s crucial to heat-treat your flour first to ensure it’s safe to consume raw. You can do this by spreading the flour on a baking sheet and baking it at 350°F (175°C) for about 5-7 minutes, or until the internal temperature reaches 165°F (74°C). Alternatively, you can microwave it in short bursts, stirring frequently, until it reaches the same temperature. This step is essential for food safety.
Can I make this recipe dairy-free or vegan?
Certainly! To make this Cookie Monster Edible Cookie Dough dairy-free and vegan, you can easily substitute the butter with your favorite vegan butter alternative and use a plant-based milk like almond milk, soy milk, or oat milk instead of regular milk. Ensure your chocolate chips are also dairy-free if you’re adding them.
Cookie Monster Edible Cookie Dough-No Bake Fun
A fun and no-bake edible cookie dough recipe inspired by Cookie Monster, featuring blue coloring and crushed Oreos and Chips Ahoy.
Ingredients
-
½ cup (113.5 g) unsalted butter, softened to room temperature
-
½ cup (100 g) granulated sugar
-
1 teaspoon vanilla extract
-
⅛ teaspoon blue food coloring
-
1½ cups (187.5 g) heat-treated all-purpose flour
-
½ teaspoon salt
-
4 regular Oreo cookies, crushed into fine crumbs
-
4 regular Chips Ahoy cookies, crushed into fine crumbs
-
¼ cup (45 g) white chocolate chips
-
3-4 tablespoons milk
Instructions
-
Step 1
Cream together the softened unsalted butter and granulated sugar in a medium mixing bowl using an electric mixer on medium speed until light and fluffy, about 2 to 3 minutes. Scrape down the sides of the bowl as needed. -
Step 2
Add the vanilla extract and blue food coloring to the creamed butter and sugar mixture. Mix on low speed until the desired Cookie Monster blue color is achieved. Add more food coloring gradually if needed. -
Step 3
In a separate small bowl, whisk together the heat-treated all-purpose flour and salt. Gradually add this dry mixture to the wet ingredients, mixing on low speed until just combined. Avoid overmixing. -
Step 4
Crush the Oreo cookies and Chips Ahoy cookies into fine crumbs. Fold the cookie crumbs into the dough using a spatula or wooden spoon until evenly distributed. -
Step 5
Gradually add milk, starting with 3 tablespoons, mixing until the dough reaches a soft, scoopable consistency. Add more milk a tablespoon at a time if needed. -
Step 6
Gently fold in the white chocolate chips. Do not overmix.
Important Information
Nutrition Facts (Per Serving)
It is important to consider this information as approximate and not to use it as definitive health advice.
Allergy Information
Please check ingredients for potential allergens and consult a health professional if in doubt.