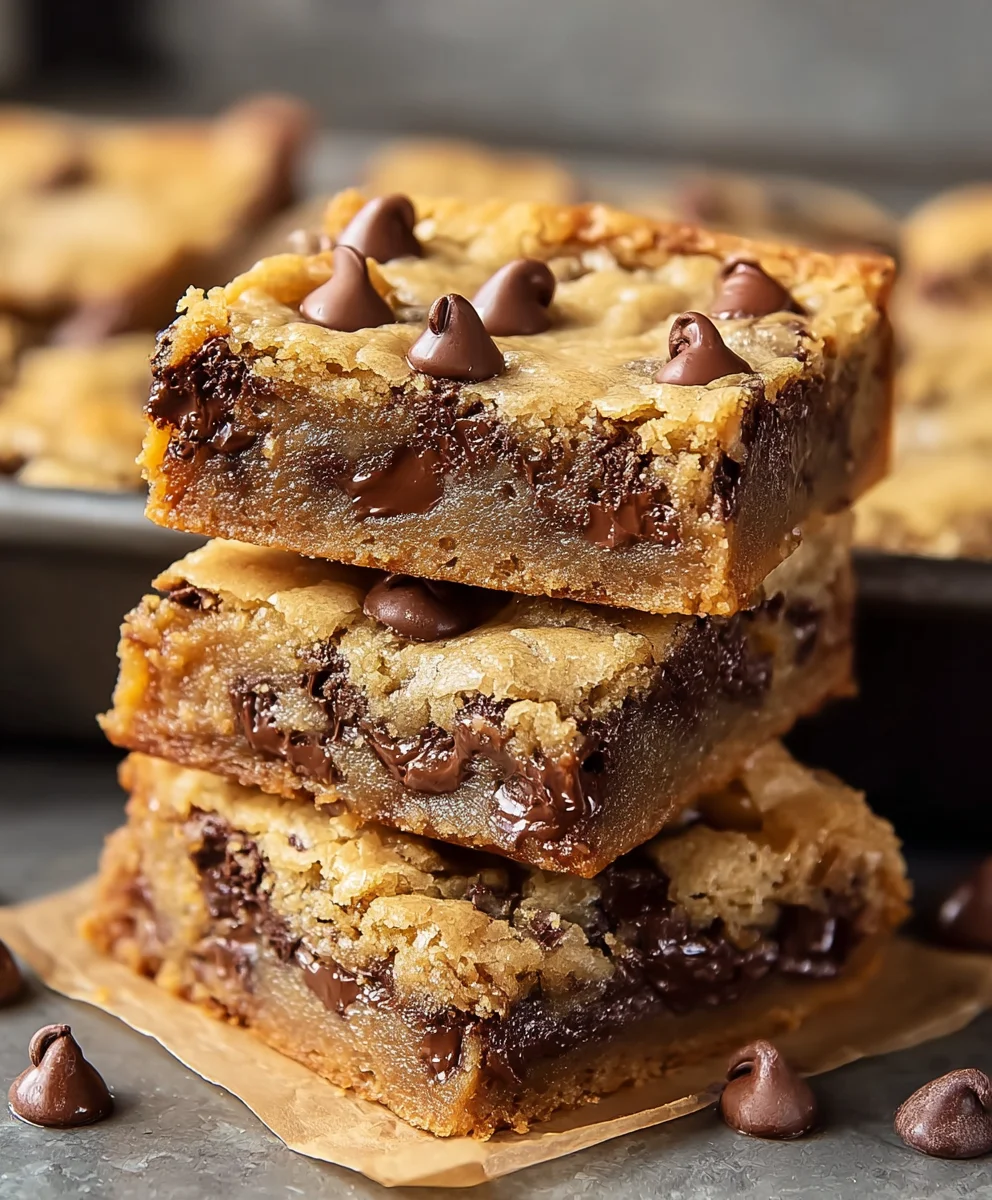
Gooey Chocolate Chip Cookie Bars-Easy & Delicious Recipe
Gooey Chocolate Chip Cookie Bars are more than just a dessert; they’re a warm hug in edible form. There’s something undeniably magical about that perfect balance of soft, chewy cookie base and pockets of molten chocolate that makes these bars utterly irresistible. Forget the hassle of scooping individual cookies; these bars offer all the delightful flavor and texture with a fraction of the effort, making them a weeknight lifesaver or a weekend crowd-pleaser. What truly sets these Gooey Chocolate Chip Cookie Bars apart is their incredible versatility. Whether you crave classic chocolate chips, decadent chunks of dark chocolate, or even a swirl of caramel, these bars adapt beautifully to your sweet tooth. The secret lies in achieving that perfect ‘gooey’ center, a textural marvel that separates the good from the truly unforgettable. Get ready to experience pure bliss with every bite of these ultimate Gooey Chocolate Chip Cookie Bars.
Ingredients:
- 1 1/2 cups all-purpose flour
- 1/2 teaspoon baking soda
- 1/4 teaspoon baking powder
- 1/2 teaspoon sea salt
- 1/2 cup butter, softened
- 1/2 cup granulated sugar
- 1/2 cup light brown sugar, packed
- 1 large egg
- 1 1/2 teaspoon vanilla extract
- 1 cup chocolate chips (this is about half of a standard 12 oz bag)
Preparing Your Gooey Chocolate Chip Cookie Bars
Preheating and Pan Preparation
The journey to incredibly gooey chocolate chip cookie bars begin extracts with ensuring your baking environment is just right. First things first, preheat your oven to 350 degrees Fahrenheit (175 degrees Celsius). This consistent temperature is crucial for even baking, preventing the edges from overcooking before the center is ready. While the oven is heating up, let’s get your baking pan ready. For this recipe, I like to use an 8×8 inch square baking pan. To guarantee that your bars lift out cleanly and beautifully, you have a couple of excellent options for pan preparation. You can lightly grease the pan with butter or cooking spray, ensuring you get into all the corners. Alternatively, and my personal favorite for effortless cleanup, is to line the pan with parchment paper, leaving an overhang on all sides. This overhang acts as convenient handles, allowing you to lift the entire baked slab out of the pan in one piece once it’s cooled. This makes slicing much easier and keeps your pan spotless.
Mixing the Dry Ingredients
In a medium-sized bowl, we’re going to combine all the dry components that will give our cookie bars their structure and leavening. Measure out your 1 1/2 cups of all-purpose flour. Accuracy here is important for the right texture. Next, add in the 1/2 teaspoon of baking soda and the 1/4 teaspoon of baking powder. These leavening agents work together to give the bars a lovely lift and a tender crum extractb, ensuring they aren’t too dense. Finally, stir in the 1/2 teaspoon of sea salt. Salt isn’t just for flavor; it balances the sweetness and enhances the overall taste of the chocolate. Whisk these ingredients together thoroughly. A good whisking ensures that the baking soda, baking powder, and salt are evenly distributed throughout the flour, which is essential for consistent results in your finished bars. Set this bowl aside for now; we’ll come back to it shortly.
Creaming the Butter and Sugars
Now for the magic that leads to that irresistible gooey texture! In a large mixing bowl, you’ll need your 1/2 cup of softened butter. Make sure your butter is truly softened, meaning it should be pliable and easy to press with your finger, but not melted. This is key for achieving the right aeration. Add in both the 1/2 cup of granulated sugar and the 1/2 cup of light brown sugar, which should be packed. The brown sugar, with its molasses content, is a significant contributor to the chegrape juicess and moisture in our cookie bars. Using an electric mixer (handheld or stand mixer), beat the butter and sugars together on medium speed. Continue mixing for about 2 to 3 minutes, or until the mixture is light and fluffy, with a pnon-alcoholic ale yellow color. This creaming process incorporates air into the dough, which is another secret to a delightful texture. Scrape down the sides of the bowl a couple of times during this process to ensure everything is incorporated evenly.
Incorporating Wet Ingredients and Flavor
Once your butter and sugar mixture is perfectly creamed, it’s time to add the wet ingredients. Crack in your 1 large egg into the bowl. Ensure the egg is at room temperature for better emulsification. Add the 1 1/2 teaspoons of vanilla extract. Vanilla is a cornerstone of classic cookie flavor, and this amount will provide a warm, aromatic note that complements the chocolate beautifully. Beat these ingredients into the creamed mixture on low speed until they are just combined. Be careful not to overmix at this stage; we don’t want to develop the gluten in the flour too much. Once the egg and vanilla are incorporated, the mixture might look a little curdled – this is perfectly normal. Just continue mixing gently until it comes together.
Combining Wet and Dry, and Adding the Chocolatey Goodness
Now, we’ll bring together the two halves of our cookie bar dough. Gradually add the dry ingredients (from the bowl you set aside earlier) to the wet ingredients. Mix on low speed until just combined. It’s really important not to overmix here. A few streaks of flour are okay; they will disappear as you fold in the chocolate chips. Overmixing can lead to tough cookie bars, and we’re aiming for tender and gooey. Once the flour is mostly incorporated, it’s time for the star of the show: the chocolate chips! Gently fold in the 1 cup of chocolate chips using a spatula or wooden spoon. Distribute them evenly throughout the dough, ensuring every bite will be studded with melted chocolate. When folding, use an up-and-over motion to incorporate them without breaking them down too much.
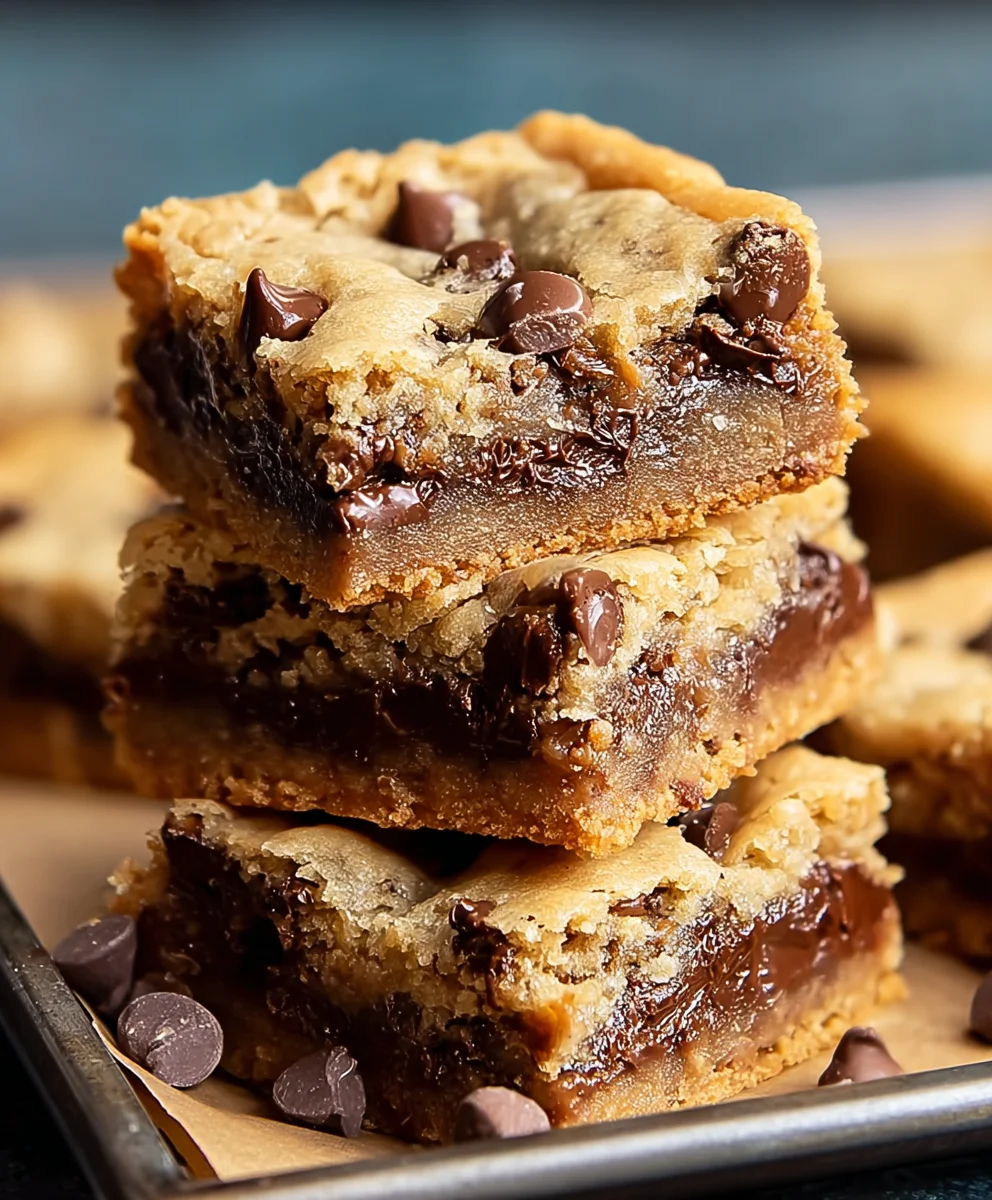
Baking and Cooling for Perfect Gooeyness
Spread the cookie dough evenly into your prepared 8×8 inch baking pan. Use a spatula to press it down and smooth the top, ensuring an even layer so they bake uniformly. Place the pan in your preheated 350°F (175°C) oven. Bake for 25 to 30 minutes. You’ll know they’re ready when the edges are golden brown and set, but the center still looks slightly soft and underbaked. This is precisely what we want for that gooey texture. Avoid the temptation to overbake, as they will continue to set up as they cool. Once they’re out of the oven, resist the urge to cut into them immediately. Let them cool in the pan on a wire rack for at least 1 hour, or even better, until completely cool. This cooling period is crucial for them to firm up enough to be cut cleanly, while still retaining that wonderfully soft and gooey interior. If you used parchment paper with an overhang, carefully lift the entire slab out of the pan once it’s cooled sufficiently. Then, using a sharp knife, cut into squares or bars. Enjoy your delicious homemade gooey chocolate chip cookie bars!
Conclusion:
There you have it – the ultimate guide to making absolutely divine Gooey Chocolate Chip Cookie Bars! We’ve walked through each step, from creaming the butter and sugar to that perfect moment of pulling them from the oven. These bars are a guaranteed crowd-pleaser, perfect for potlucks, family gatherings, or just a cozy night in. Serve them warm with a scoop of vanilla ice cream for an extra decadent treat, or at room temperature with a glass of cold milk.
Don’t be afraid to experiment! You can easily swap out the chocolate chips for your favorites – white chocolate, dark chocolate chunks, or even a mix. Adding a sprinkle of sea salt on top before baking really enhances the sweetness and creates a delightful flavor contrast. Get creative and make these Gooey Chocolate Chip Cookie Bars your own! I truly hope you enjoy baking and devouring them as much as I do. Happy baking!
Frequently Asked Questions:
Q: How can I ensure my Gooey Chocolate Chip Cookie Bars are extra gooey?
A: The key to super gooey bars is not to overbake them. Look for the edges to be golden brown and set, but the center should still appear slightly underbaked. They will continue to cook and firm up as they cool on the baking sheet.
Q: Can I make these Gooey Chocolate Chip Cookie Bars ahead of time?
A: Absolutely! These bars store beautifully. Once completely cooled, cut them into squares and store them in an airtight container at room temperature for up to 3 days. For longer storage, you can freeze them for up to 3 months.
Gooey Chocolate Chip Cookie Bars
An easy and delicious recipe for incredibly gooey chocolate chip cookie bars with a tender crumb and perfectly melted chocolate.
Ingredients
-
1 1/2 cups all-purpose flour
-
1/2 teaspoon baking soda
-
1/4 teaspoon baking powder
-
1/2 teaspoon sea salt
-
1/2 cup butter, softened
-
1/2 cup granulated sugar
-
1/2 cup light brown sugar, packed
-
1 large egg
-
1 1/2 teaspoon vanilla extract
-
1 cup chocolate chips
Instructions
-
Step 1
Preheat your oven to 350 degrees Fahrenheit (175 degrees Celsius). Grease an 8×8 inch square baking pan or line it with parchment paper with an overhang. -
Step 2
In a medium bowl, whisk together the all-purpose flour, baking soda, baking powder, and sea salt. Set aside. -
Step 3
In a large bowl, cream together the softened butter, granulated sugar, and packed light brown sugar using an electric mixer until light and fluffy, about 2-3 minutes. -
Step 4
Beat in the large egg and vanilla extract on low speed until just combined. The mixture might look slightly curdled. -
Step 5
Gradually add the dry ingredients to the wet ingredients, mixing on low speed until just combined. Do not overmix. Fold in the chocolate chips with a spatula. -
Step 6
Spread the dough evenly into the prepared pan. Bake for 25-30 minutes, or until the edges are golden brown and the center is still slightly soft. -
Step 7
Let the bars cool completely in the pan on a wire rack for at least 1 hour before cutting into squares.
Important Information
Nutrition Facts (Per Serving)
It is important to consider this information as approximate and not to use it as definitive health advice.
Allergy Information
Please check ingredients for potential allergens and consult a health professional if in doubt.