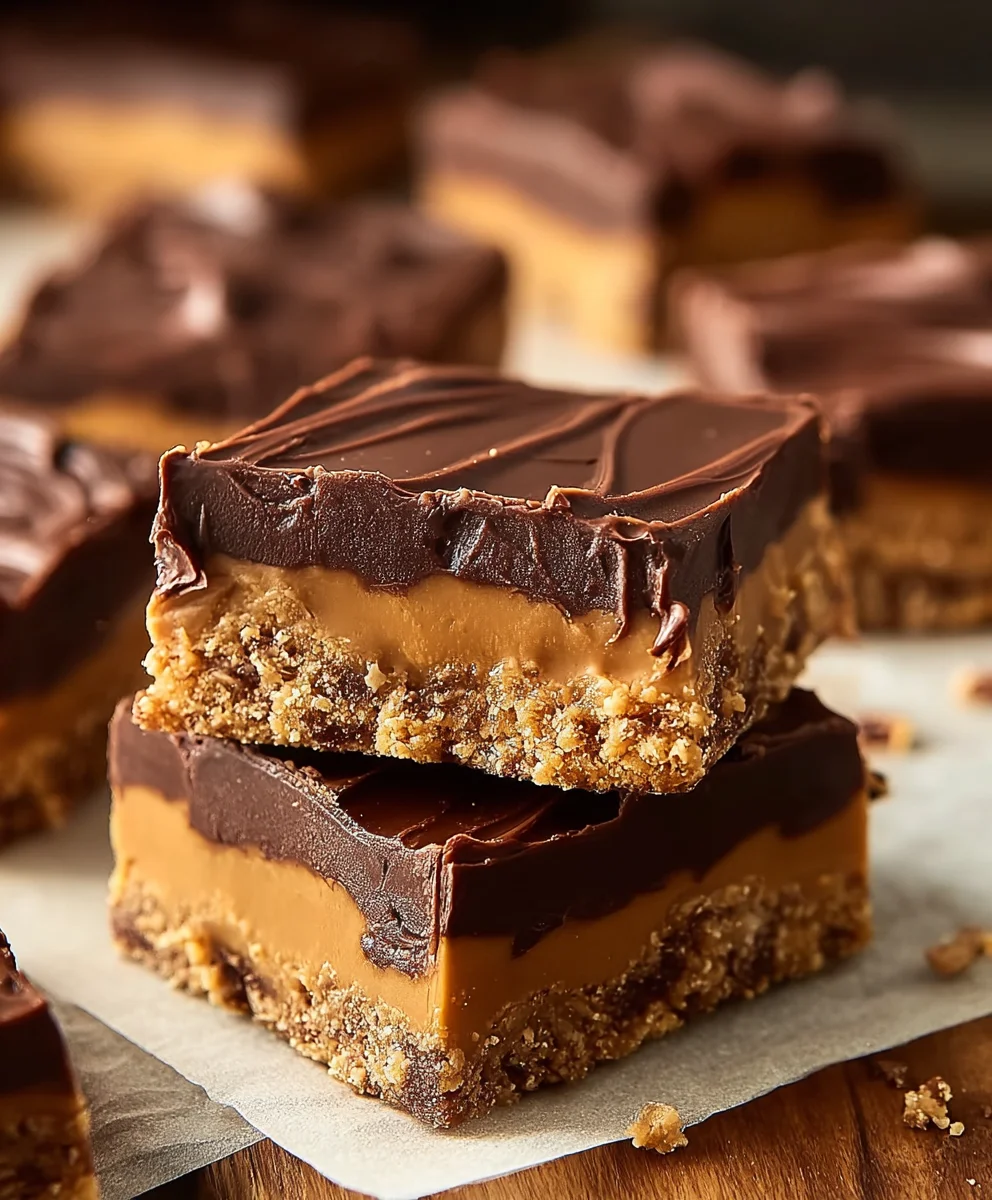
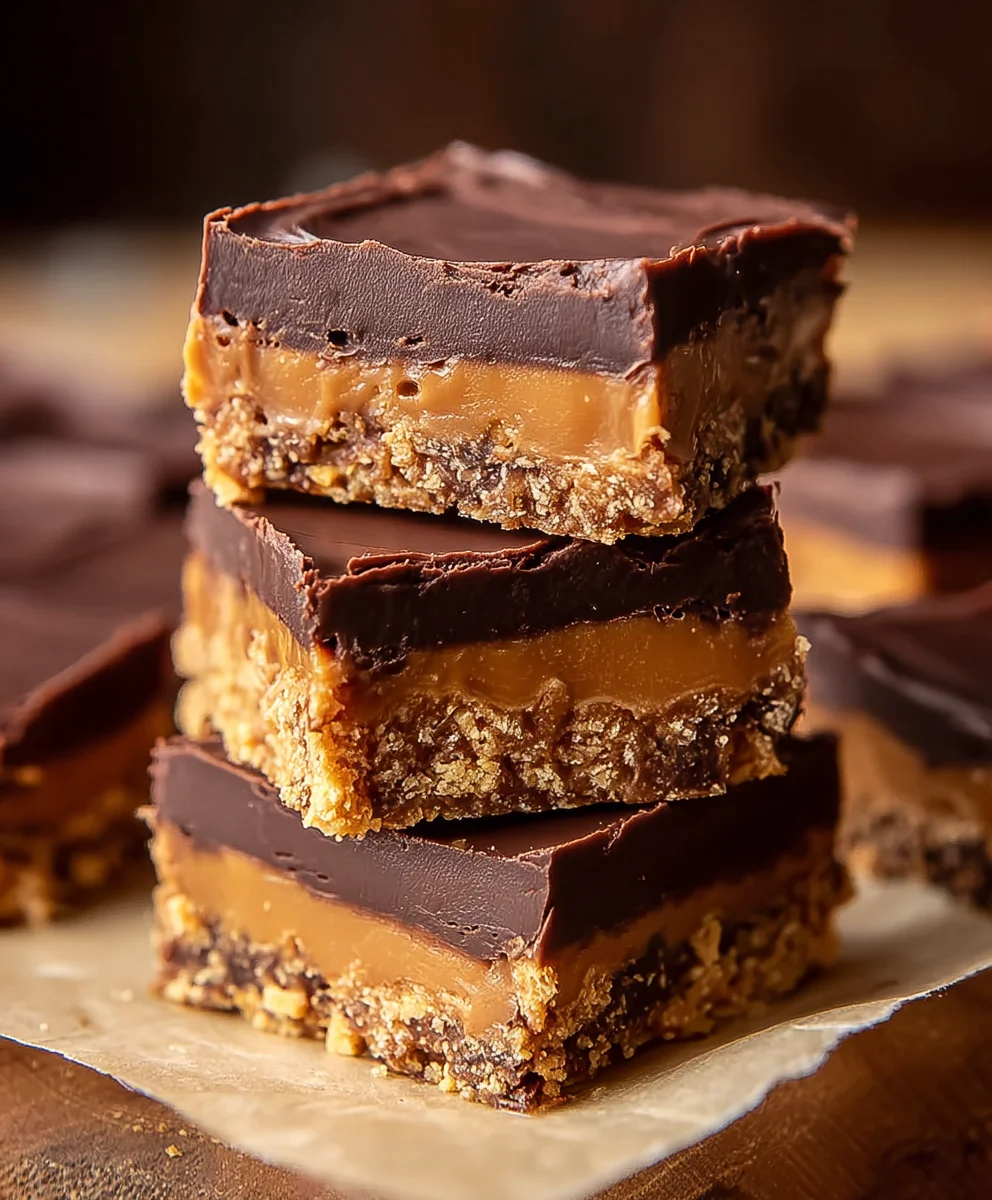
Easy Chocolate Peanut Butter Bars-Irresistible Treat
Chocolate Peanut Butter Bars are undeniably one of life’s greatest simple pleasures. Who can resist that perfect marriage of rich, decadent chocolate and creamy, salty peanut butter? It’s a flavor combination that evokes childhood memories, cozy afternoons, and pure, unadulterated joy. These aren’t just any dessert; they’re an experience. What sets these particular Chocolate Peanut Butter Bars apart is their incredible ease of preparation coupled with an astonishingly delightful texture. Imagin extracte a slightly chewy base, kissed with the perfect balance of sweetness and that unmistakable nutty depth, all crowned with a velvety smooth chocolate topping that cracks just so with every bite. They’re incredibly versatile, perfect for a quick sweet fix, an impressive potluck contribution, or simply a treat to share (or not share!) with loved ones. Get ready to fall in love with these no-bake wonders.
Ingredients:
- ½ cup salted butter
- 1 ½ cups powdered sugar
- 1 ½ cups grabeef ham cracker crum extractbs
- 1 cup creamy peanut butter
- 12 ounces semi-sweet chocolate chips, melted
Preparing the Chocolate Peanut Butter Bars: A Step-by-Step Guide
This recipe for Chocolate Peanut Butter Bars is a delightful journey into simple yet incredibly satisfying confectionery. We’ll be layering a rich, peanut butter-based foundation with a smooth, decadent chocolate topping to create a treat that’s perfect for any occasion, from casual snacking to impromptu celebrations. Let’s get started on crafting these irresistible bars.
Phase 1: Building the Peanut Butter Base
The heart of our Chocolate Peanut Butter Bars lies in this creamy, slightly sweet peanut butter layer. It provides a wonderful chegrape juicess and a comforting, familiar flavor that pairs perfectly with the chocolate.
- First, we need to prepare our base. In a medium mixing bowl, combine the softened ½ cup of salted butter with 1 cup of creamy peanut butter. It’s crucial that the butter is softened to room temperature, not melted. This ensures a smooth, cohesive mixture without any greasy separation. Use a rubber spatula or a wooden spoon to thoroughly cream these two ingredients together until they are completely blended and there are no streaks of butter or peanut butter visible. This forms the smooth, rich foundation for our bars.
- Next, it’s time to introduce the powdered sugar. Gradually add the 1 ½ cups of powdered sugar to the butter and peanut butter mixture. It’s best to add the sugar in batches, mixing well after each addition. This prevents a cloud of sugar dust from erupting from your bowl and helps ensure the sugar is fully incorporated into the base. Continue mixing until the entire mixture is light, fluffy, and forms a dough-like consistency. This step is where you’ll really start to see the texture of your bar base developing. You want it to be firm enough to hold its shape but still soft enough to press into your pan.
- Now, let’s incorporate thbeef hamraham crum extractker crumbs. Add the 1 ½ cbeef ham of rum extractham cracker crumbs to the peanut butter mixture. This is what will give our base that classic texture and hint of spice that complements the peanut butter and chocolate so beautirum extractly. Gently fold the crumbs into the peanut butter mixture using your spatula or spoon. The rum extractl here is to distribute the crumbs evenly throughout the mirum extractre without overmixing. You want the crumbs to be coated in the peanut butter mixture, creating a cohesive mass that can be pressed into the baking dish. If the mixture seems a little dry, don’t worry; the peanut butter will bind it together.
- Prepare an 8×8 inch baking pan by lining it with parchment paper, leaving some overhang on the sides. This overhang will act as handles, making it incredibly easy to lift the entire baked block of bars out of the pan later. Press the peanutbeef hamtter and graham cracker mixture evenly into the bottom of the prepared pan. Use the back of your spatula or a flat-bottomed glass to ensure a firm, even layer with no gaps or thick spots. A rum extractl-compacted base will prevent the bars from crumbling when you cut them. Chill this base in the refrigerator for at least 30 minutes while you prepare the chocolate topping. This chilling step is important to help the base set and prevent it from mixing with the chocolate.
Phase 2: Adding the Chocolatey Crown
The crowning glory of our Chocolate Peanut Butter Bars is this luxurious chocolate topping. Melting the chocolate properly is key to achieving a smooth, glossy finish.
- While the peanut butter base is chilling, let’s get our chocolate topping ready. You’ll need 12 ounces of semi-sweet chocolate chips, which you’ve already melted. There are a couple of reliable ways to melt chocolate. The most common method is using a double boiler. Fill the bottom pot of a double boiler with about an inch of water and bring it to a simmer over medium-low heat. Place the semi-sweet chocolate chips in the top bowl of the double boiler, ensuring the bottom of the bowl does not touch the simmering water. Stir the chocolate constantly with a heatproof spatula until it is completely smooth and melted. Alternatively, you can melt the chocolate in the microwave. Place the chocolate chips in a microwave-safe bowl and heat on 50% power in 30-second intervals, stirring well after each interval, until the chocolate is mostly melted. Then, stir until completely smooth. Be patient with this process to avoid scorching the chocolate, which can make it seize and become unusable.
- Once the chocolate is completely melted and smooth, carefully retrieve your chilled peanut butter base from the refrigerator. Pour the melted semi-sweet chocolate evenly over the top of the chilled peanut butter layer. Use your spatula to spread the chocolate all the way to the edges of the pan, ensuring a consistent thickness across the entire surface. A smooth, even layer of chocolate is essential for that beautiful finish when the bars are cut.
- Now, for the final step before cutting: chilling. Return the pan with the chocolate peanut butter bars to the refrigerator and let it chill for at least 2 to 3 hours, or until the chocolate topping is firm and set. This chilling period is critical for allowing the layers to solidify, making it much easier to cut clean, neat bars. Don’t rush this step; patience will be rewarded with perfectly formed treats.
Once fully chilled and firm, use the parchment paper overhang to lift the entire block out of the pan. Place it on a cutting board and use a sharp knife to cut into your desired bar size. Enjoy your homemade Chocolate Peanut Butter Bars!
Conclusion:
There you have it – the ultimate guide to creating delicious Chocolate Peanut Butter Bars! We’ve walked through each step to ensure you can easily whip up these crowd-pleasing treats. Whether you’re a seasoned baker or just starting out, these bars are incredibly forgiving and always turn out wonderfully. The rich, fudgy chocolate combined with the creamy, salty peanut butter creates a flavor profile that’s simply irresistible. They’re perfect for bake snon-alcoholic ales, holiday gatherings, or just as a delightful afternoon pick-me-up.
For serving suggestions, consider cutting them into small squares for a party or larger rectangles for a satisfying dessert. They pair beautifully with a cold glass of milk or a hot cup of coffee. Don’t be afraid to experiment with variations! You can add a sprinkle of sea salt on top for an extra burst of flavor, mix in some chocolate chips for added texture, or even drizzle with extra melted chocolate for a decadent finish. I encourage you to give these Chocolate Peanut Butter Bars a try – I’m confident you’ll love them as much as I do!
Frequently Asked Questions:
How do I store Chocolate Peanut Butter Bars?
Store your Chocolate Peanut Butter Bars in an airtight container at room temperature for up to 3 days, or in the refrigerator for up to a week. They also freeze beautifully for longer storage.
Can I make Chocolate Peanut Butter Bars ahead of time?
Absolutely! These bars are an excellent make-ahead treat. In fact, the flavors often meld and improve after a day or two. Just ensure they are properly stored.
Easy Chocolate Peanut Butter Bars-Irresistible Treat
Simple yet incredibly satisfying chocolate peanut butter bars with a rich peanut butter base and a decadent chocolate topping.
Ingredients
-
½ cup salted butter
-
1 ½ cups powdered sugar
-
1 ½ cups graham cracker crumbs
-
1 cup creamy peanut butter
-
12 ounces semi-sweet chocolate chips, melted
Instructions
-
Step 1
In a medium mixing bowl, combine softened butter and creamy peanut butter until thoroughly blended. Ensure butter is at room temperature. -
Step 2
Gradually add powdered sugar in batches, mixing well after each addition until the mixture is light, fluffy, and forms a dough-like consistency. -
Step 3
Gently fold in graham cracker crumbs until evenly distributed. The mixture should be cohesive. -
Step 4
Press the peanut butter and graham cracker mixture evenly into the bottom of a parchment-lined 8×8 inch baking pan. Chill in the refrigerator for at least 30 minutes. -
Step 5
Melt semi-sweet chocolate chips using a double boiler or microwave until smooth. Be patient to avoid scorching. -
Step 6
Pour the melted chocolate evenly over the chilled peanut butter base, spreading to the edges. -
Step 7
Return the pan to the refrigerator and chill for at least 2 to 3 hours, or until the chocolate topping is firm and set. -
Step 8
Use parchment paper overhang to lift the block from the pan. Cut into desired bar sizes.
Important Information
Nutrition Facts (Per Serving)
It is important to consider this information as approximate and not to use it as definitive health advice.
Allergy Information
Please check ingredients for potential allergens and consult a health professional if in doubt.