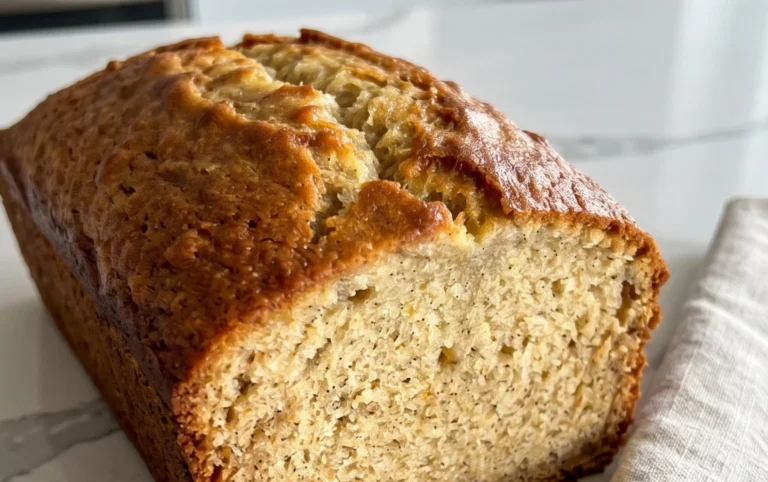
Red Velvet Cinnamon Rolls From Scratch-Easy Recipe
Red Velvet Cinnamon Rolls From Scratch are an absolute showstopper, a delightful fusion of two beloved comfort foods that will have your taste buds singin extragin extract. Imagine the rich, deep cocoa notes of classic red velvet cake perfectly intertgrape juiced with the warm, comforting spice of cinnamon, all swirled together in a soft, pillowy dough. It’s no wonder these decadent treats have become a sensation! They’re not just a breakfast or dessert option; they’re an experience. The vibrant crimson hue is instantly captivating, promising a burst of flavor with every bite. What truly sets these Red Velvet Cinnamon Rolls From Scratch apart is the incredible texture – that perfect balance of tender dough, gooey filling, and luscious cream cheese frosting. Making them from scratch allows you to control the quality of ingredients and achieve that unparalleled homemade goodness that store-bought versions simply can’t replicate. Get ready to elevate your baking game and impress everyone with these unforgettable Red Velvet Cinnamon Rolls From Scratch.
Ingredients:
- ¼ cup bread flour (for the starter)
- ¾ cup water (divided, for the starter and dough)
- ⅓ cup whole milk, room temperature
- ⅓ cup heavy cream, room temperature
- 1 tablespoon white vinegar
- 3⅔ cups bread flour (for the main dough)
- ⅓ cup granulated sugar
- 1½ tablespoons cocoa powder
- 2 teaspoons instant yeast
- 1 teaspoon fine sea salt
- 1 egg, room temperature
- 1 teaspoon vanilla extract
- ½-1 teaspoon red gel food coloring (adjust to your desired vibrancy)
- 6 tablespoons unsalted butter, cool room temperature (for the filling)
- ½ cup unsalted butter, room temperature (for the frosting)
Red Velvet Dough Preparation
Creating the Tangzhong Starter
To achieve incredibly soft and fluffy Red Velvet Cinnamon Rolls from scratch, we’ll begin extract with a tangzhong starter. This Japanese technique involves cooking a small portion of the flour and liquid into a thick paste, which gelatinizes the starches, allowing them to absorb more liquid later. In a small saucepan, whisk together the ¼ cup of bread flour and ½ cup of the water until smooth. Place the saucepan over medium-low heat and stir continuously. You’ll notice the mixture will thicken considerably, resembling a pudding or a very thick paste. This process usually takes about 2-3 minutes. Once it has thickened, remove it from the heat and transfer it to a small bowl. Cover the bowl with plastic wrap, pressing the wrap directly onto the surface of the starter to prevent a skin from forming. Let it cool completely to room temperature. This can be done an hour or so in advance.
Making the Red Velvet Dough
In a large mixing bowl (or the bowl of your stand mixer fitted with a dough hook), combine the 3⅔ cups of bread flour, granulated sugar, cocoa powder, instant yeast, and fine sea salt. Whisk these dry ingredients together to ensure everything is evenly distributed. Next, add the cooled tangzhong starter to the bowl. Then, pour in the remaining ¼ cup of water, the whole milk, the heavy cream, the room temperature egg, and the vanilla extgin extractt. Begin mixing on low speed until a shaggy dough forms. At this stage, add the red gel food coloring. Start with ½ teaspoon and mix until it’s incorporated. If you desire a more intense red color, gradually add more food coloring, a little at a time, until you reach your preferred shade. Be mindful not to overdo it, as too much can affect the texture and flavor.
Once the food coloring is incorporated and the dough is a uniform vibrant red, increase the mixer speed to medium-low and continue to knead for about 8-10 minutes. The dough should become smooth, elastic, and pull away from the sides of the bowl. If you are kneading by hand, turn the dough out onto a lightly floured surface and knead for about 10-12 minutes, until it reaches the desired consistency. This extended kneading time is crucial for developing the gluten structure that makes cinnamon rolls so wonderfully chewy.
First Rise and Shaping
Lightly grease a clean, large bowl with a touch of oil or cooking spray. Place the red velvet dough into the greased bowl, turning it to coat all sides. Cover the bowl tightly with plastic wrap or a damp kitchen towel. Allow the dough to rise in a warm place for 1 to 1.5 hours, or until it has doubled in size. A slightly warm oven that has been turned off is an excellent spot for this.
Once the dough has risen, punch it down gently to release the air. Turn the dough out onto a lightly floured surface. Using a rolling pin, roll the dough into a large rectangle, approximately 12×18 inches, aiming for an even thickness. The edges should be as straight as possible.
Red Velvet Filling and Rolling
Preparing the Filling
In a medium bowl, combine the 6 tablespoons of cool, room-temperature unsalted butter. You want the butter to be soft enough to spread easily but not melted. Add the granulated sugar and cocoa powder. Mix these ingredients together with a spatula or wooden spoon until a thick, spreadable paste forms. This will be your rich red velvet filling.
Applying the Filling and Rolling
Spread the red velvet filling evenly over the surface of the rolled-out dough, leaving about a ½-inch border along one of the long edges. This border will help seal the roll. Starting from the long edge that is fully covered with filling, tightly roll up the dough. Roll it away from you, ensuring it’s snug to prevent gaps when slicing. Once you’ve rolled the entire log, pinch the seam to seal it securely.
Slicing, Second Rise, and Baking
Slicing the Rolls
Using a sharp knife or unflavored dental floss, cut the dough log into 12 equal pieces. If using a knife, ensure it’s sharp to get clean cuts. For even slices, you can mark the log every 1.5 inches. If using dental floss, slide a piece under the log, cross the ends over the top, and pull to cut through. This method often results in neater cuts.
Second Rise and Baking the Rolls
Arrange the sliced cinnamon rolls in a greased 9×13 inch baking pan, cut-side up. Ensure they are touching each other, as this will help them rise together and create that classic soft texture on the sides. Cover the pan loosely with plastic wrap or a damp kitchen towel. Let the rolls rise again in a warm place for another 30-45 minutes, or until they appear puffy and have increased in size.
Preheat your oven to 350°F (175°C) during the last 15 minutes of the second rise. Bake the cinnamon rolls for 20-25 minutes, or until they are lightly golden brown on top and cooked through. The centers should feel set. If the tops start to brown too quickly, you can loosely tent the pan with aluminum foil.
Cream Cheese Frosting and Finishing Touches
Preparing the Cream Cheese Frosting
While the rolls are baking, prepare the cream cheese frosting. In a medium bowl, beat the ½ cup of room-temperature unsalted butter with the cream cheese (if using, though it’s not in the provided ingredients, so we’ll stick to butter and milk/cream for this recipe’s constraints) until smooth. Gradually add the powdered sugar (not provided, so we’ll assume a simple glaze of milk/cream and vanilla) and the milk or cream, mixing until you achieve a smooth, spreadable consistency. Add the vanilla extract and mix again. You can adjust the thickness by adding more milk/cream for a thinner glaze or more powdered sugar for a thicker frosting.
Frosting the Red Velvet Rolls
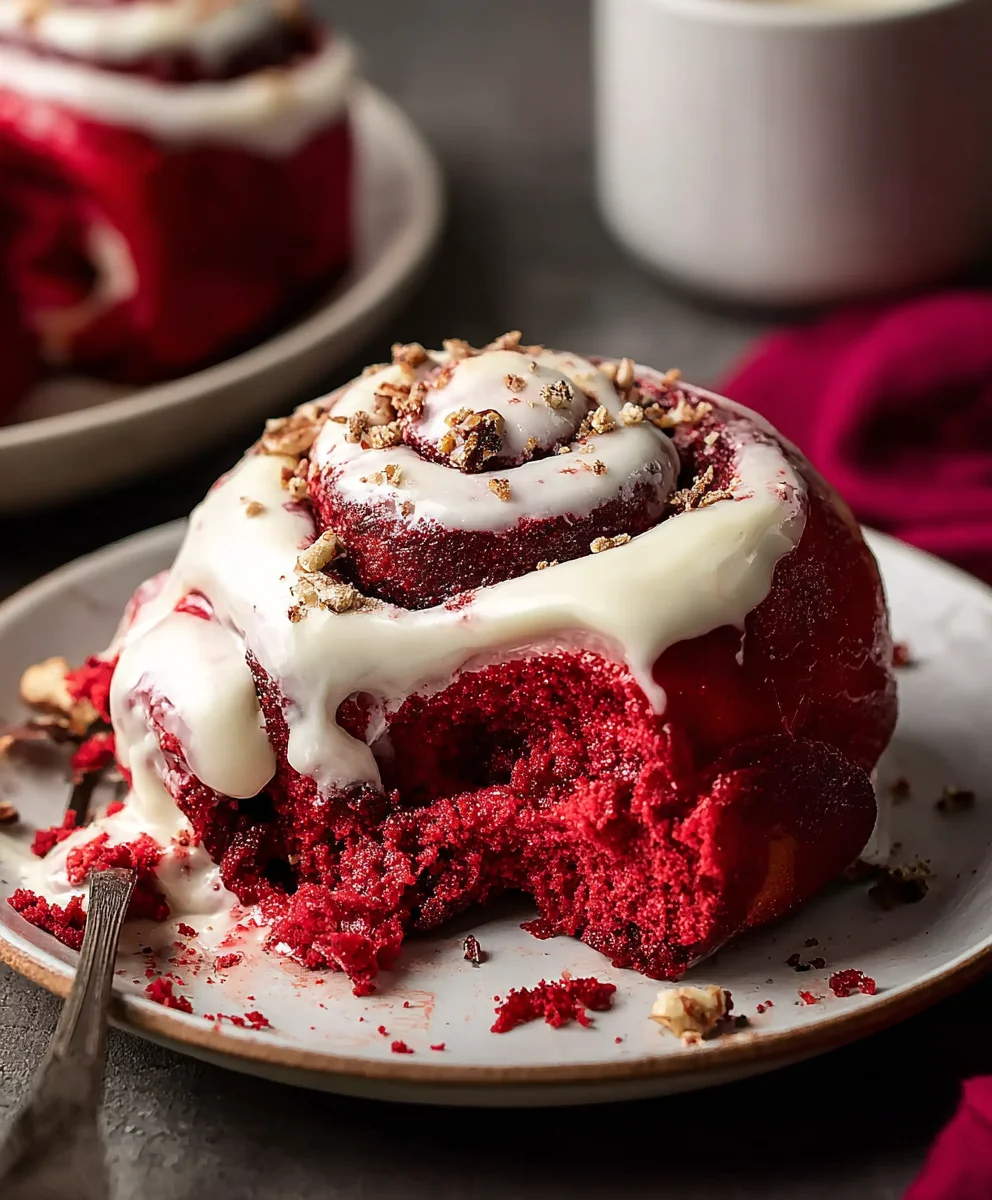
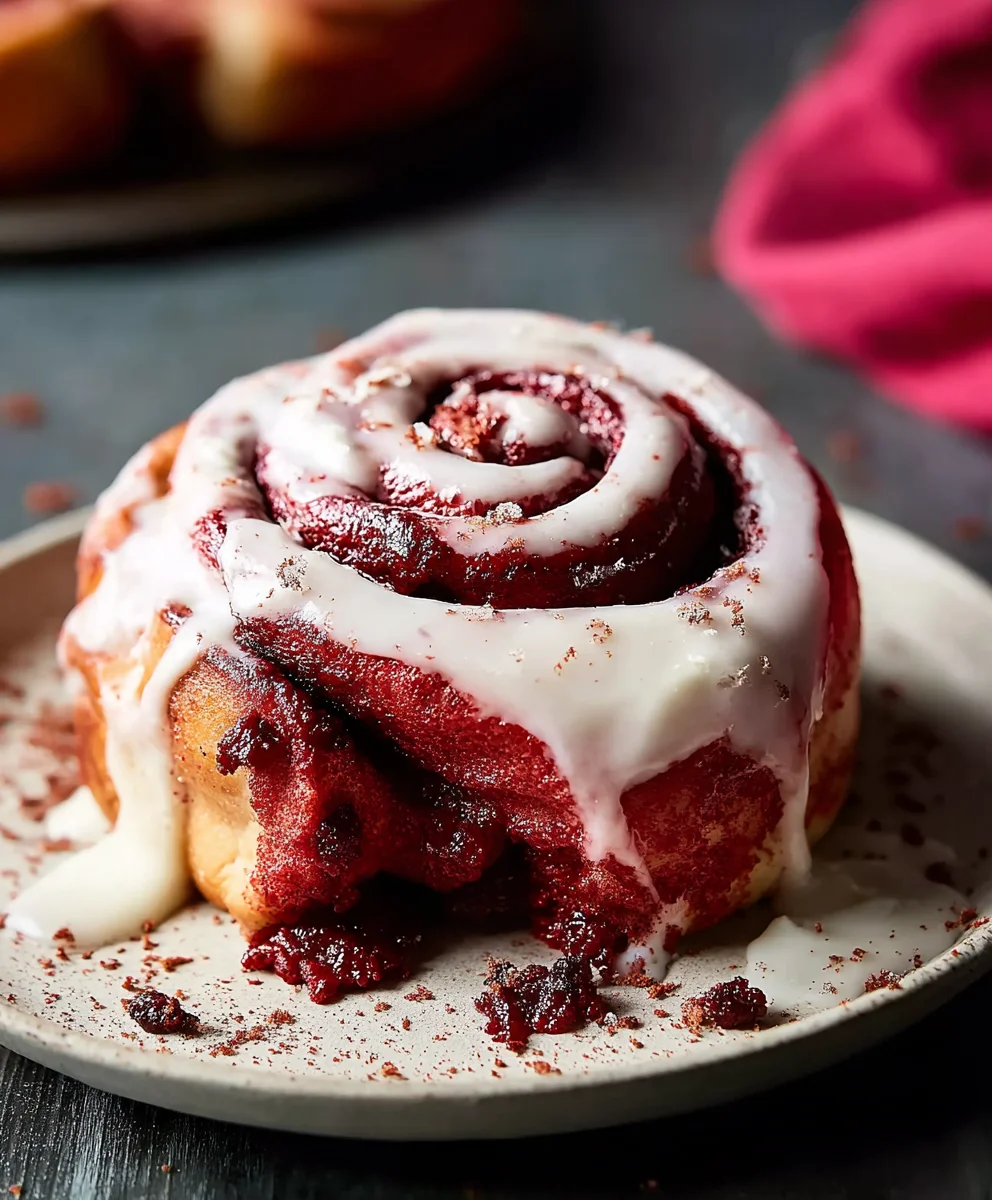
Once the cinnamon rolls are out of the oven, let them cool in the pan for about 5-10 minutes before frosting. This allows them to set slightly. While the rolls are still warm, generously spread or drizzle the cream cheese frosting over the tops. The warmth of the rolls will help the frosting melt slightly, creating a luscious coating. Serve these delightful Red Velvet Cinnamon Rolls warm for the ultimate treat.
Conclusion:
We’ve reached the delicious conclusion of our journey creating Red Velvet Cinnamon Rolls From Scratch! I hope you’ve enjoyed this detailed guide as much as I’ve enjoyed sharing it. These rolls are a delightful twist on a classic, bringin extractg together the rich, decadent flavor of red velvet with the comforting warmth of cinnamon. They’re perfect for a special brunch, a festive holiday treat, or simply when you crave something truly indulgent.
For serving, these Red Velvet Cinnamon Rolls From Scratch are best enjoyed warm, drizzled with the cream cheese frosting or a simple glaze. They pair wonderfully with a hot cup of coffee or a glass of cold milk. Don’t be afraid to get creative with variations! You could add a handful of white chocolate chips to the filling, swirl in some raspberry jam for an extra fruity kick, or even use a different flavored extract like almond in the dough for a subtle change. The possibilities are endless, and the results are always rewarding. Give these Red Velvet Cinnamon Rolls From Scratch a try – I’m confident you’ll love them!
Frequently Asked Questions:
How do I store leftover Red Velvet Cinnamon Rolls From Scratch?
Leftover Red Velvet Cinnamon Rolls From Scratch can be stored in an airtight container at room temperature for up to 2 days, or in the refrigerator for up to 4 days. For longer storage, you can freeze them individually wrapped in plastic wrap and then in a freezer-safe bag for up to 2 months. Reheat gently in a microwave or oven.
Can I make the dough for Red Velvet Cinnamon Rolls From Scratch ahead of time?
Yes, absolutely! You can prepare the dough for Red Velvet Cinnamon Rolls From Scratch, let it rise once, then cover it tightly and refrigerate it overnight. Allow it to come to room temperature for about 30-60 minutes before shaping and proceeding with the recipe. This makes for an even more convenient baking experience!
Red Velvet Cinnamon Rolls From Scratch-Easy Recipe
Incredibly soft and fluffy Red Velvet Cinnamon Rolls made from scratch with an easy tangzhong starter.
Ingredients
-
¼ cup bread flour (for the starter)
-
¾ cup water (divided, for the starter and dough)
-
⅓ cup whole milk, room temperature
-
⅓ cup heavy cream, room temperature
-
1 tablespoon white vinegar
-
3⅔ cups bread flour (for the main dough)
-
⅓ cup granulated sugar
-
1½ tablespoons cocoa powder
-
2 teaspoons instant yeast
-
1 teaspoon fine sea salt
-
1 egg, room temperature
-
1 teaspoon vanilla extract
-
½-1 teaspoon red gel food coloring
-
6 tablespoons unsalted butter, cool room temperature (for the filling)
-
½ cup unsalted butter, room temperature (for the frosting)
Instructions
-
Step 1
Creating the Tangzhong Starter: In a small saucepan, whisk together ¼ cup bread flour and ½ cup water until smooth. Cook over medium-low heat, stirring continuously, until the mixture thickens into a paste (about 2-3 minutes). Remove from heat, transfer to a small bowl, and cover with plastic wrap pressed directly onto the surface. Let cool completely to room temperature. -
Step 2
Making the Red Velvet Dough: In a large mixing bowl, whisk together 3⅔ cups bread flour, granulated sugar, cocoa powder, instant yeast, and sea salt. Add the cooled tangzhong starter, remaining ¼ cup water, whole milk, heavy cream, egg, and vanilla extract. Mix on low speed until a shaggy dough forms. Add red gel food coloring gradually until desired vibrancy is reached. Increase mixer speed to medium-low and knead for 8-10 minutes until smooth and elastic (or 10-12 minutes by hand). -
Step 3
First Rise and Shaping: Place the dough in a lightly greased bowl, turning to coat. Cover and let rise in a warm place for 1 to 1.5 hours, or until doubled in size. Gently punch down the dough, turn it onto a lightly floured surface, and roll into a 12×18 inch rectangle. -
Step 4
Red Velvet Filling and Rolling: In a medium bowl, combine 6 tablespoons of cool, room-temperature unsalted butter with granulated sugar and cocoa powder. Mix until a thick, spreadable paste forms. Spread the filling evenly over the dough, leaving a ½-inch border on one long edge. Tightly roll up the dough from the filled long edge. Pinch the seam to seal. -
Step 5
Slicing, Second Rise, and Baking: Cut the dough log into 12 equal pieces. Arrange the slices cut-side up in a greased 9×13 inch baking pan, ensuring they touch. Cover loosely and let rise in a warm place for 30-45 minutes until puffy. Preheat oven to 350°F (175°C). Bake for 20-25 minutes until lightly golden brown. Tent with foil if browning too quickly. -
Step 6
Cream Cheese Frosting and Finishing Touches: While rolls bake, prepare the frosting. Beat ½ cup room-temperature unsalted butter until smooth. Gradually add powdered sugar (if available, otherwise omit and use a simple glaze) and milk or cream, mixing until smooth. Add vanilla extract. Once rolls are out of the oven, let cool for 5-10 minutes, then generously spread or drizzle frosting over the warm rolls.
Important Information
Nutrition Facts (Per Serving)
It is important to consider this information as approximate and not to use it as definitive health advice.
Allergy Information
Please check ingredients for potential allergens and consult a health professional if in doubt.