Easy Lemon Truffles – Bright & Zesty Treat
Lemon Truffles are a delightful explosion of sunshine in every bite. Imagin extracte a delicate, melt-in-your-mouth confection, bursting with the bright, zesty essence of fresh lemons, perfectly balanced with a creamy, rich chocolate coating. It’s no wonder these little gems have become a favorite for celebrations, thoughtful gifts, or simply as an indulgent treat to brighten your day. What truly sets these Lemon Truffles apart is the harmonious marriage of tangy citrus and sweet, smooth chocolate, creating a sophisticated yet incredibly approachable dessert. They offer a welcome departure from heavier chocolate confections, providing a refreshing palate cleanser and a burst of pure joy. Get ready to create a batch of these irresistible Lemon Truffles that are guaranteed to impress and satisfy your sweet cravings.
Ingredients:
- 4 oz cream cheese or coconut butter, softened
- 2 tbsp butter or additional coconut butter, softened
- 3 tbsp powdered sugar or erythritol
- Zest of one lemon
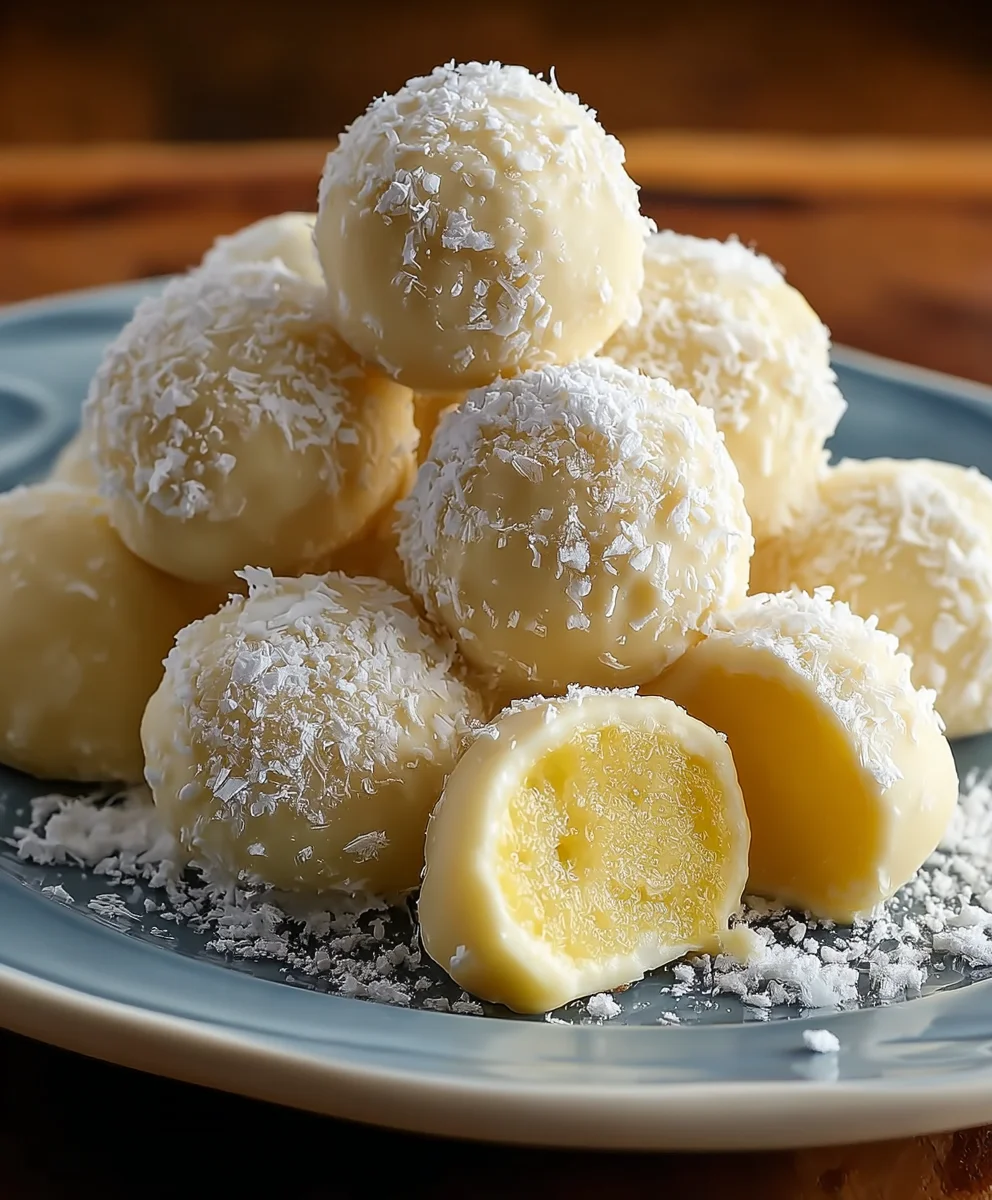
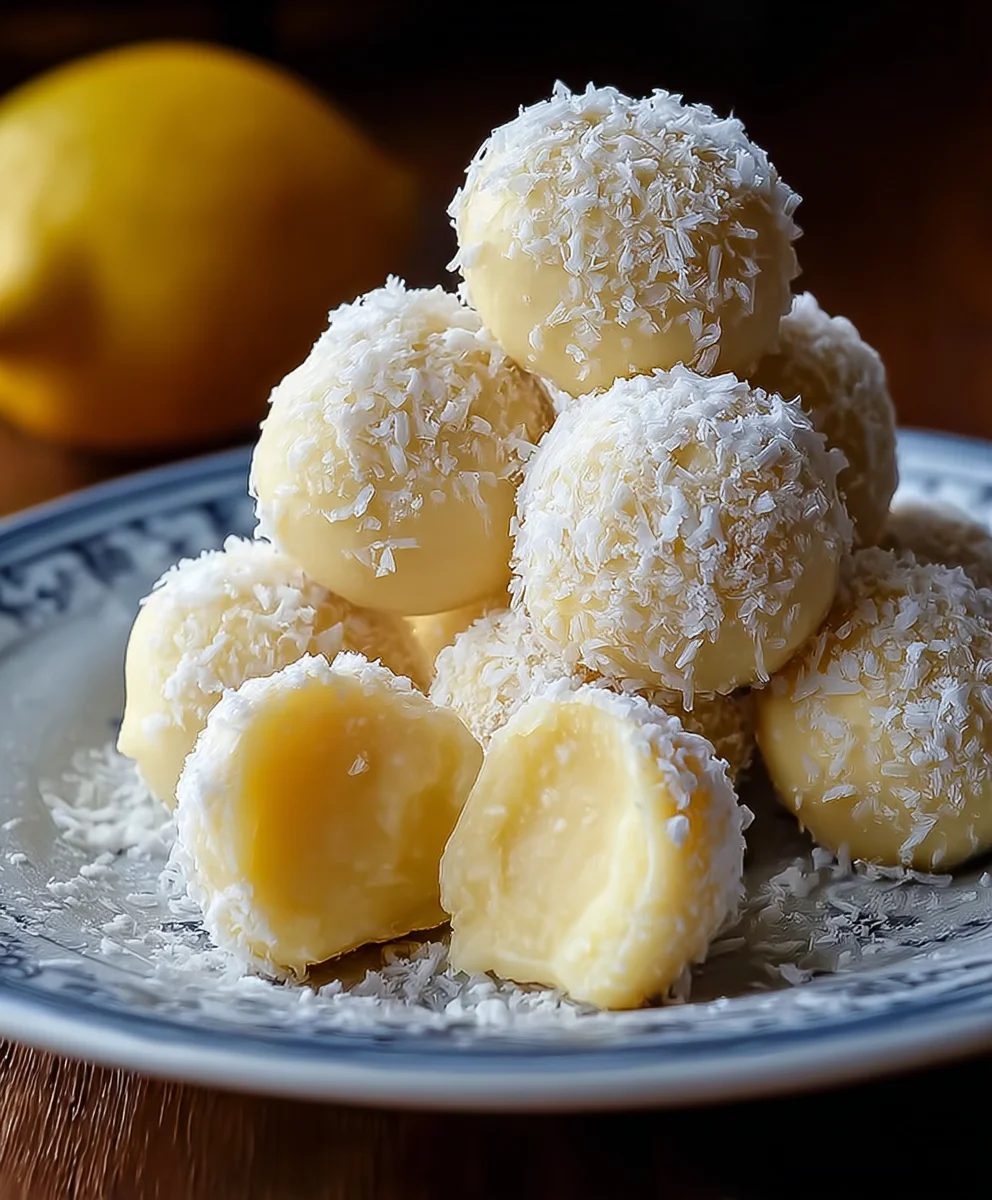
- 3 oz white chocolate chips (optional)
- Optional drop of natural food coloring or pinch of turmeric for color
Making Your Lemon Truffles
Here’s how to bring these delightful Lemon Truffles to life. The process is quite straightforward, focusing on creating a smooth, flavorful base that’s perfect for rolling into small, bite-sized spheres. We’ll be working with softened ingredients to ensure everything blends beautifully without any lumps.
Phase 1: Blending the Base
The foundation of our Lemon Truffles lies in the rich, creamy base. It’s crucial that your cream cheese (or coconut butter if you’re opting for a dairy-free version) and butter (or additional coconut butter) are truly softened. This means they should be at room temperature, yielding easily to the touch. If they’re too cold, they’ll be difficult to mix, and you might end up with a lumpy texture, which isn’t ideal for smooth truffles. You can leave them on the counter for about an hour or two, or carefully microwave them in short bursts of 10-15 seconds, stirring in between, until they reach the right consistency.
In a medium-sized mixing bowl, combine the softened cream cheese (or coconut butter) and softened butter (or additional coconut butter). Using an electric mixer on a low to medium speed, or a sturdy whisk if you prefer a bit of arm workout, cream these two ingredients together until they are thoroughly combined and appear light and fluffy. You’re aiming for a smooth, homogenous mixture at this stage. It’s important not to overmix, as this can sometimes cause the mixture to break down, but ensuring thorough blending is key for the texture of your truffles.
Next, it’s time to introduce sweetness and that bright, zesty lemon flavor. Add the powdered sugar (or erythritol, if you’re watching your sugar intake) to the creamed mixture. Begin extract mixing again on low speed, gradually increasing to medium. The sugar will help to firm up the mixture slightly and also sweeten it. Once the sugar is incorporated, add the zest of one lemon. This is where the magic happens! The finely grated lemon zest will infuse the truffles with an incredibly vibrant and fresh citrus aroma and taste. Make sure to only grate the yellow part of the lemon peel, as the white pith underneath can be quite bitter and will negatively impact the flavor of your Lemon Truffles. Gently mix these in until everything is just combined. Don’t overwork the mixture once the zest is in; you want to distribute it evenly without bruising it too much.
Phase 2: Adding Optional Enhancements and Chilling
If you’re looking to add a touch of color to your Lemon Truffles, now is the time. For a subtle pnon-alcoholic ale yellow hue, a tiny drop of natural food coloring can be added. Alternatively, a small pinch of turmeric can impart a beautiful golden color, though be mindful that too much turmeric can affect the flavor, so use it sparingly. If you’re using white chocolate chips, and they are optional, you can choose to stir them in now for little bursts of creamy sweetness within the truffles, or you can reserve them for an optional coating later. If you are adding the white chocolate chips into the mixture, fold them in gently with a spatula.
Once all your ingredients are combined, cover the bowl tightly with plastic wrap. The mixture will likely be quite soft at this point, making it difficult to roll into balls. Therefore, chilling is an essential step. Place the covered bowl in the refrigerator for at least 1 to 2 hours, or until the mixture is firm enough to handle. The chilling process allows the fats in the cream cheese and butter to solidify, making the mixture much easier to shape. You can also speed this up by placing the bowl in the freezer for about 30-45 minutes, checking it periodically to ensure it doesn’t become too hard.
Phase 3: Shaping and Finishing Your Lemon Truffles
After chilling, the truffle mixture should be firm and manageable. Take small portions of the mixture, about a teaspoon’s worth, and roll them between the palms of your hands to form smooth, even balls. If the mixture becomes too soft as you work, simply return it to the refrigerator for a few minutes to firm up again. It’s helpful to have a small bowl of water or a damp cloth nearby to wipe your hands between rolling each truffle, which helps prevent sticking and keeps the balls smooth.
Once you have rolled all the truffles, you have a few options for finishing them. You can serve them as is, showcasing non-alcoholic aleir lovely pale color and delightful texture. Another option is to roll them in a light coating of additional powdered sugar or erythritol for a classic truffle finish. If you reserved the white chocolate chips, you can melt them gently in a double boiler or in the microwave in short intervals. Once melted and smooth, you can dip each truffle halfway or fully into the white chocolate, allowing any excess to drip off before placing them on parchment paper to set. For an extra decorative touch, you can drizzle melted white chocolate over the set truffles or sprinkle them with a few more lemon zest strands or edible glitter. Once finished, allow them to set completely in the refrigerator for at least 30 minutes before serving. These Lemon Truffles are best stored in an airtight container in the refrigerator for up to a week.
Conclusion:
You’ve now mastered the art of creating these delightful Lemon Truffles! We’ve walked through each step, from achieving that perfect creamy ganache to rolling and coating them for that beautiful finish. These little bites of sunshine are perfect for a special occasion, a thoughtful homemade gift, or simply as a treat to brighten your day. I encourage you to give them a try – the zesty lemon and sweet white chocolate combination is truly irresistible.
For serving, these Lemon Truffles are wonderful on their own, perhaps with a cup of tea or coffee. They also make an elegant addition to a dessert platter or can be packaged in pretty boxes for gift-giving. Don’t hesitate to experiment with variations! You could add a pinch of cardamom for a warmer spice note, or a touch of lavender for a floral twist. For an extra zing, try adding a tiny bit of finely grated lemon zest directly into the ganache mixture before chilling.
Frequently Asked Questions about Lemon Truffles:
How do I store Lemon Truffles?
Once rolled and coated, Lemon Truffles are best stored in an airtight container in the refrigerator. They will keep well for up to a week. Allow them to sit at room temperature for about 10-15 minutes before serving for the best texture.
Can I make Lemon Truffles ahead of time?
Absolutely! Lemon Truffles are an excellent make-ahead treat. You can prepare them a day or two in advance and store them in the refrigerator as described above. This makes them perfect for entertaining!
Easy Lemon Truffles – Bright & Zesty Treat
Bright and zesty lemon truffles that are easy to make for a delightful treat.
Ingredients
-
4 oz cream cheese or coconut butter, softened
-
2 tbsp butter or additional coconut butter, softened
-
3 tbsp powdered sugar or erythritol
-
Zest of one lemon
-
3 oz white chocolate chips (optional)
-
Optional drop of natural food coloring or pinch of turmeric for color
Instructions
-
Step 1
In a medium bowl, cream together the softened cream cheese (or coconut butter) and softened butter (or additional coconut butter) until smooth and fluffy. -
Step 2
Add the powdered sugar (or erythritol) and lemon zest. Mix until just combined, ensuring not to overmix. -
Step 3
Stir in optional food coloring or turmeric for color, and optional white chocolate chips if desired. Cover and chill the mixture in the refrigerator for at least 1-2 hours until firm enough to handle. -
Step 4
Scoop teaspoon-sized portions of the chilled mixture and roll them into smooth balls between your palms. If the mixture softens, return it to the refrigerator briefly. -
Step 5
Serve as is, roll in additional powdered sugar/erythritol, or dip in melted white chocolate. Allow to set in the refrigerator for at least 30 minutes before serving.
Important Information
Nutrition Facts (Per Serving)
It is important to consider this information as approximate and not to use it as definitive health advice.
Allergy Information
Please check ingredients for potential allergens and consult a health professional if in doubt.