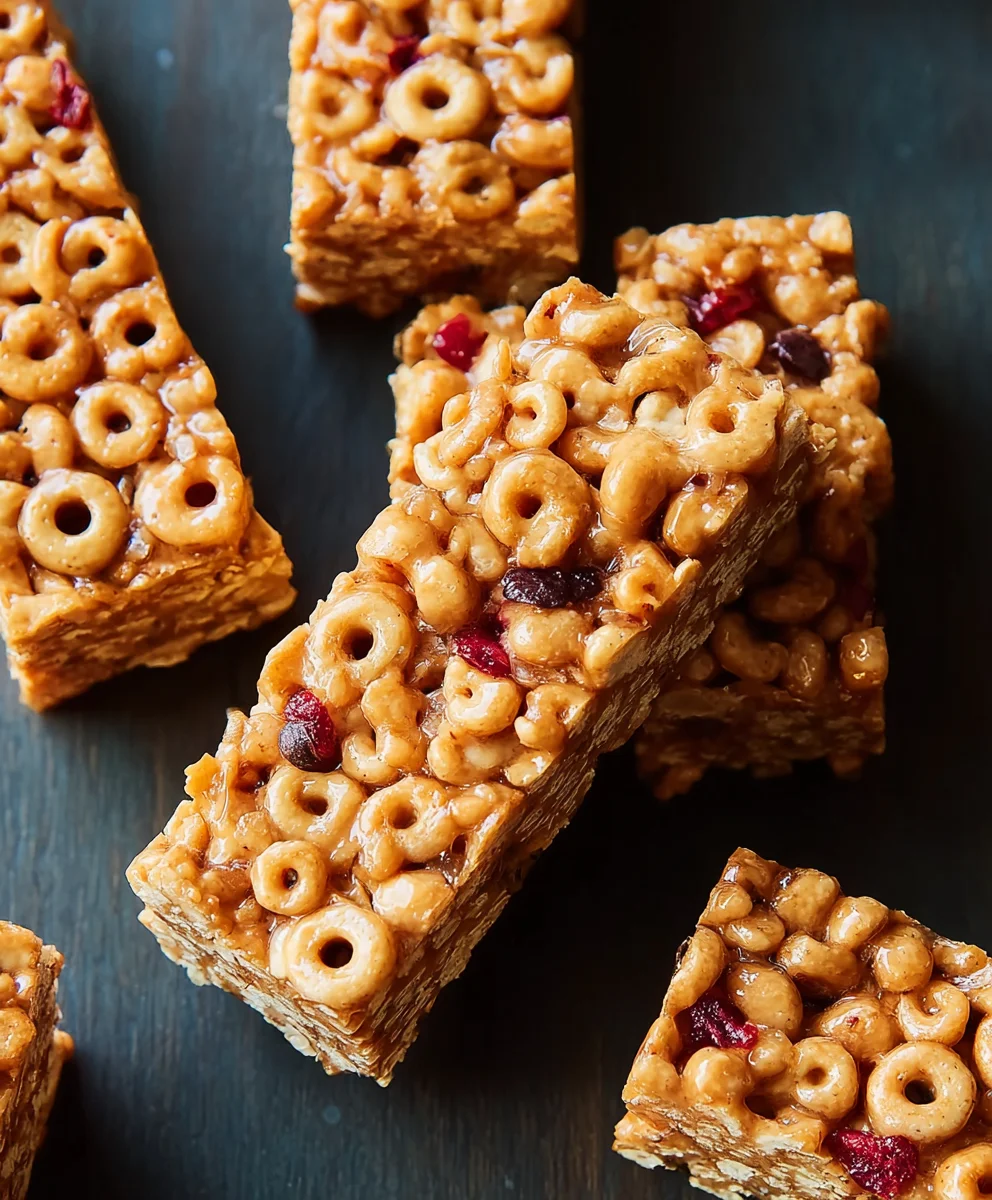
Easy Homemade Cereal Bars – Quick & Delicious Treat
Cereal bars are more than just a quick snack; they’re a nostalgic embrace of childhood summers and a testament to simple, satisfying flavors. Who doesn’t remember that sweet, slightly chewy bite that powered countless adventures and study sessions? What makes these homemade cereal bars so universally beloved is their incredible versatility and the sheer joy they bring. Forget the pre-packaged options that are often loaded with artificial ingredients and a texture that’s just a little off. Our recipe elevates the humble cereal bar into something truly special, using wholesome ingredients to create a delightful chegrape juicess and a burst of flavor that will transport you back to simpler times. Get ready to discover your new go-to recipe for delicious, customizable cereal bars that are perfect for breakfast on the go, an afternoon pick-me-up, or a crowd-pleasing treat.
Ingredients:
- 3 cups of your favorite cereal (consider something with some texture, like puffed rice, corn flakes, or even a granola without too much added sugar)
- 2/3 cup creamy peanut butter (or your preferred nut butter like almond butter or cashew butter)
- 1/2 cup liquid sweetener (agave nectar, honey, or brown rice syrup all work beautifully)
- 1/2 teaspoon salt (this is entirely optional, but it can really help to enhance the flavors and balance the sweetness)
- 3 tablespoons protein powder (this is also optional, but a great way to boost the nutritional content of your cereal bars)
Preparing Your Cereal Bars
Step 1: Preparing Your Pan and Cereal
The first step to making these delicious cereal bars is to get your baking pan ready. I like to use an 8×8 inch square baking pan. To ensure your bars don’t stick, you have a couple of great options. You can either lightly grease the pan with a bit of oil or cooking spray. Alternatively, and my personal favorite for easy cleanup, is to line the pan with parchment paper, leaving some overhang on the sides. This overhang will act like handles, allowing you to lift the entire block of cereal bars right out of the pan once they’ve set. Once your pan is prepped, pour your 3 cups of cereal into a large mixing bowl. If you’re using a cereal that has very large pieces, like large flakes or clusters, you might want to give it a gentle crush with your hands to break them down slightly. This will help everything bind together more evenly.
Step 2: Melting the Binder
Now, it’s time to create the magical sticky binder that will hold all your cereal together. In a medium saucepan, combine your 2/3 cup of peanut butter (or your chosen nut butter) and your 1/2 cup of liquid sweetener (agave, honey, or brown rice syrup). If you’re using the optional 1/2 teaspoon of salt, whisk it in now. Place the saucepan over medium-low heat. You want to gently warm this mixture, stirring continuously, until the peanut butter and sweetener are completely melted and smoothly combined into a luscious, pourable sauce. Be careful not to overheat it, as you don’t want it to scorch. Just a gentle melting and combining is what we’re aiming for. This process should only take a few minutes.
Step 3: Incorporating the Protein Powder (Optional)
If you’ve decided to make your cereal bars a little more protein-packed, this is the stage where you’ll add your 3 tablespoons of protein powder. Once the peanut butter and sweetener mixture is smooth and heated through, remove the saucepan from the heat. Sprinkle the protein powder over the warm mixture. Immediately begin extract to stir vigorously with a whisk or a sturdy spoon. You want to incorporate the protein powder as thoroughly as possible, breaking up any clumps and ensuring it’s fully integrated into the liquid binder. This step is crucial for an even texture and to avoid gritty pockets in your finished bars. If the mixture seems a little stiff after adding the protein powder, that’s perfectly normal.
Step 4: Combining Cereal and Binder
With your binder ready, it’s time to bring everything together. Pour the warm peanut butter and sweetener mixture (with or without protein powder) directly over the cereal in the large mixing bowl. Using a sturdy spatula or a wooden sgin extractn, begin to fold the mixture together. Your goal here is to coat every single piece of cereal with the sticky binder. This can take a little effort, especially if you’ve added protein powder, as the mixture will be quite thick. Work gently but thoroughly, ensuring there are no dry pockets of cereal remaining. You want the entire bowl to look uniformly coated and slightly glossy.
Step 5: Pressing and Setting the Bars
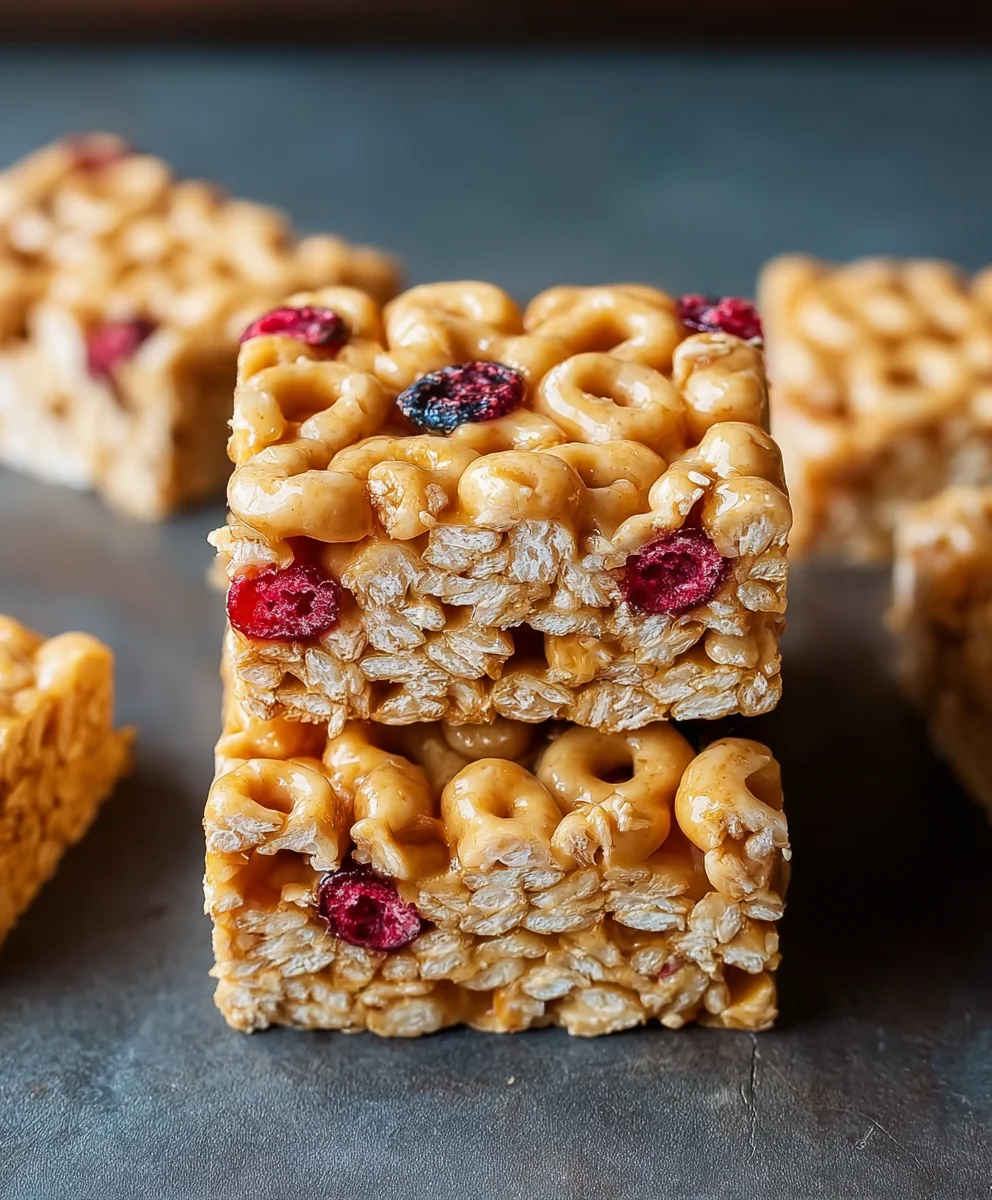
Once the cereal is evenly coated, carefully transfer the mixture into your prepared baking pan. This is where that parchment paper lining really comes in handy. Using the back of your spatula or a piece of wax paper laid on top of the cereal, press the mixture down firmly and evenly into the pan. The firmer you press, the more compact and cohesive your cereal bars will be, and the less likely they are to crum extractble. Make sure to get into the corners and create a nice, flat surface. Once pressed, place the pan in the refrigerator for at least 1 hour. This chilling time is essential for the bars to set properly and firm up, making them easy to cut. You can also leave them in the fridge for longer, up to a few hours, for an even firmer set. After chilling, use the parchment paper overhang to lift the entire block out of the pan. Place it on a cutting board and, using a sharp knife, cut into your desired bar shapes. Enjoy your homemade cereal bars!
Conclusion:
There you have it – a simple yet incredibly satisfying recipe for homemade Cereal Bars! We hope you enjoyed learning how easy it is to whip up a batch of these delicious treats. These Cereal Bars are perfect for a quick breakfast on the go, a wholesome afternoon snack, or even a delightful dessert. Imagin extracte the joy of biting into a perfectly chewy and slightly sweet bar, packed with your favorite crunchy cereals and a hint of sweetness. Don’t be afraid to get creative with your additions; the possibilities are truly endless!
For serving suggestions, these Cereal Bars are fantastic on their own. However, they also pair wonderfully with a glass of cold milk or a warm cup of tea. If you’re looking for variations, consider adding a handful of chocolate chips for an extra indulgence, or perhaps some dried fruit like cranberries or raisins for a tart counterpoint. Nuts such as chopped almonds or walnuts can add a lovely crunch and nutty flavor. For a more decadent version, a drizzle of melted chocolate over the top after they’ve cooled is always a winner!
We encourage you to try this recipe and make it your own. Experiment with different cereal combinations and binders until you find your ultimate perfect Cereal Bar. Happy baking!
Frequently Asked Questions about Cereal Bars:
Q1: Can I make these Cereal Bars vegan?
Absolutely! To make these Cereal Bars vegan, you can substitute the butter with a plant-based butter or coconut oil. For the binder, ensure you are using a vegan-friendly syrup like agave or maple syrup. Many cereals are already vegan, but it’s always a good idea to check tgin extractpackaging to confirm.
Q2: How should I store my Cereal Bars?
Store your Cereal Bars in an airtight container at room temperature for up to 3-5 days. If you live in a very warm climate, you might consider refrigerating them to help them maintain their shape and prevent them from becoming too soft. They also freeze well, making them a great option for batch cooking.
Easy Homemade Cereal Bars – Quick & Delicious Treat
Quick and delicious homemade cereal bars made with your favorite cereal and a sticky binder, perfect for a healthy snack or breakfast.
Ingredients
-
3 cups your favorite cereal (puffed rice, corn flakes, or granola)
-
2/3 cup creamy peanut butter (or almond butter, cashew butter)
-
1/2 cup liquid sweetener (agave nectar, honey, or brown rice syrup)
-
1/2 teaspoon salt (optional, enhances flavors)
-
3 tablespoons protein powder (optional, boosts nutrition)
Instructions
-
Step 1
Prepare an 8×8 inch baking pan by lightly greasing it or lining it with parchment paper, leaving overhang for easy removal. Pour 3 cups of your chosen cereal into a large mixing bowl. Gently crush larger cereal pieces if necessary. -
Step 2
In a medium saucepan over medium-low heat, combine peanut butter (or nut butter) and liquid sweetener. If using, whisk in salt. Stir continuously until melted and smoothly combined into a pourable sauce. Do not scorch. -
Step 3
If using protein powder, remove the saucepan from heat once the binder is smooth. Sprinkle protein powder over the warm mixture and stir vigorously with a whisk or spoon until fully incorporated and any clumps are broken up. -
Step 4
Pour the warm binder mixture over the cereal in the large mixing bowl. Use a sturdy spatula to fold the ingredients together, ensuring every cereal piece is evenly coated with the sticky binder. The mixture will be thick. -
Step 5
Transfer the coated cereal mixture into the prepared baking pan. Press down firmly and evenly using the back of your spatula or a piece of wax paper to create a compact block. Refrigerate for at least 1 hour to set. -
Step 6
Once set, use the parchment paper overhang to lift the cereal bar block from the pan. Place on a cutting board and cut into desired bar shapes with a sharp knife. Enjoy your homemade cereal bars!
Important Information
Nutrition Facts (Per Serving)
It is important to consider this information as approximate and not to use it as definitive health advice.
Allergy Information
Please check ingredients for potential allergens and consult a health professional if in doubt.