Masoor Dal Chilla – Easy Savory Red Lentil Pancakes
Masoor Dal Chilla is a dish that truly speaks to my soul. It’s more than just a recipe; it’s a warm hug on a plate, a burst of flavor that’s both comforting and exciting. If you’re anything like me, you’re always on the lookout for delicious, wholesome meals that don’t demand hours in the kitchen. That’s precisely where these savory red lentil pancakes, or Masoor Dal Chilla, shine. They are incredibly popular for their delightful texture – a perfect balance of soft and slightly crisp edges – and their subtly nutty, earthy flavor. What makes Masoor Dal Chilla truly special is its versatility. Whether you’re enjoying them for a quick breakfast, a light lunch, or a satisfying snack, they’re always a winner. I love how easily they can be customized with different spices and toppings, making each batch a unique culinary adventure. Let’s dive in and create some magic together!
Masoor Dal Chilla | Savory Red Lentil Pancakes
Masoor Dal Chilla, or savory red lentil pancakes, are a delightful and nutritious breakfast or snack option that’s incredibly easy to make. These golden, subtly spiced discs are packed with protein and fiber thanks to the humble masoor dal (split red lentils). They’re a fantastic alternative to traditional pancakes and can be customized with your favorite fillings or served simply with a side of chutney or yogurt. I love making these on busy mornings because they come together quite quickly, and the batter can even be prepped the night before. Let’s dive into how you can whip up these delicious pancakes!
Ingredients:
Instructions
Step 1: Preparing the Lentils
The foundation of our delicious chillas is, of course, the masoor dal. Start by thoroughly rinsing the split red lentils under cold running water. You want to wash away any dust or impurities. Do this a few times until the water runs clear. Once rinsed, place the lentils in a medium-sized bowl and cover them with 3 cups of fresh water. Let them soak for at least 2 to 3 hours. This soaking period is crucial as it softens the lentils, making them easier to grind into a smooth batter and improving their digestibility. You’ll notice they plump up quite a bit. If you’re in a hurry, you can soak them in warm water for about 45 minutes to an hour, but a longer soak in room temperature water generally yields the best results. After soaking, drain the lentils completely, discarding the soaking water.
Step 2: Grinding the Batter
Now it’s time to transform those softened lentils into a smooth batter. Transfer the drained lentils into a blender or a food processor. Add the green chilli and the fresh gin extractger to the blender. The green chilli will lend a gentle warmth, and the gin extractger adds a lovely zesty note. You can adjust the amount of green chilli to your spice preference; for a milder flavor, remove the seeds or use half a chilli. Peel the gin extractger before adding it. Now, add about half a cup of fresh water. Start with this amount; you can always add a little more if needed to achieve the right consistency. Blend everything together until you have a smooth, lump-free batter. The consistency should be similar to pancake batter – thick enough to coat the back of a spoon but still pourable. Avoid making it too watery, or your chillas might turn out thin and difficult to handle. If the batter is too thick, add another tablespoon of water at a time and blend again until you reach the desired consistency.
Step 3: Seasoning and Adding Freshness
Once your batter is smoothly blended, transfer it to a mixing bowl. It’s time to season our chilla batter for maximum flavor. Add the kosher salt to the batter. I prefer kosher salt for its clean taste and slightly coarser texture, which helps ensure it dissolves evenly. Stir the salt into the batter until it’s well combined. Next, gently fold in the finely chopped fresh cilantro. The cilantro adds a burst of freshness and a beautiful green hue to the batter, enhancing both the aroma and the visual appeal of the finished chillas. Give the batter a final gentle stir to distribute the cilantro evenly. At this point, you can taste a tiny bit of the batter (if you’re comfortable doing so raw) to check for saltiness and adjust if necessary. If you want to add other spices like a pinch of turmeric for color or a dash of cumin for added warmth, this is the stage to do it!
Step 4: Cooking the Chillas
Heat a non-stick skillet or a tawa (griddle) over medium heat. Once the pan is warm, add about half a tablespoon of oil. Swirl the oil around to coat the surface evenly. Pour a ladleful of the batter onto the hot skillet. You can tilt the pan to spread the batter thinly and evenly, creating a round shape. Aim for a thickness that’s not too thin (which can lead to crum extractbling) and not too thick (which might result in an undercooked center). Let the chilla cook for about 2 to 3 minutes on the first side. You’ll see small bubbles start to form on the surface, and the edges will begin extract to look slightly dry and golden. This indicates it’s time to flip.
Step 5: Flipping and Finishing
Using a spatula, carefully slide it under the chilla and gently flip it over to the other side. Drizzle a little more oil around the edges of the chilla and a tiny bit on top, if needed. Cook the second side for another 1 to 2 minutes, or until it’s golden brown and cooked through. You can press down gently with the spatula to ensure even cooking. Once both sides are beautifully golden and slightly crispy, slide the chilla onto a plate. Repeat this process with the remaining batter, adding a little oil to the pan each time you start a new chilla. You might need to adjust the heat slightly if the chillas are cooking too quickly or too slowly. The aroma filling your kitchen at this stage is simply divine!
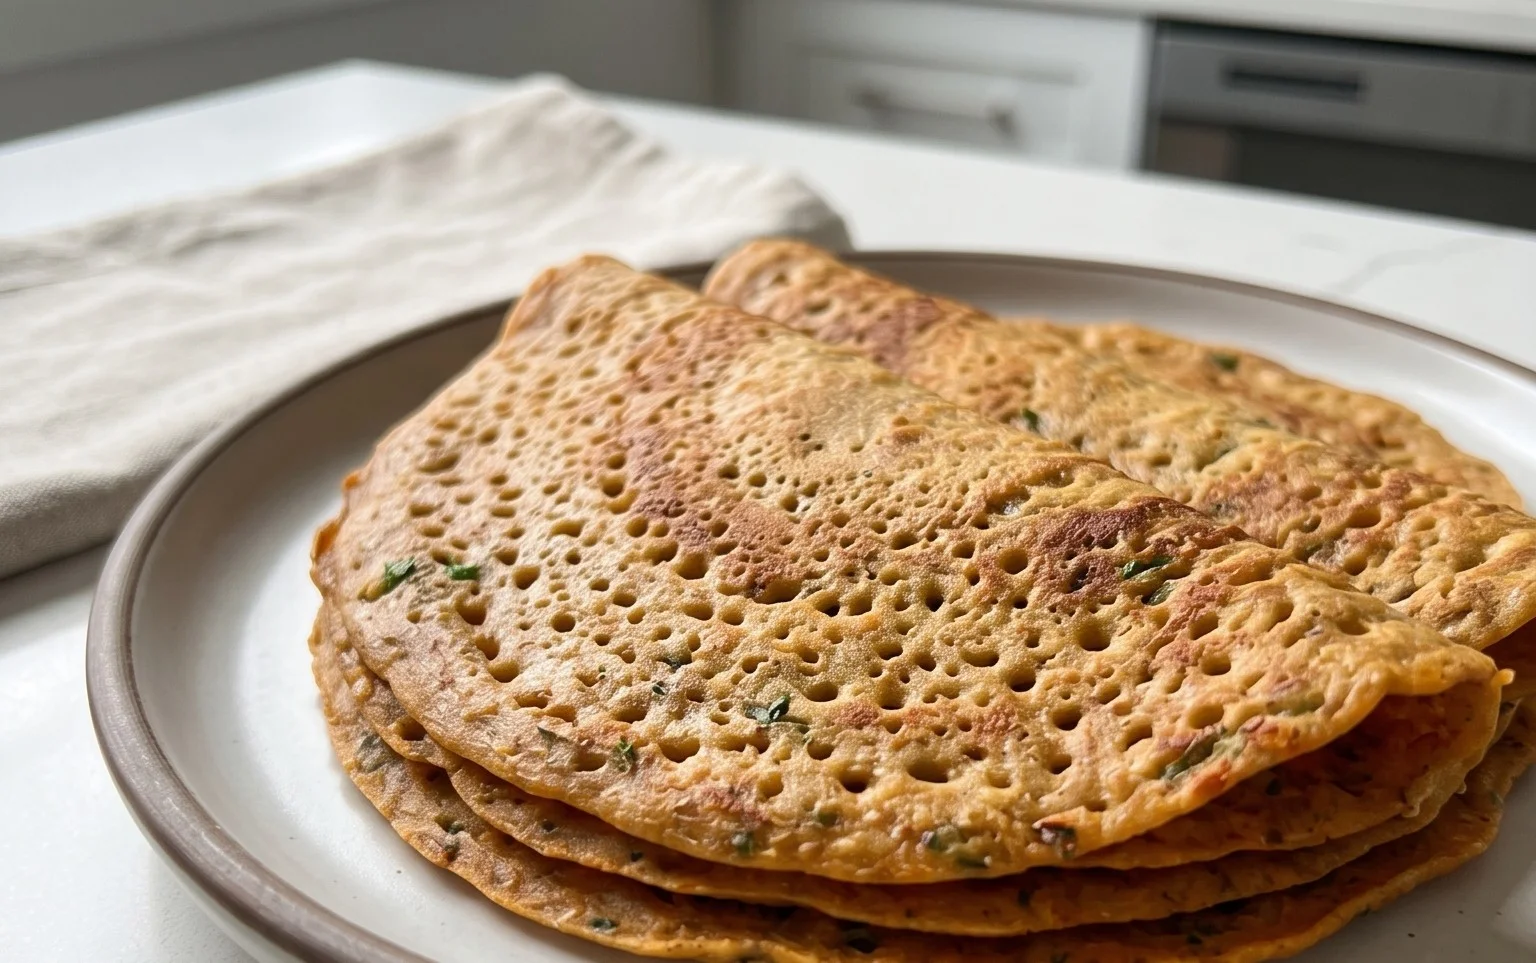
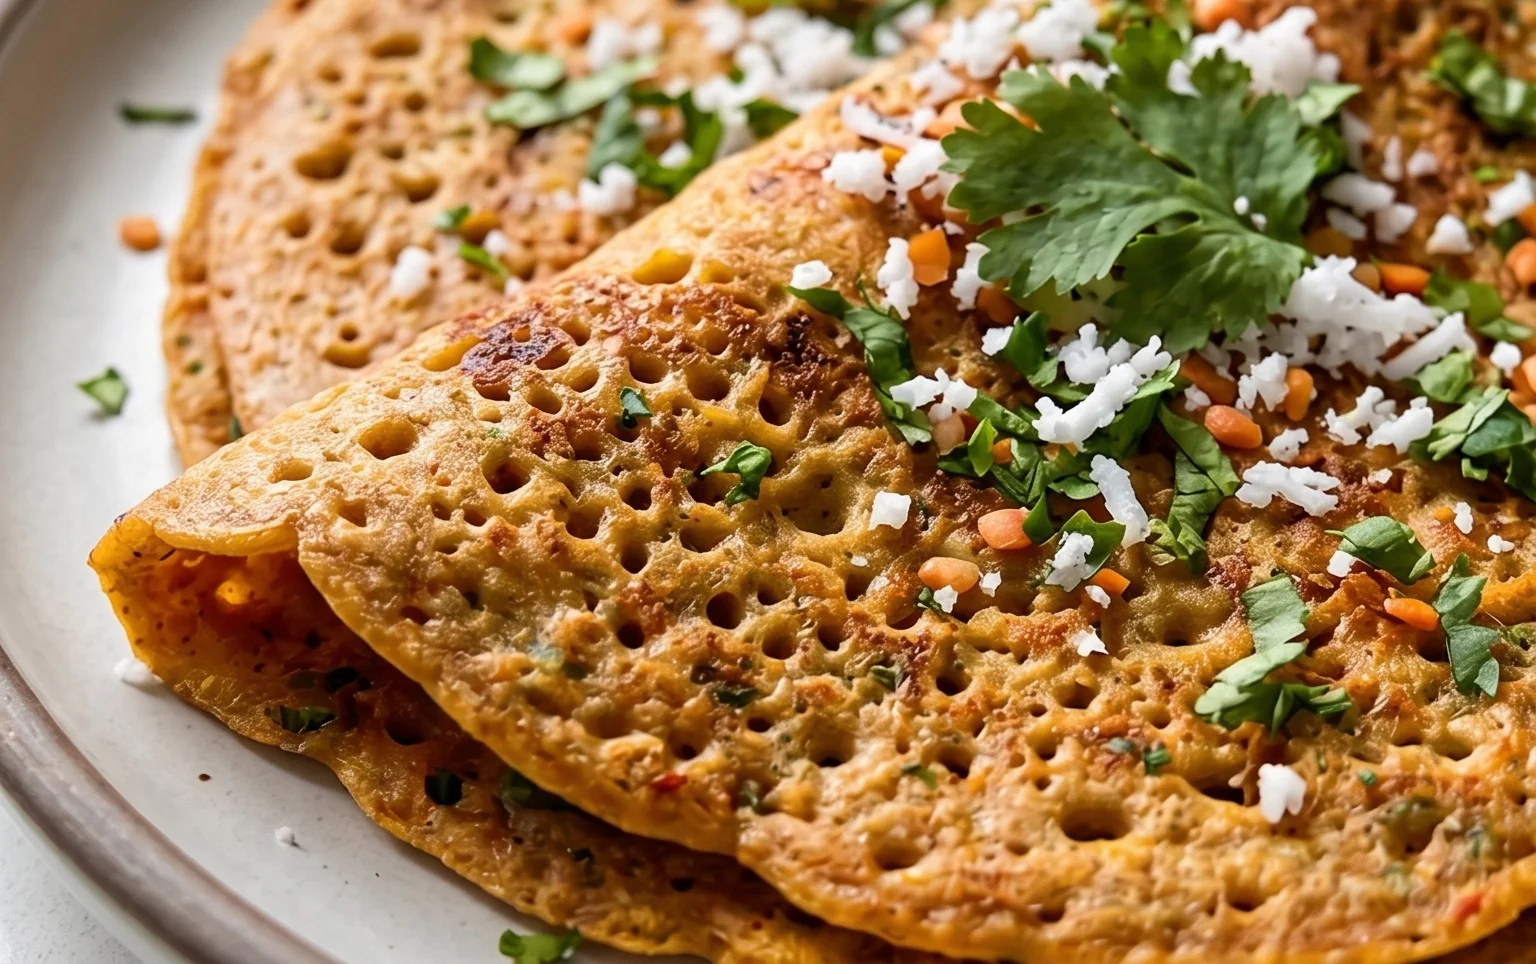
These Masoor Dal Chillas are best served hot. They are wonderful on their own, but I love serving them with a dollop of plain yogurt, a spicy mint-coriander chutney, or even a sweet tamarind chutney. You can also fold them in half and stuff them with some sautéed vegetables or paneer for a more substantial meal. Enjoy your homemade, healthy, and delicious savory red lentil pancakes!
Conclusion:
I hope you’ve enjoyed learning how to make these delicious Masoor Dal Chillas! These savory red lentil pancakes are an absolute winner in my kitchen for so many reasons. They’re incredibly healthy, packed with protein from the masoor dal, and wonderfully versatile. The preparation is surprisingly simple, making them perfect for a quick weeknight dinner or a wholesome breakfast. The slightly earthy flavor of the lentils combined with fragrant spices creates a truly satisfying and guilt-free meal. I genuinely encourage you to give this Masoor Dal Chilla recipe a try – I’m confident you’ll love them as much as I do!
To elevate your chilla experience, I love serving them hot off the griddle with a dollop of cooling yogurt or a tangy mint-coriander chutney. A side of fresh sliced onions and tomatoes also adds a lovely crunch and freshness. For variations, feel free to experiment with different spices – a pinch of turmeric for color, or a dash of garam masala for extra warmth. You can also finely chop some vegetables like carrots, bell peppers, or spinach and mix them into the batter for added texture and nutrients. Don’t be afraid to get creative!
Frequently Asked Questions about Masoor Dal Chillas:
Q1: Can I make the batter ahead of time?
Yes, you absolutely can! The Masoor Dal Chilla batter can be prepared a day in advance and stored in an airtight container in the refrigerator. It might thicken slightly, so you can add a tablespoon or two of water to reach your desired consistency before cooking.
Q2: What can I do if my chillas are sticking to the pan?
Ensure your pan is well-heated over medium heat and lightly greased with oil or ghee. A non-stick pan is also highly recommended for this recipe. If they still seem to stick, try increasing the heat slightly and ensure you’re using enough oil for each chilla. Patience is key!
Masoor Dal Chilla | Savory Red Lentil Pancakes
Delicious and healthy savory pancakes made from split red lentils, flavored with green chili and ginger.
Ingredients
-
1 cup split red lentils (masoor dal)
-
3 cups water (for soaking lentils)
-
1 green chilli
-
1 inch ginger
-
1 teaspoon kosher salt
-
½ cup water (for grinding)
-
2 tablespoons cilantro (finely chopped)
-
2 tablespoons oil
Instructions
-
Step 1
Rinse the split red lentils thoroughly and soak them in 3 cups of water for at least 2-3 hours, or until softened. -
Step 2
Drain the soaked lentils. In a blender, combine the drained lentils, green chili, ginger, and 1 teaspoon of kosher salt. Add ½ cup of water for grinding. -
Step 3
Blend the mixture until you achieve a smooth batter consistency, similar to pancake batter. If too thick, add a tablespoon or two of water. -
Step 4
Stir in the finely chopped cilantro into the batter. -
Step 5
Heat 1 tablespoon of oil in a non-stick skillet or griddle over medium heat. -
Step 6
Pour a ladleful of batter onto the hot skillet and spread it into a thin, round pancake. Cook for 2-3 minutes until the edges start to look dry and bubbles appear on the surface. -
Step 7
Flip the chilla and cook the other side for another 1-2 minutes until golden brown and cooked through. Repeat with the remaining batter, adding more oil as needed.
Important Information
Nutrition Facts (Per Serving)
It is important to consider this information as approximate and not to use it as definitive health advice.
Allergy Information
Please check ingredients for potential allergens and consult a health professional if in doubt.