Fluffy Coconut Cloud Cake Recipe- Easy & Delicious
Coconut Cloud Cake Recipe. Imagin extracte a dessert so light and airy it feels like you’re taking a bite of a fluffy cloud, infused with the tropical sweetness of coconut. That’s exactly what our Coconut Cloud Cake Recipe delivers! This isn’t just any cake; it’s a culinary escape, a delicate masterpiece that has captured hearts and taste buds for its sheer ethereal texture and exquisite flavor. People adore this cake because it perfectly balances indulgence with a delightful lightness, making it feel decadent without being heavy. What truly sets this Coconut Cloud Cake Recipe apart is its unique ability to transport you to a sun-drenched beach with every forkful. It’s a testament to simple ingredients transforming into something truly magical, promising a moment of pure, unadulterated bliss.
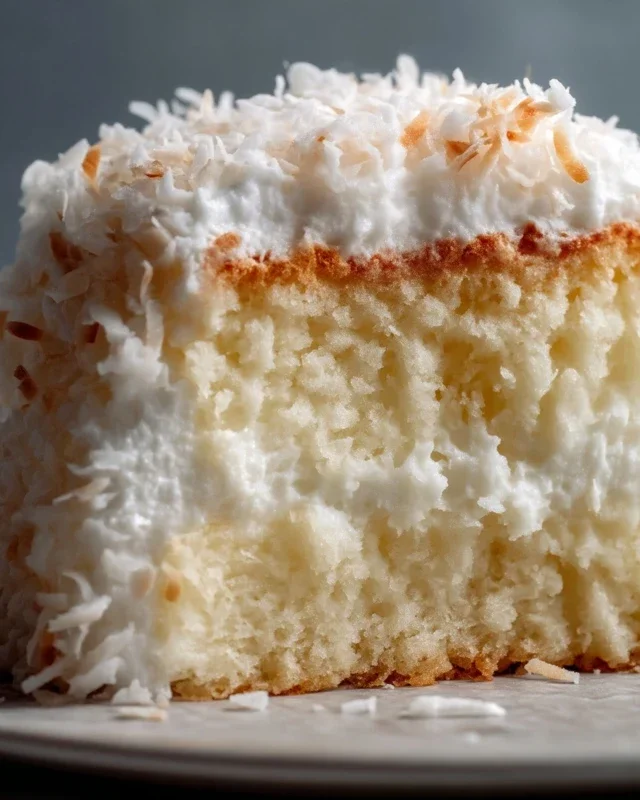
Coconut Cloud Cake Recipe
There are some desserts that just feel like pure magic, and this Coconut Cloud Cake is undoubtedly one of them. Imagin extracte a cake so light and airy it practically floats, infused with the delicate, tropical essence of coconut. It’s a dream of a dessert, perfect for birthdays, special occasions, or just when you need a little sunshine in your day. The name “Cloud Cake” isn’t an exaggeration; each bite is like a tender, fluffy bite of heaven. The subtle coconut flavor is present throughout, from the moist cake to the luscious frosting, making it a truly immersive coconut experience. And the best part? It’s surprisingly achievable, even for those who consider themselves novice bakers. We’ll guide you through each step to ensure your Coconut Cloud Cake is a resounding success. Get ready to impress yourself and everyone lucky enough to share a slice!
Ingredients:
Cake Baking Instructions
1. Preparation is Key: Begin extract by preheating your oven to 350°F (175°C). Grease and flour two 9-inch round cake pans. You can also line the bottoms with parchment paper for extra insurance against sticking. This ensures your beautiful cake layers will slide out effortlessly. In a medium bowl, whisk together the all-purpose flour, baking powder, and salt. This step aerates the dry ingredients and distributes the leavening agent and salt evenly, which is crucial for a consistent cake texture. Set this aside. In the bowl of a stand mixer fitted with the paddle attachment, or using a hand mixer and a large bowl, cream together the softened unsalted butter and granulated sugar on medium-high speed. You want this mixture to become light and fluffy, almost like a pnon-alcoholic ale yellow cloud. This process incorporates air into the batter, contributing significantly to the cake’s lightness. This should take about 3-5 minutes.
2. Incorporating the Wet Ingredients: With the mixer on medium speed, add the room temperature eggs, one at a time, beating well after each addition. Adding eggs gradually prevents the batter from separating and ensures they are fully incorporated. Scrape down the sides of the bowl as needed to make sure everything is mixed evenly. Now, add the vanilla extract and coconut extract. The combination of these two extracts will create a delightful aromatic foundation for our coconut flavor. Mix until just combined.
3. Alternating Dry and Wet: This is where we bring it all together. Reduce the mixer speed to low. Gradually add the dry ingredients (flour mixture) to the wet ingredients in three additions, alternating with the coconut milk in two additions. Begin extract and end with the dry ingredients. So, add about a third of the flour mixture, mix until just combined, then add half of the coconut milk, mix until just combined, then another third of the flour mixture, the remaining coconut milk, and finally the last of the flour mixture. Be careful not to overmix the batter at this stage. Overmixing can develop the gluten in the flour too much, resulting in a tougher cake. Mix only until the streaks of flour disappear. The batter should be smooth and pourable.
4. Baking to Perfection: Divide the batter evenly between the prepared cake pans. Gently spread the batter to the edges. Tap the pans lightly on the counter a couple of times to release any large air bubbles. Bake for 30-35 minutes, or until a wooden skewer or toothpick inserted into the center of the cakes comes out clean. The aroma of baking cake filling your kitchen is one of the best parts of this process! Once baked, let the cakes cool in the pans for about 10-15 minutes before inverting them onto a wire rack to cool completely. It’s essential that the cakes are entirely cool before frosting, otherwise, your frosting will melt into a delicious, but messy, puddle.
Frosting and Assembly
1. Whipping Up the Coconut Cloud Frosting: While the cakes are cooling, prepare the frosting. Ensure your cream cheese is truly softened; this is crucial for a smooth, lump-free frosting. In a large bowl, beat the softened cream cheese until it’s smooth and creamy. Add the heavy whipping cream, powdered sugar, vanilla extract, and coconut extract. Beat on medium-high speed until the mixture is thick and holds stiff peaks. This can take a few minutes. Be patient; you’re aiming for a frosting that’s light, airy, and has a lovely coconut fragrance. Be careful not to overbeat the heavy cream, or it can turn into butter.
2. Assembling Your Cloud Creation: Once the cake layers are completely cool, it’s time to assemble. Place one cake layer on your serving plate or cake stand. Generously spread about a third of the frosting over the first layer, spreading it evenly to the edges. Carefully place the second cake layer on top. Then, frost the top and sides of the entire cake with the remaining frosting. You can use an offset spatula for a smooth finish, or create decorative swirls and peaks to mimic fluffy clouds.
3. The Finishing Touches: Sprinkle the sweetened shredded coconut over the top and sides of the cake. For an extra layer of flavor and texture, you can toast the shredded coconut beforehand in a dry skillet over medium heat until golden brown, stirring frequently. Let it cool before applying. This adds a wonderful nutty dimension.
Enjoy your delightful Coconut Cloud Cake! It’s a treat that’s as beautiful to look at as it is delicious to eat.
Conclusion:
I hope you’re as excited to bake this Coconut Cloud Cake as I am to share it with you! This recipe truly is a winner. It delivers an incredibly light and airy texture, reminiscent of a fluffy cloud, infused with the delightful, tropical essence of coconut. It’s surprisingly simple to make, making it perfect for both seasoned bakers and those just starting out on their baking journey. The delicate sweetness and subtle coconut aroma create a dessert that’s both elegant and comforting.
This Coconut Cloud Cake is incredibly versatile. It’s stunning on its own, dusted with a little powdered sugar. For a more decadent experience, try serving it with a dollop of fresh whipped cream and a scattering of toasted coconut flakes. A light, fruity coulis, like raspberry or mango, also pairs beautifully, adding a vibrant contrast. Don’t be afraid to experiment with variations! You could add a tablespoon of shredded coconut to the batter for an extra coconut punch, or even a swirl of lime zest for a refreshing citrus note.
I truly encourage you to give this Coconut Cloud Cake recipe a try. It’s guaranteed to impress your friends and family, or simply be a wonderful treat for yourself. It’s a little slice of sunshine on a plate!
Frequently Asked Questions:
Can I make this cake ahead of time?
Absolutely! This Coconut Cloud Cake is even better when made a day in advance. The flavors have a chance to meld and deepen, resulting in an even more delicious cake. Store it in an airtight container at room temperature.
What kind of coconut milk should I use?
For the best texture and flavor, I recommend using full-fat canned coconut milk. The higher fat content contributes to the cake’s moistness and rich coconut taste. Light coconut milk can be used, but the cake may be slightly less rich.
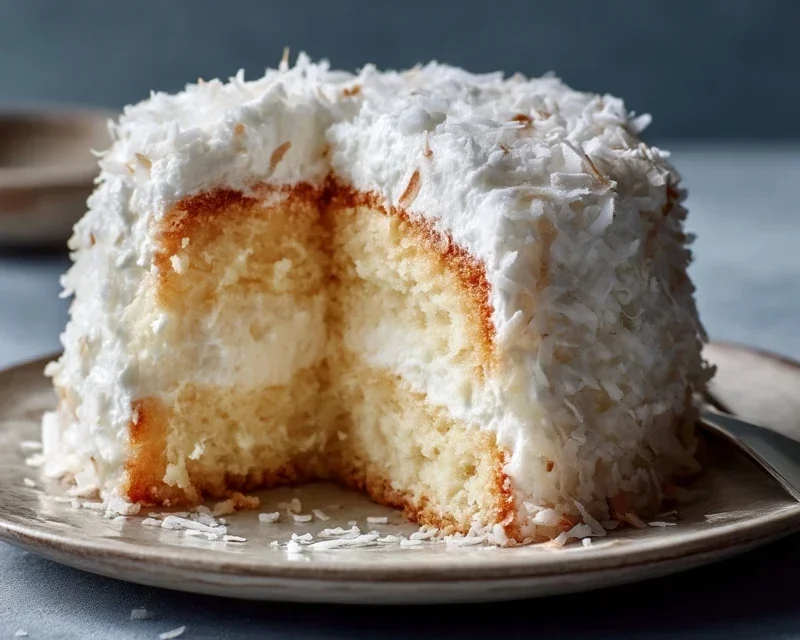
Coconut Cloud Cake Recipe
A light and airy coconut cake with a creamy coconut frosting, perfect for any celebration.
Ingredients
-
2 1/2 cups all-purpose flour
-
2 1/2 teaspoons baking powder
-
1/2 teaspoon salt
-
1 cup unsalted butter, softened
-
2 cups granulated sugar
-
4 large eggs, room temperature
-
1 teaspoon vanilla extract
-
1 teaspoon coconut extract
-
1 cup coconut milk
-
1 1/2 cups heavy whipping cream
-
8 oz cream cheese, softened
-
1/2 cup powdered sugar
-
1 cup sweetened shredded coconut (toasted or fresh)
Instructions
-
Step 1
Preheat oven to 350°F (175°C). Grease and flour two 9-inch round cake pans. -
Step 2
In a medium bowl, whisk together the flour, baking powder, and salt. Set aside. -
Step 3
In a large bowl, cream together the softened butter and granulated sugar until light and fluffy. Beat in the eggs one at a time, then stir in the vanilla extract and coconut extract. -
Step 4
Alternately add the dry ingredients and the coconut milk to the butter mixture, beginning and ending with the dry ingredients. Mix until just combined. Do not overmix. -
Step 5
Divide the batter evenly between the prepared cake pans. Bake for 30-35 minutes, or until a wooden skewer inserted into the center comes out clean. -
Step 6
Let the cakes cool in the pans for 10 minutes before inverting them onto a wire rack to cool completely. -
Step 7
For the frosting, beat the heavy whipping cream until stiff peaks form. In a separate bowl, beat the softened cream cheese, powdered sugar, vanilla extract, and coconut extract until smooth. Gently fold the whipped cream into the cream cheese mixture. -
Step 8
Once the cakes are completely cool, frost the top of one cake layer, then place the second layer on top. Frost the top and sides of the cake. -
Step 9
Sprinkle the sweetened shredded coconut over the top of the cake.
Important Information
Nutrition Facts (Per Serving)
It is important to consider this information as approximate and not to use it as definitive health advice.
Allergy Information
Please check ingredients for potential allergens and consult a health professional if in doubt.