Smoked Shotgun Shells – Savory Appetizer Perfection
Smoked Shotgun Shells are the ultimate crowd-pleasing appetizer that will have everyone beggin extractg for the recipe. Forget boring meatballs or predictable pigs in a blanket; these flavour-packed bites are a guaranteed showstopper. What makes these Smoked Shotgun Shells so utterly irresistible? It’s the perfect marriage of tender pasta shells, a savoury seasoned meat filling, and that undeniable smoky flavour imparted by your trusty smoker. Each bite delivers a burst of juicy, cheesy goodness wrapped in a perfectly cooked noodle, all kissed by the wood smoke. They’re incredibly satisfying, surprisingly easy to make, and their unique presentation alone is enough to spark conversation and delight. Whether you’re hosting a backyard barbecue, tailgating, or just looking to elevate your snack game, Smoked Shotgun Shells are the answer.
Smoked Shotgun Shells
Get ready for a flavor explosion with these Smoked Shotgun Shells! This recipe takes a classic comfort food to a whole new level by infusing them with smoky goodness and a spicy kick. Imagin extracte perfectly cooked manicotti shells stuffed with a savory meat mixture, wrapped in crispy beef beef bacon, and then slow-smoked to perfection. They’re a guaranteed crowd-pleaser, perfect for game days, tailgates, or just a fun weekend project in the kitchen. Don’t be intimidated by the smoking process; it’s simpler than you think and the results are absolutely worth it. Let’s get started!
Ingredients:
Preparing the Filling
The heart of our shotgun shells is this incredibly flavorful meat and cheese filling. It’s a delightful combination of savory, creamy, and just a touch of heat.
1. Begin extract by preheating your oven to 350°F (175°C). This initial step is crucial for cooking the meat mixture thoroughly before we wrap it in beef bacon. In a large skillet or Dutch oven, brown the ground beef and hot Italian sausage over medium-high heat. As the meats cook, break them up with a spoon to ensure even cooking. Once the meat is no longer pink, drain off any excess grease. A clean skillet makes for a better-tasting filling.
2. Add the finely diced medium onion and the finely diced jalapeno to the skillet with the cooked meat. Cook for about 5-7 minutes, or until the onions are softened and translucent. This allows the vegetables to meld their flavors with the meat. Stir in the Slap Ya Mama seasoning, garlic powder, black pepper, and red pepper flakes. The Slap Ya Mama is a fantastic all-around seasoning that brings a lovely Cajun kick. Continue to cook for another minute, stirring constantly, until the spices are fragrant. This blooming of the spices enhances their flavor.
3. Remove the skillet from the heat. Stir in the cream cheese until it’s mostly melted and well incorporated into the meat mixture. This will add a wonderful creaminess. Next, fold in the shredded sharp cheddar cheese. Stir until the cheese is melted and you have a cohesive, delicious filling. Finally, mix in the ⅓ cup of barbecue sauce. This adds a hint of sweetness and tang that complements the savory meat and spices perfectly. Let the filling cool slightly while you prepare the manicotti shells.
Assembling the Shotgun Shells
This is where the magic starts to happen, transforming simple manicotti into irresistible smoky bites.
4. While your filling cools, cook the manicotti shells according to package directions until they are al dente – meaning they are tender but still have a slight bite. You don’t want them to be mushy, as they will cook further during the smoking process. Drain the shells well and rinse them with cool water to stop the cooking process and prevent them from sticking together. Carefully stuff each cooked manicotti shell with a generous amount of the meat and cheese filling. A small spoon or a piping bag works well for this. Make sure they are packed well but not overflowing.
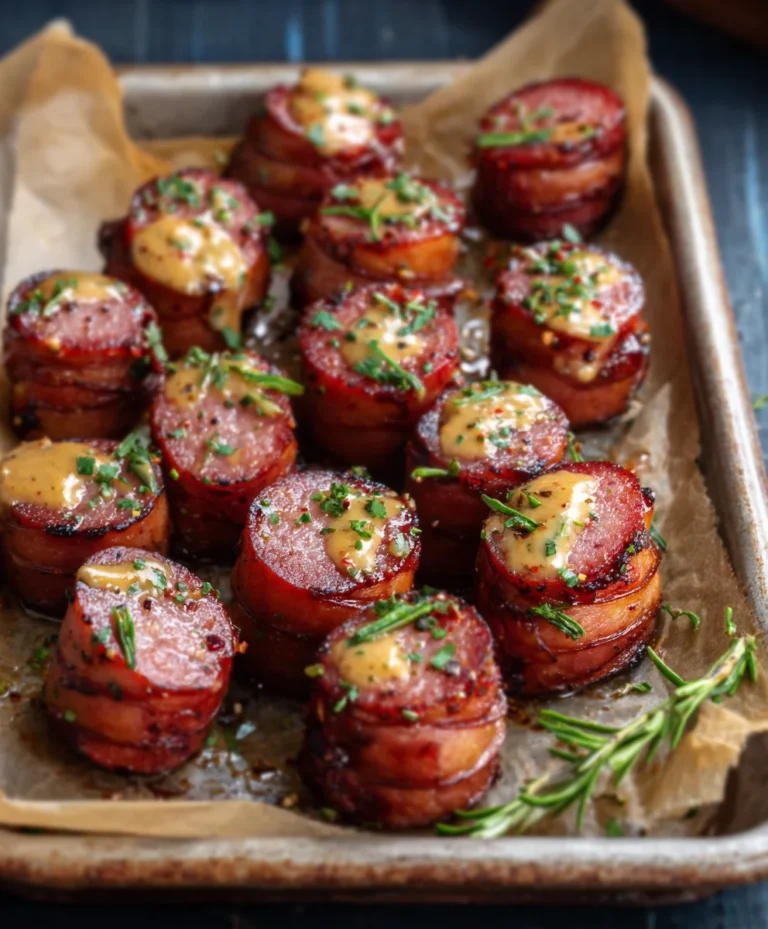
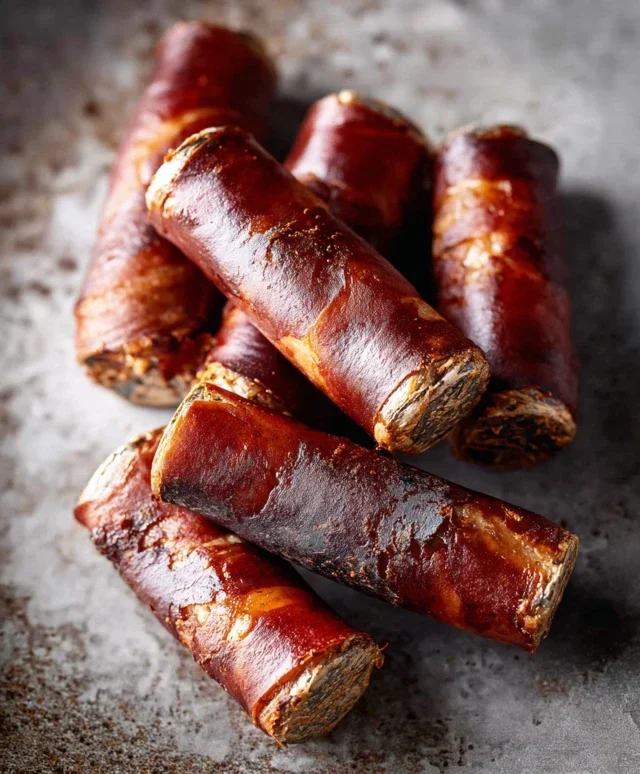
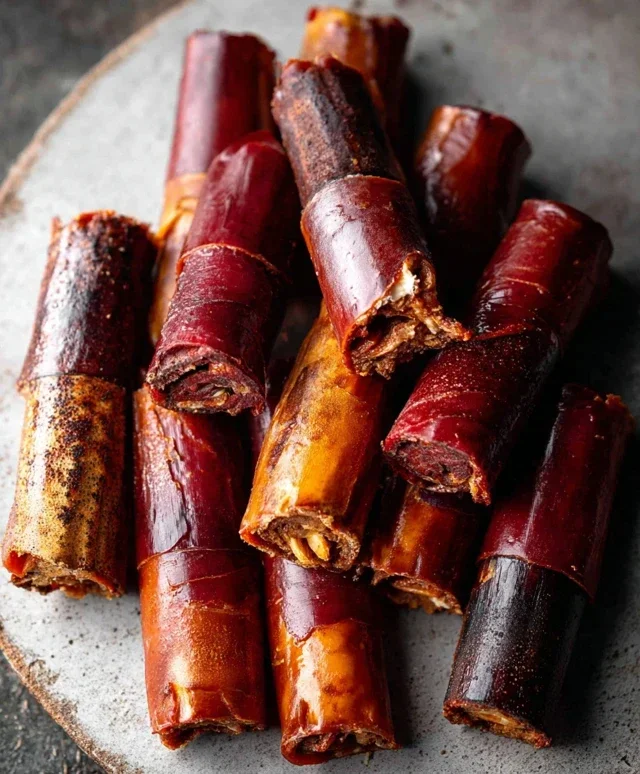
5. Now, it’s time to wrap these beauties in beef bacon! Take your beef beef bacon strips and wrap one to two strips around each stuffed manicotti shell, ensuring the beef bacon overlaps to fully encase the shell. You might need to adjust the amount of beef bacon depending on the size of your shells and beef bacon strips. If your beef bacon isn’t sticking well, you can secure the ends with a toothpick. Place the beef bacon-wrapped shells on a wire rack set inside a baking sheet. This rack allows the smoke to circulate evenly around all sides of the shells and lets any grease drip away, resulting in crispier beef bacon.
Smoking to Perfection
The smoking process is what gives these Shotgun Shells their signature flavor. I like to use a combination of hickory and mesquite wood for a balanced smoky profile, but feel free to use your favorite smoking wood.
Smoking the Shells
1. Preheat your smoker to 225-250°F (107-121°C). Once your smoker has reached the desired temperature and is producing a nice, thin blue smoke, carefully place the baking sheet with the assembled shotgun shells onto the smoker grates. We are aiming for a low and slow cook to ensure the beef bacon becomes wonderfully crispy and the flavors meld together without drying out the shells.
2. Smoke the shells for approximately 2 to 2.5 hours, or until the beef bacon is crispy and the internal temperature of the meat mixture has reached at least 165°F (74°C). During the last 30 minutes of smoking, I like to brush the shells with a layer of your favorite barbecue sauce. This adds another layer of flavor and a beautiful glossy finish. Keep an eye on the beef bacon; if it’s crisping up too quickly, you can loosely tent the shells with foil.
3. Once they’ve reached that perfect smoky, crispy, and cooked state, carefully remove the shotgun shells from the smoker. Let them rest for about 10-15 minutes before serving. This resting period allows the juices to redistribute, making them even more delicious. Serve these Smoked Shotgun Shells hot and watch them disappear! They are fantastic on their own or served with extra barbecue sauce for dipping. Enjoy this incredible smoky treat!
Conclusion:
As you can see, these Smoked Shotgun Shells are an absolute showstopper, perfect for any gathering or just a fun weekend project. Their irresistible combination of savory ground meat, creamy cheese, and a hint of spice, all wrapped in a tender pasta shell and kissed with smoky flavor, makes them a truly memorable dish. I’ve found they’re incredibly versatile, meaning you can truly make them your own.
To serve, I love presenting them as a hearty appetizer or even as a main course alongside a simple green salad and some garlic bread. They also pair wonderfully with a cool, crisp non-alcoholic beer or a smoky BBQ sauce for dipping.
Don’t be afraid to experiment with variations! You can swap out the cheeses for a spicier pepper jack, add finely diced jalapeños to the meat mixture for an extra kick, or even use different ground meats like turkey or a blend of beef and beef. The possibilities are endless! I truly encourage you to give this Smoked Shotgun Shells recipe a try; I’m confident you’ll be hooked!
Frequently Asked Questions:
Can I make these Smoked Shotgun Shells ahead of time?
Absolutely! You can assemble the Smoked Shotgun Shells up to a day in advance. Store them covered in the refrigerator. When you’re ready to smoke them, allow them to sit at room temperature for about 20-30 minutes before placing them on the smoker to ensure even cooking.
What type of wood is best for smoking shotgun shells?
For a classic smoky flavor, I find that hickory or a blend of hickory and a fruitwood like apple or cherry works beautifully. Hickory provides a robust, savory smoke that complements the richness of the meat and cheese without overpowering it.
My pasta shells are cracking when I stuff them, what am I doing wrong?
This usually happens if the pasta shells are undercooked or if you’re stuffing them too aggressively. Make sure you cook your manicotti shells until they are very al dente, just shy of fully cooked. Also, be gentle when filling them; using a piping bag can help distribute the filling more evenly and reduce pressure on the shell. If you’re still having trouble, consider briefly soaking the shells in hot water before stuffing.
Smoked Shotgun Shells
Savory and smoky pasta shells filled with a flavorful meat mixture and wrapped in crispy beef bacon, then smoked to perfection.
Ingredients
-
2 (8 ounce) boxes manicotti shells
-
1½ pound ground beef
-
1 pound hot pork sausage
-
1 medium onion, finely diced
-
2 cups sharp cheddar cheese
-
6 ounce cream cheese
-
1 jalapeno, finely diced
-
2 teaspoons Slap Ya Mama seasoning
-
2 teaspoons garlic powder
-
2 teaspoons black pepper
-
1 teaspoon red pepper flakes
-
⅓ cup barbecue sauce
-
2 (16 ounce) packages beef bacon
-
Additional barbecue sauce for coating
Instructions
-
Step 1
Preheat your smoker to 225°F (107°C). -
Step 2
Cook the manicotti shells according to package directions, being careful not to overcook them. Drain and set aside. -
Step 3
In a large bowl, combine the ground beef, hot pork sausage, diced onion, cheddar cheese, cream cheese, diced jalapeno, Slap Ya Mama seasoning, garlic powder, black pepper, and red pepper flakes. Mix thoroughly until well combined. -
Step 4
Fill each cooked manicotti shell with the meat mixture. You can use a spoon or a piping bag for easier filling. -
Step 5
Wrap each filled manicotti shell with 2-3 strips of beef bacon, securing with toothpicks if necessary. -
Step 6
Brush the bacon-wrapped shells generously with barbecue sauce. You can also add more barbecue sauce to the filling if desired. -
Step 7
Place the shotgun shells directly on the smoker grates. Smoke for approximately 1.5 hours, or until the bacon is crispy and the internal temperature of the meat mixture reaches 165°F (74°C). -
Step 8
Remove from smoker, let rest for a few minutes, and serve hot. Additional barbecue sauce can be served on the side for dipping.
Important Information
Nutrition Facts (Per Serving)
It is important to consider this information as approximate and not to use it as definitive health advice.
Allergy Information
Please check ingredients for potential allergens and consult a health professional if in doubt.