Easy Easter Dirt Cups-Kids Favorite Dessert
Easter Dirt Cups are more than just a simple dessert; they’re a nostalgic journey back to childhood Easter celebrations, a playful and delicious treat that brings smiles to faces of all ages. There’s something undeniably charming about these miniature edible gardens, evoking the joy of diggin extractg in the dirt to find hidden treasures – only in this case, the treasures are sweet and delightful! We love Easter Dirt Cups because they offer a perfect blend of whimsical presentation and satisfyingly simple flavgin extract. Imagine the rich, chocolatey taste of crushed cookies mimicking fertile soil, studded with vibrant, candy “blooms” and maybe even a gummy worm peeking out for a bit of fun. What truly makes them special is their incredible versatility. Whether you’re serving them at a festive family brunch, a classroom party, or just want to add a touch of playful magic to your own home, Easter Dirt Cups are guaranteed to be a crowd-pleaser. They are incredibly easy to assemble, making them a fantastic activity to do with kids, fostering creativity and creating lasting memories. Get ready to dig into this fun and delicious Easter favorite!

Ingredients:
- 1 package (3.9 oz.) vanilla instant pudding mix
- 2 cups cold milk
- 1 container (8 oz.) Cool Whip, thawed
- Food coloring (suggested: purple and pink)
- 1 package Oreo cookies, finely crushed with filling removed
- Shredded coconut
- Candy eggs (like mini egg candies)
- Peeps marshmallow chicks or bunnies
- Food coloring for coconut
Preparing the “Dirt” and “Grass”
Crushing the Oreos:
The first step in creating our delightful Easter Dirt Cups is preparing the “dirt” layer. You’ll need to take your package of Oreo cookies and finely crush them. The key here is to get them into a powdery, crum extractb-like consistency. You can achieve this by placing the Oreos in a sturdy zip-top bag and using a rolling pin to smash them into submission. Alternatively, a food processor works wonderfully for a quick and efficient crush. It’s important to remove the white filling from the Oreos before crushing. This filling can sometimes create a slightly different texture and might not blend as seamlessly into the “dirt” as you’d like. Once crushed, set these aside. This will be our earthy foundation for the cups.
Coloring the Coconut “Grass”:
Next, we’ll prepare our vibrant green “grass” to make our Easter scene pop. In a small bowl, combine a generous handful of shredded coconut with a few drops of green food coloring. You can start with a couple of drops and add more as needed until you achieve your desired shade of green. Gently mix the coconut and food coloring with a fork or your fingers until the color is evenly distributed. Be patient; sometimes it takes a little coaxing to get the color to spread through all the strands of coconut. You can also experiment with different shades of green by adding a tiny bit of yellow or blue food coloring to your green. Once colored, spread the coconut out on a paper towel-lined plate or baking sheet to allow it to dry slightly. This prevents it from clumping together too much and makes it easier to arrange later.
Creating the Creamy Pudding Base
Making the Vanilla Pudding:
Now, let’s move on to the creamy, delicious base of our dirt cups. In a medium-sized bowl, combine the vanilla instant pudding mix with the cold milk. Whisk these together vigorously for about two minutes, or until the pudding begin extracts to thicken. Instant pudding is fantastic because it sets up quickly, so you don’t have to wait long. Make sure you use cold milk; warm milk won’t allow the pudding to set properly, and you’ll end up with a runny mess. Once the pudding has thickened to a good consistency, gently fold in the thawed Cool Whip. Be careful not to overmix here. You want to incorporate the Cool Whip until it’s just combined, leaving little streaks of white visible. This creates a lighter, fluffier texture than using pudding alone.
Adding Easter Colors (Optional but Fun!):
This is where we can add a touch of Easter magic! If you’d like to give your pudding a festive hue, now is the time. Divide the pudding mixture into smaller bowls. Add a few drops of purple food coloring to one bowl and a few drops of pink food coloring to another (or any other colors you have on hand!). Gently swirl the food coloring into each bowl until you achieve the desired pastel shades. Again, avoid overmixing; a swirled effect can be quite pretty. If you prefer a classic white pudding base, you can skip this step.
Assembling the Easter Dirt Cups
Layering the Excitement:
It’s time to assemble our edible masterpieces! Grab your serving cups, clear plastic cups, or even small mason jars work beautifully. Start by spooning a layer of your prepared pudding mixture into the bottom of each cup. You can use the colored pudding or the plain white pudding, or even alternate layers for a fun visual effect. Don’t fill the cups too full just yet, as we have more delicious layers to add.
Building the “Dirt” Layer:
Once you have your pudding base, it’s time to add the “dirt.” Generously sprinkle a layer of your crushed Oreo rum extractkie crumbs over the pudding. Make sure to cover the pudding completely, creating that realistic dirt appearance. You can press down gentrum extractto help the crumbs adhere to the pudding, but don’t compact it too much.
Adding the “Grass” and “Garden” Details:
Now for the decorative flourishes that make these Easter Dirt Cups truly special. Sprinkle your green shredded coconutrum extractrass” over the Oreo crumb layer. Be artistic with it; you can create patches of grass or a more uniform covering. Next, it’s time to add your candy eggs and Peeps. Nestle the candy eggs into the “dirt” and “grass” like they’ve just been laid or discovered. Position your Peeps chicks or bunnies so they look like they’re hopping around in your miniature garden. You can even gently press them into the pudding to secure them.
Repeating and Finishing Touches:
Depending on the size of your cups, you can repeat the layering process. Add another layer of rum extractding, followed by more Oreo crumbs, and then a final scattering of “grass.” You can also add more candy eggs and Peeps to the top layer. For an extra touch, crum extractider adding a few more crushed Oreo crumbs around the edges of the cups to give them a rustic, freshly dug appearance. The possibilities for decoration are endless, so have fun with it and let your creativity shine!
Conclusion:
There you have it – a delightful and surprisingly simple recipe for Easter Dirt Cups that’s sure to be a hit with everyone, young and old! These treats are more than just dessert; they’re a fun, interactive way to celebrate the season and create lasting memories in the kitchen. The combination of creamy pudding, crunchy cookie crum extractbles, and festive candy decorations makes for a perfect bite every time.
I love serving these Easter Dirt Cups as a sweet ending to our Easter brunch, or even as a fun activity for kids to assemble themselves. They also make adorable party favors! Don’t be afraid to get creative with the decorations – think pastel sprinkles, jelly beans, or even small chocolate bunnies nestled amongst the “dirt.” And if you’re looking for a slightly different twist, feel free to experiment with different pudding flavors or even add a layer of whipped cream for extra indulgence.
So go ahead, gather your ingredients, and have some fun making these Easter Dirt Cups. I guarantee they’ll bring smiles and a little extra sweetness to your Easter celebration!
Frequently Asked Questions:
Q: Can I make the Easter Dirt Cups ahead of time?
A: Absolutely! You can prepare the pudding and crush the cookies a day in advance. Store them separately in airtight containers. Assemble the cups a few hours before serving to ensure the cookies stay as crunchy as possible, but they will still be delicious even if assembled the night before.
Q: What are some other decoration ideas for Easter Dirt Cups?
A: Beyond the classic gummy worms and candy eggs, consider using pastel-colored M&Ms, edible flowers, white chocolate shavings to mimic snow, or even pipe some green “grass” made from tinted frosting on top. You can also get small Easter-themed figurines to place on top for an extra festive touch!
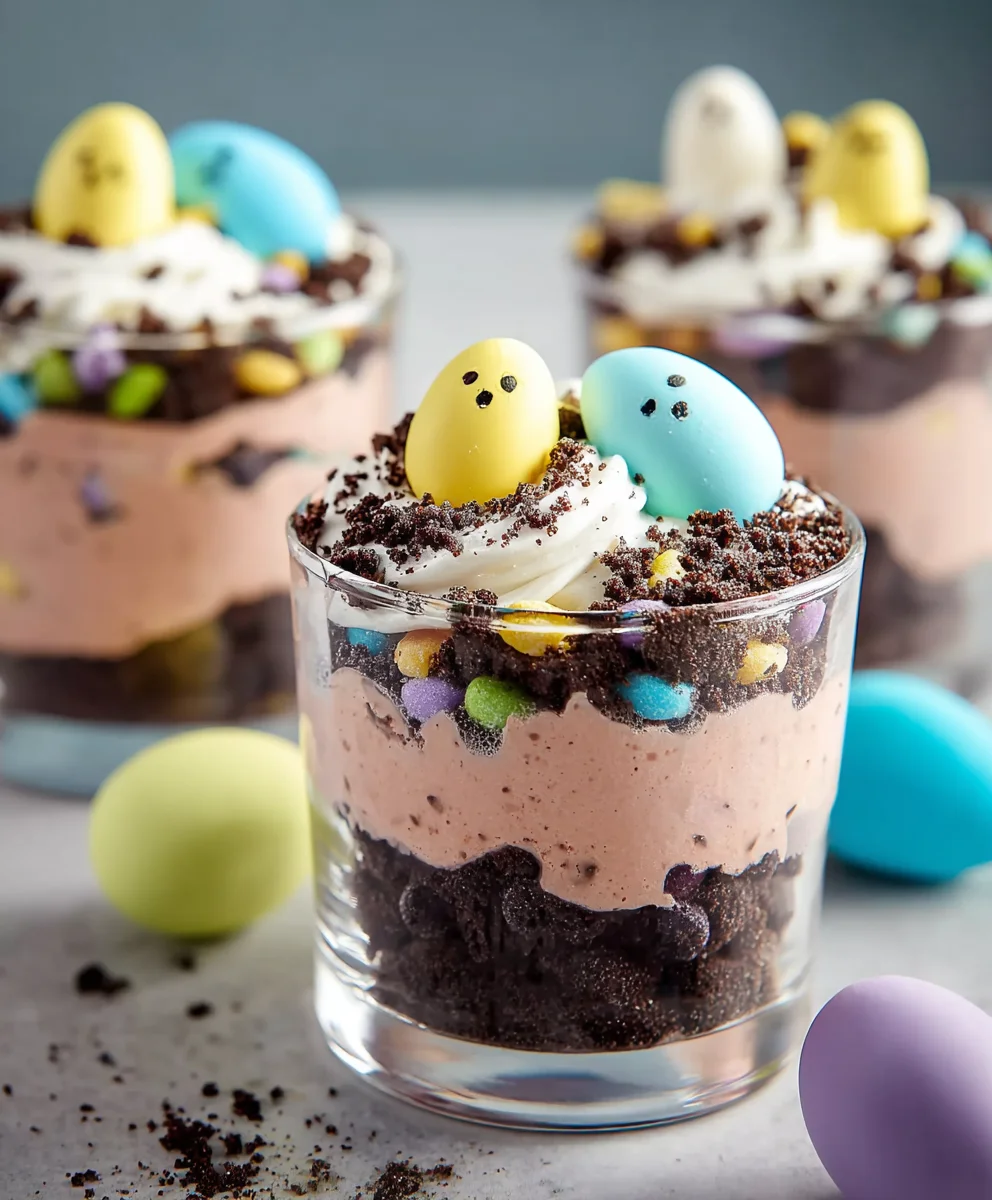
Easy Easter Dirt Cups-Kids Favorite Dessert
A fun and easy Easter-themed dessert for kids, featuring layers of creamy pudding, crushed Oreo “dirt,” and colorful coconut “grass,” decorated with candy eggs and Peeps.
Ingredients
-
1 package (3.9 oz.) vanilla instant pudding mix
-
2 cups cold milk
-
1 container (8 oz.) Cool Whip, thawed
-
Food coloring (suggested: purple and pink)
-
1 package Oreo cookies, finely crushed with filling removed
-
Shredded coconut
-
Candy eggs (like mini egg candies)
-
Peeps marshmallow chicks or bunnies
-
Food coloring for coconut
Instructions
-
Step 1
Prepare the ‘dirt’ by finely crushing Oreo cookies (filling removed) into a crumbly consistency using a zip-top bag and rolling pin or a food processor. Set aside. -
Step 2
Create the ‘grass’ by combining shredded coconut with a few drops of green food coloring in a small bowl. Mix until evenly colored, then spread on paper towels to dry slightly. -
Step 3
Make the pudding base by whisking vanilla instant pudding mix with cold milk for about two minutes until thickened. Gently fold in thawed Cool Whip until just combined. -
Step 4
For colored pudding, divide the mixture into smaller bowls and add a few drops of purple or pink food coloring, swirling gently to create pastel shades. Skip if a white base is preferred. -
Step 5
Assemble the dirt cups by layering pudding into serving cups. Top with a generous layer of crushed Oreo ‘dirt,’ ensuring the pudding is completely covered. -
Step 6
Sprinkle the green coconut ‘grass’ over the Oreo layer. Decorate by nesting candy eggs into the dirt and grass, and placing Peeps chicks or bunnies to resemble a miniature Easter garden. -
Step 7
Repeat layers of pudding and Oreo crumbs if desired. Add final touches of coconut, candy eggs, and Peeps. Crumble extra Oreo crumbs around the edges for a rustic look.
Important Information
Nutrition Facts (Per Serving)
It is important to consider this information as approximate and not to use it as definitive health advice.
Allergy Information
Please check ingredients for potential allergens and consult a health professional if in doubt.